Create Subnet
Creating Subnets in Your VPC
ℹ️ What are Subnets?
Subnets are segments of a VPC’s IP address range where you can place groups of isolated resources. They allow you to organize your network architecture into public subnets (internet-accessible) and private subnets (internal only) across multiple Availability Zones for high availability.
Step-by-Step Subnet Creation
- Access the subnet creation interface:
- Navigate to the VPC console
- Select Subnets from the left navigation panel
- Click Create subnet
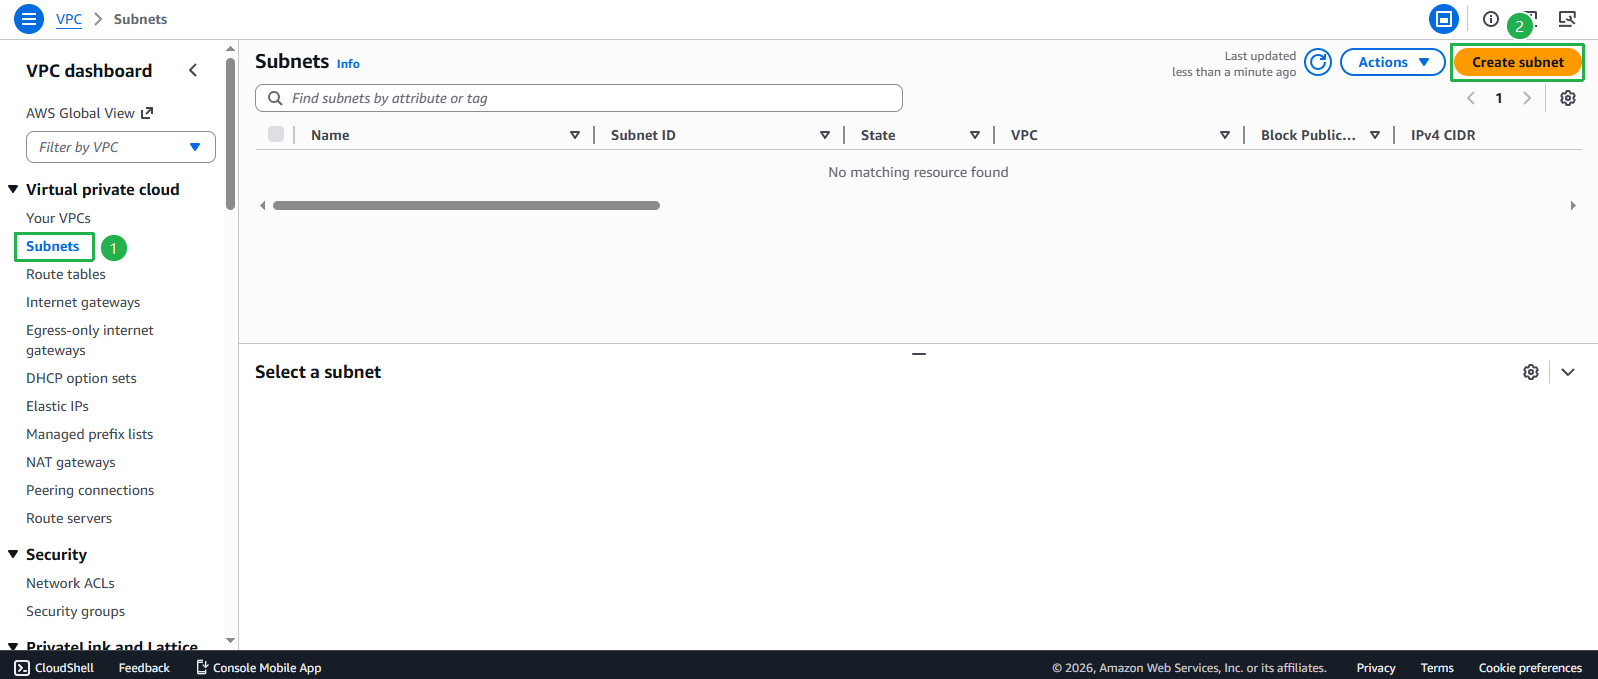
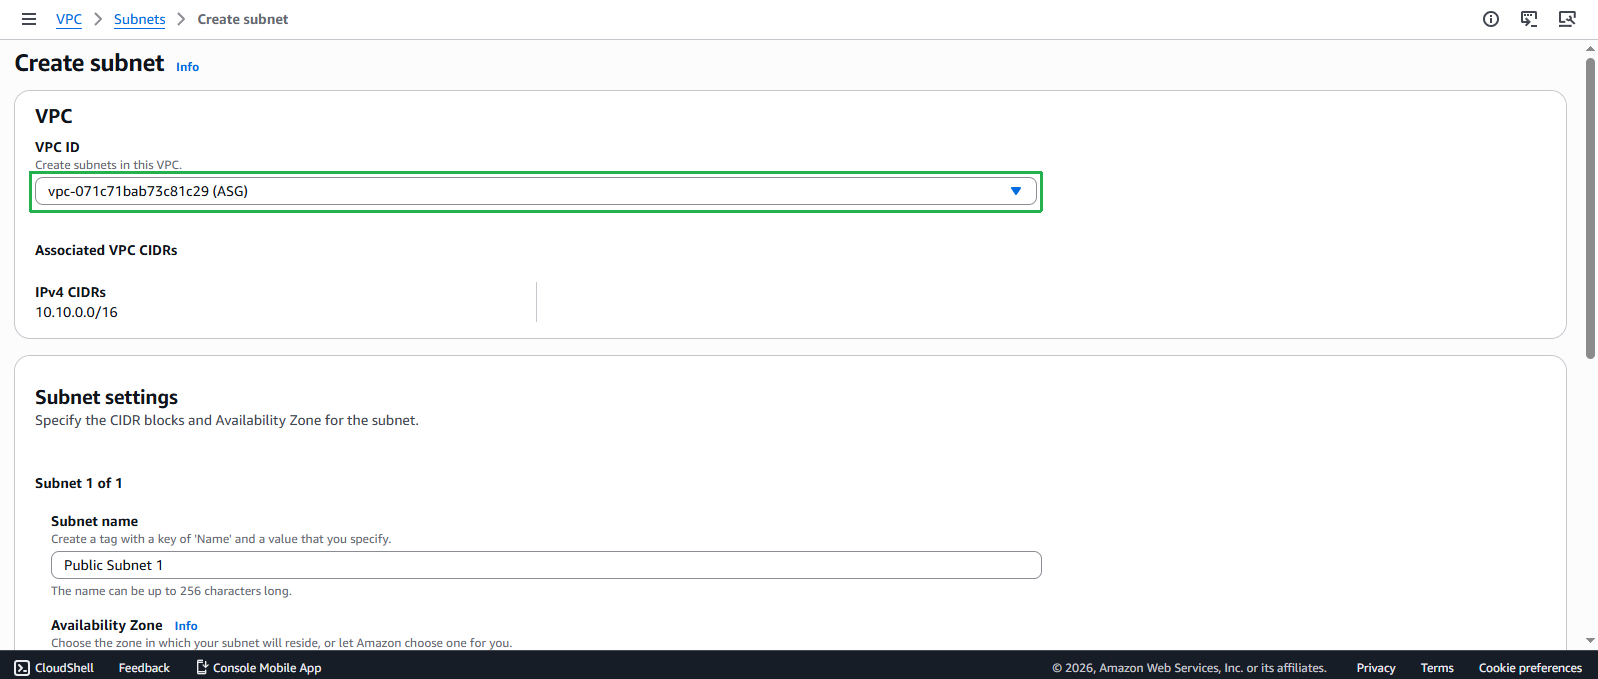
- Select your VPC:
- In the Create subnet interface, select the ASG VPC from the dropdown
- The VPC ID will be displayed for confirmation
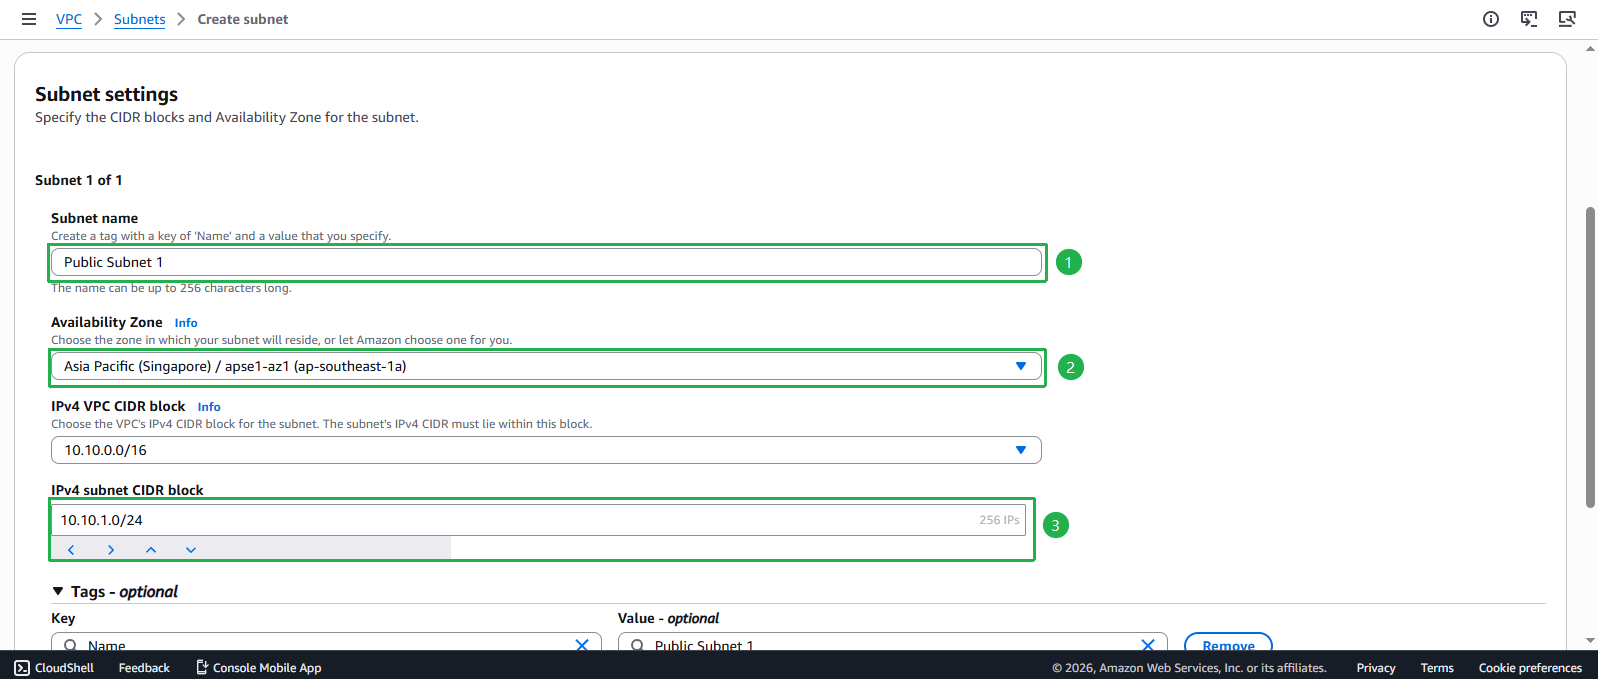
- Configure your first public subnet:
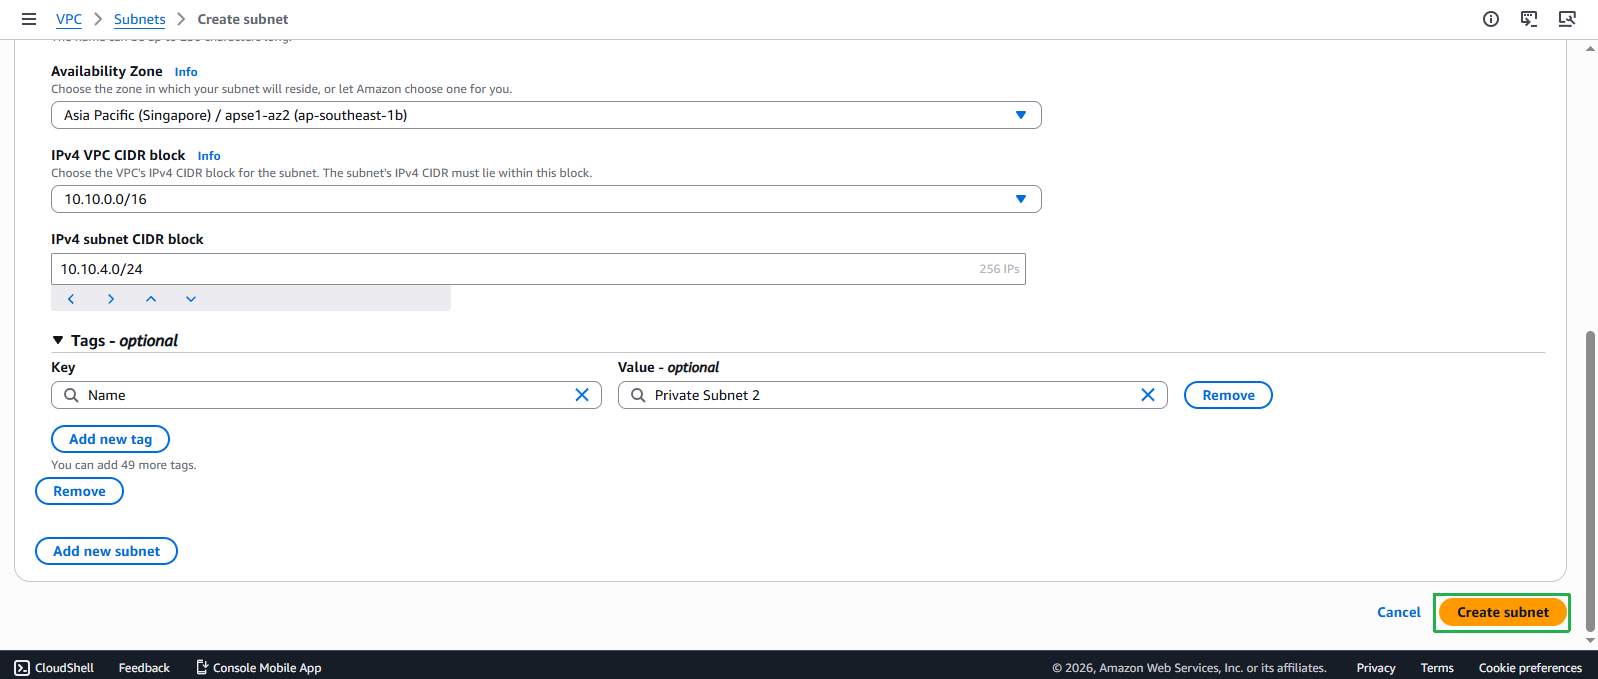
- Subnet name: Enter
Public Subnet 1 - Availability Zone: Select ap-southeast-1b
- IPv4 CIDR block: Enter
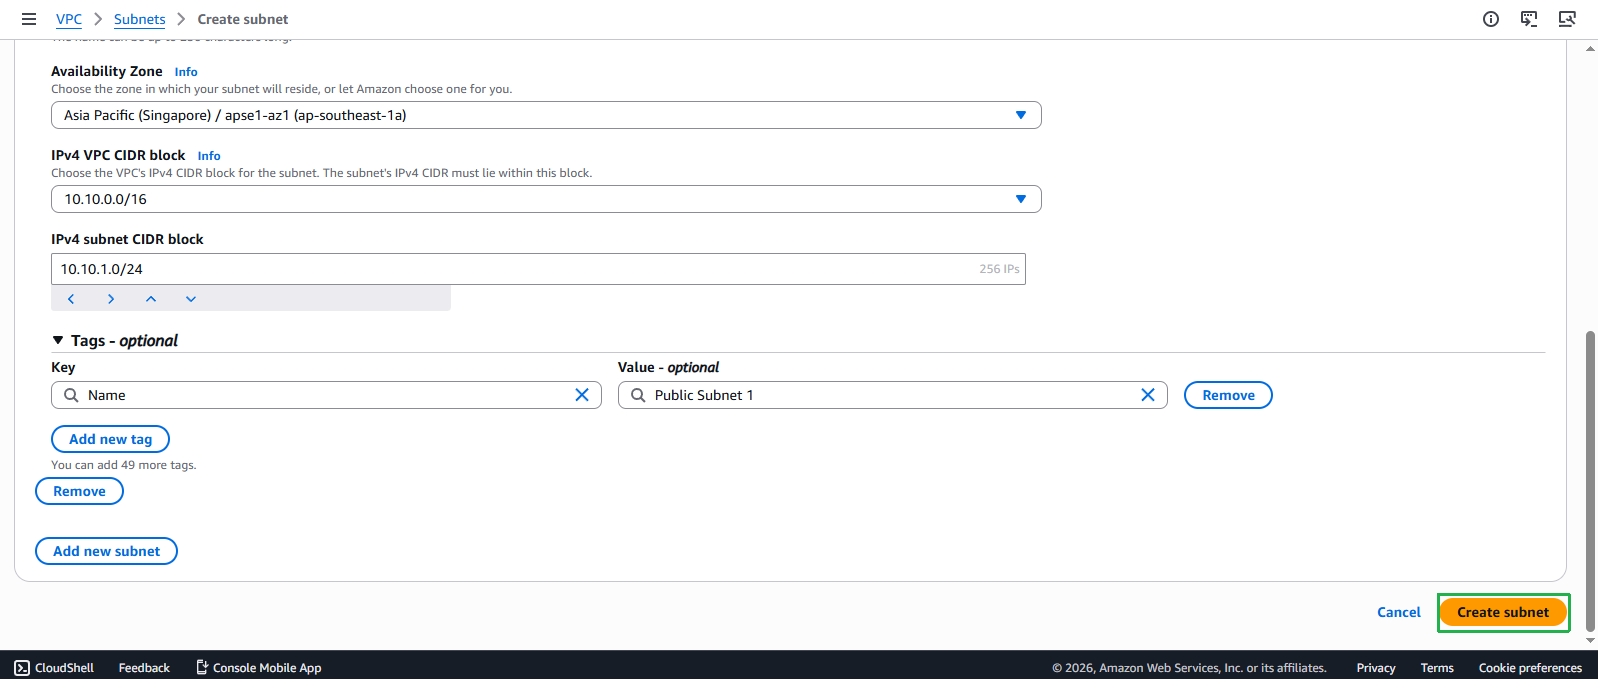
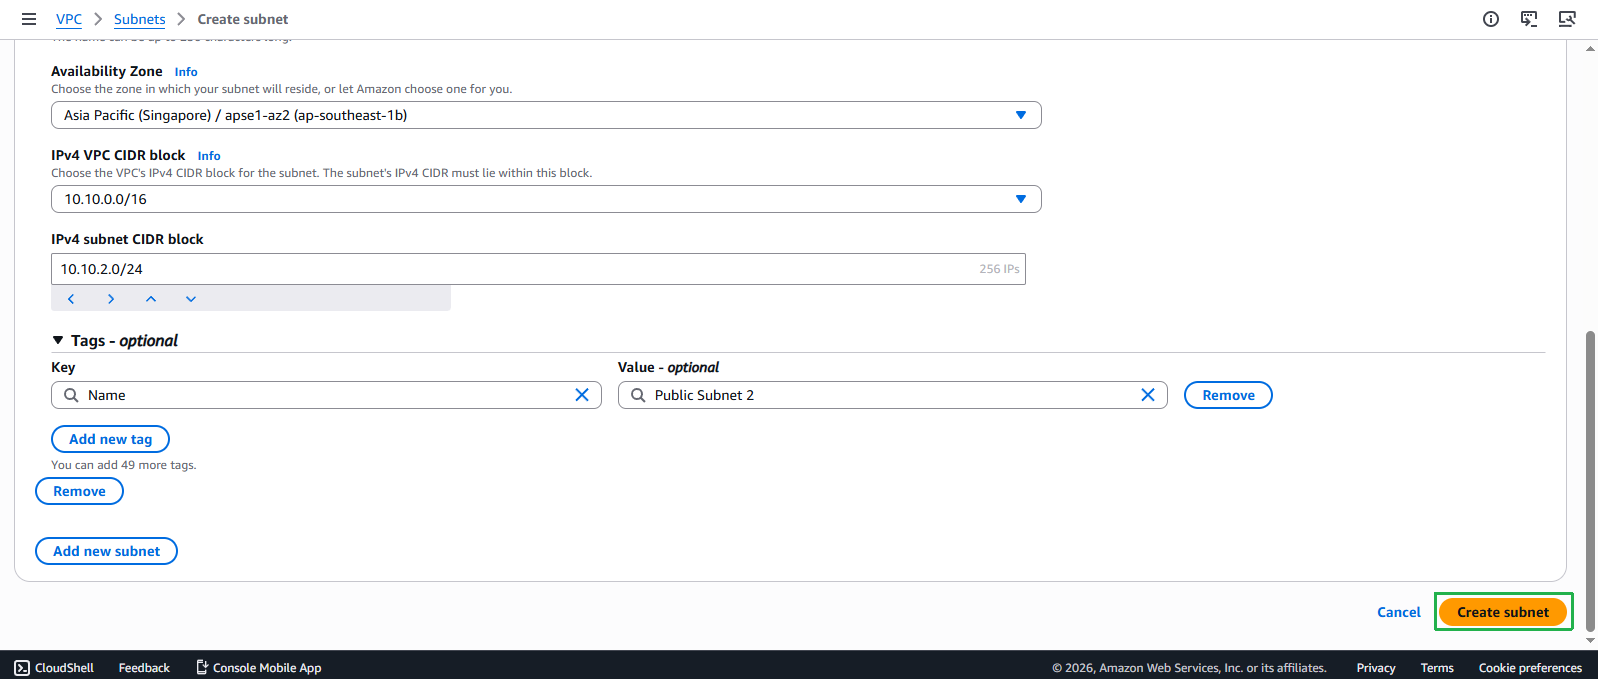
10.10.1.0/24(providing 256 IP addresses) - Click Add new subnet to create multiple subnets at once, or Create subnet to create one at a time
- Subnet name: Enter
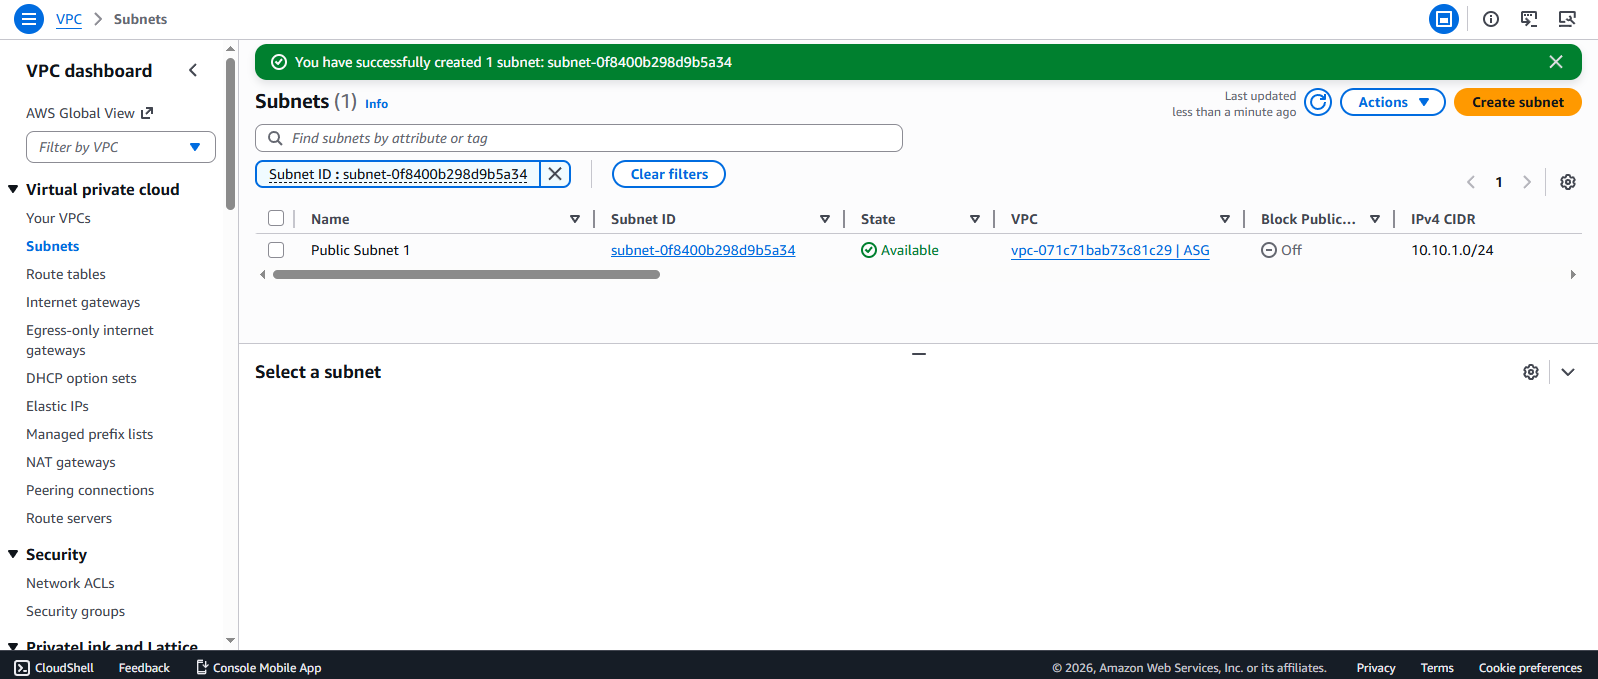
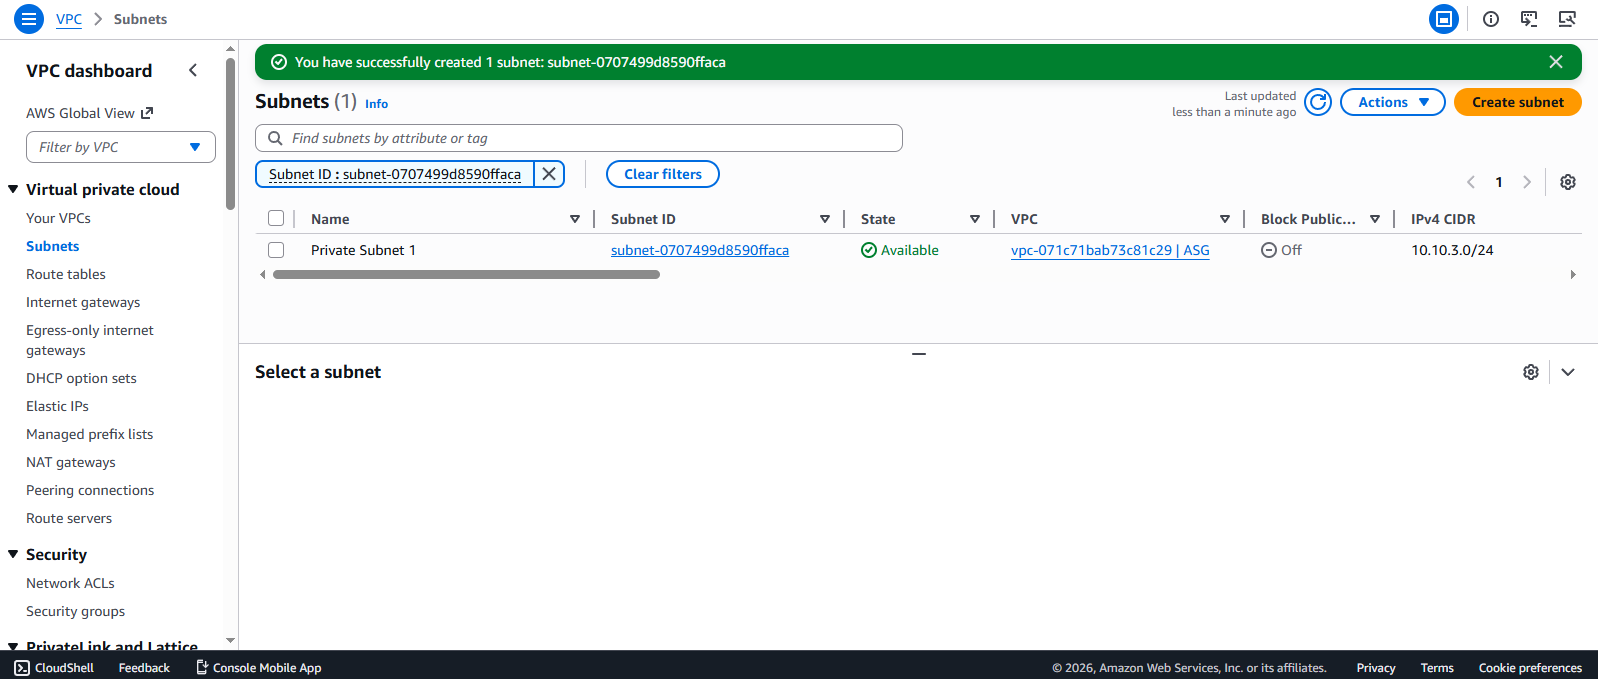
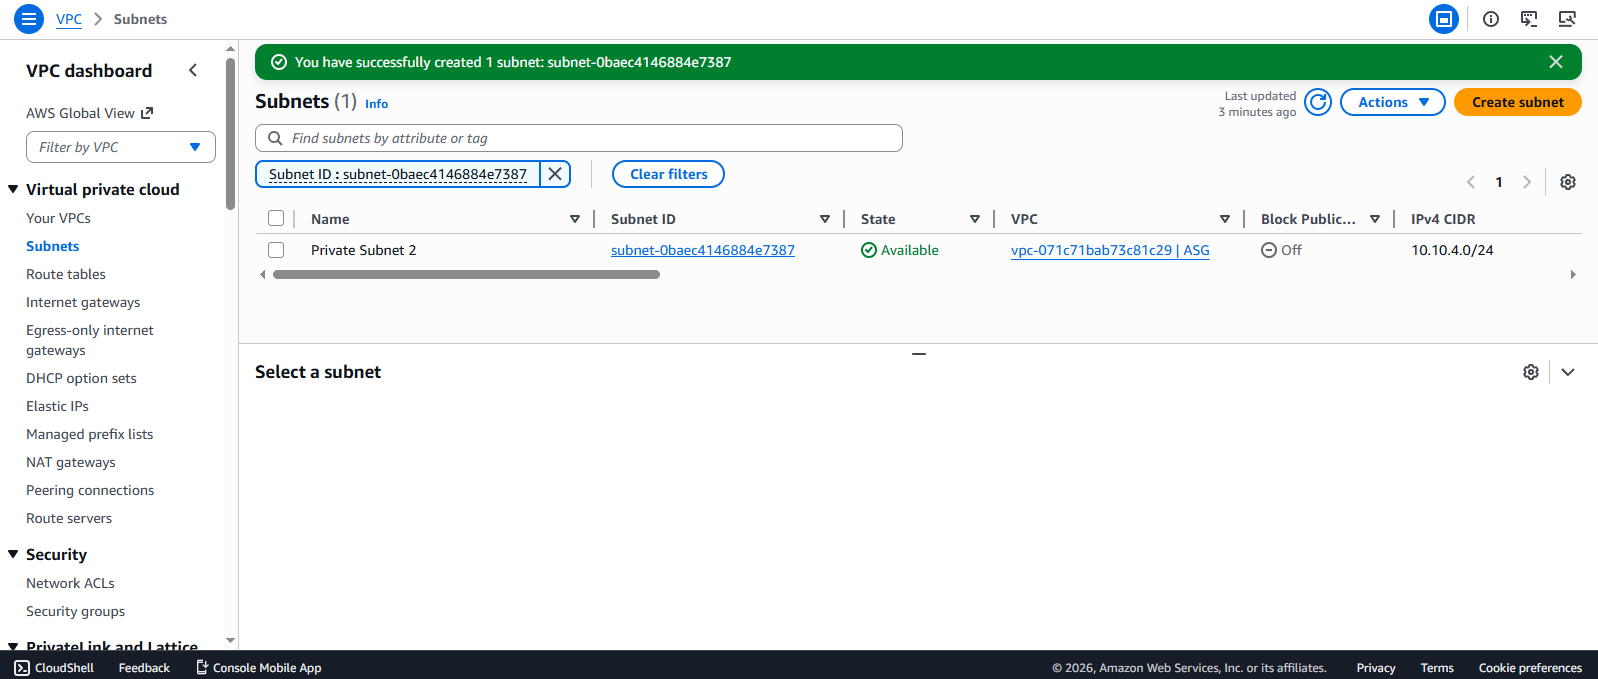
- Verify successful subnet creation:
- You should see a success message
- Your new subnet will appear in the subnet list with the correct CIDR and AZ
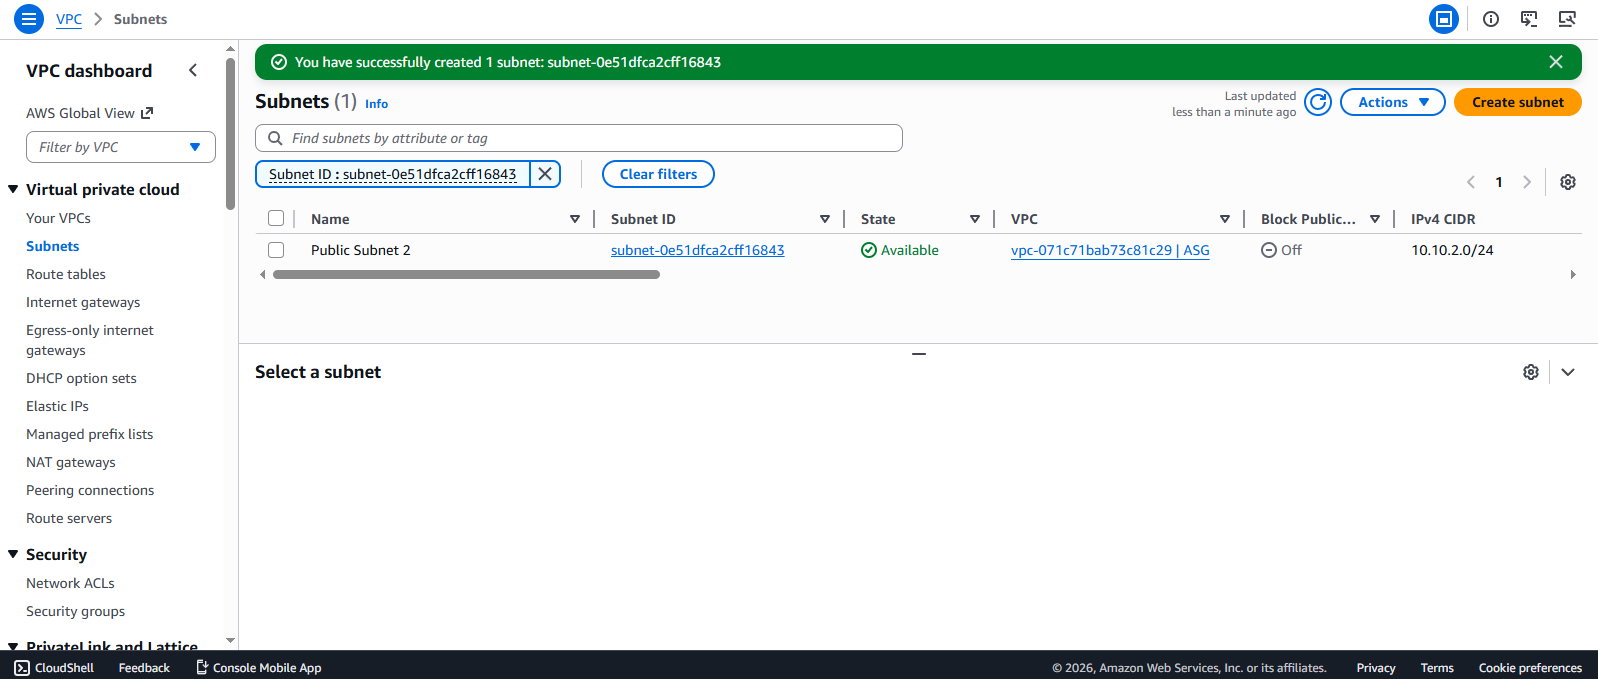
- Create additional subnets following the same process:
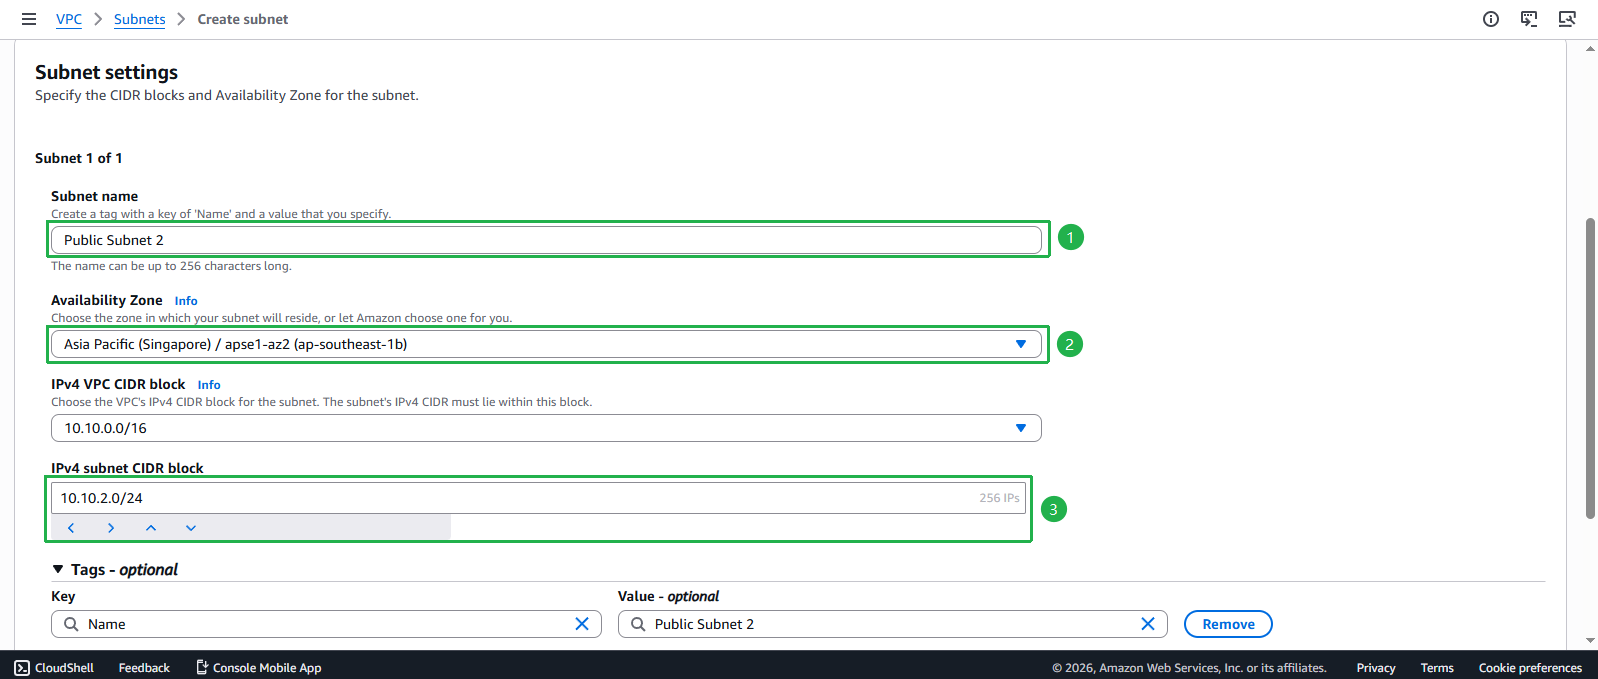
- Public Subnet 2:
- Subnet name:
Public Subnet 2 - CIDR:
10.10.2.0/24 - Availability Zone: us-west-1c
- Subnet name:
- Public Subnet 2:
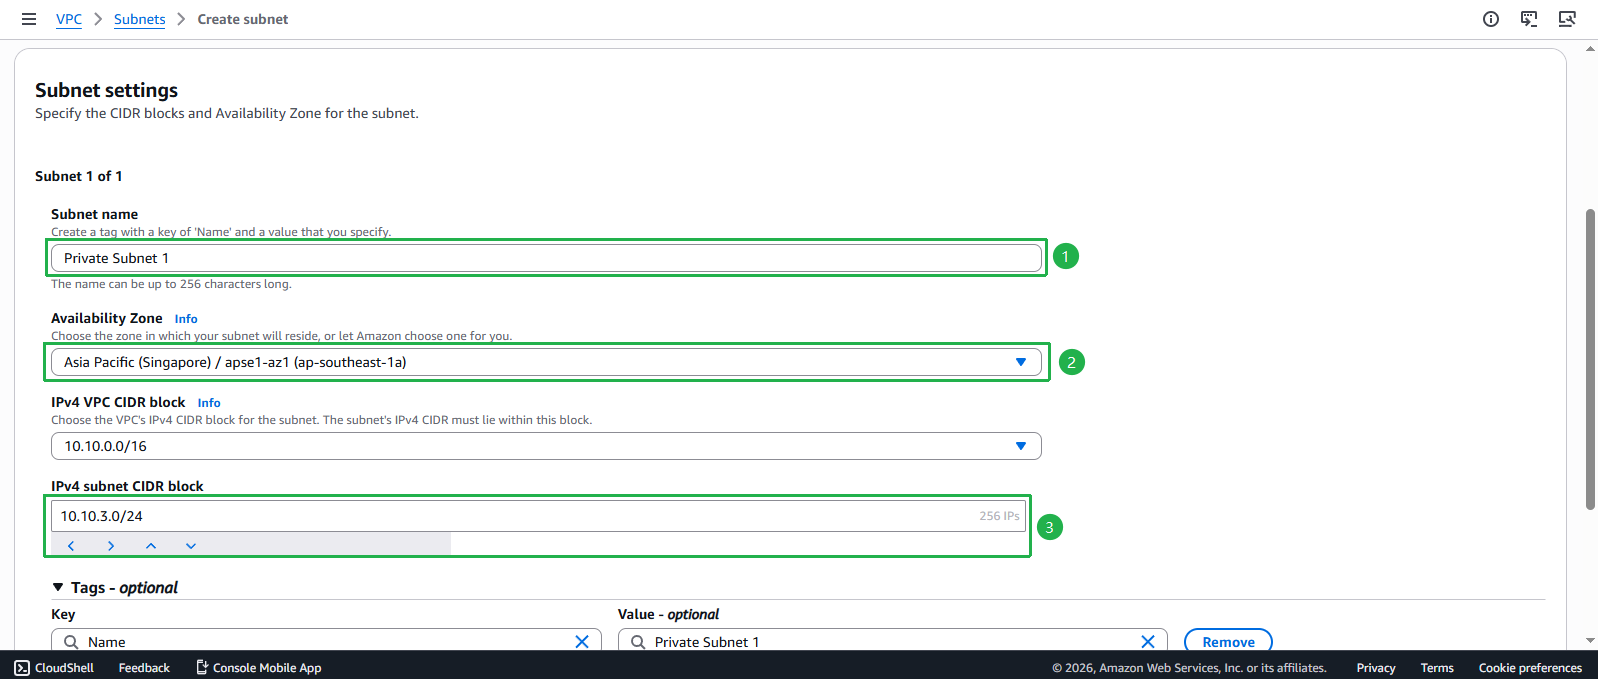
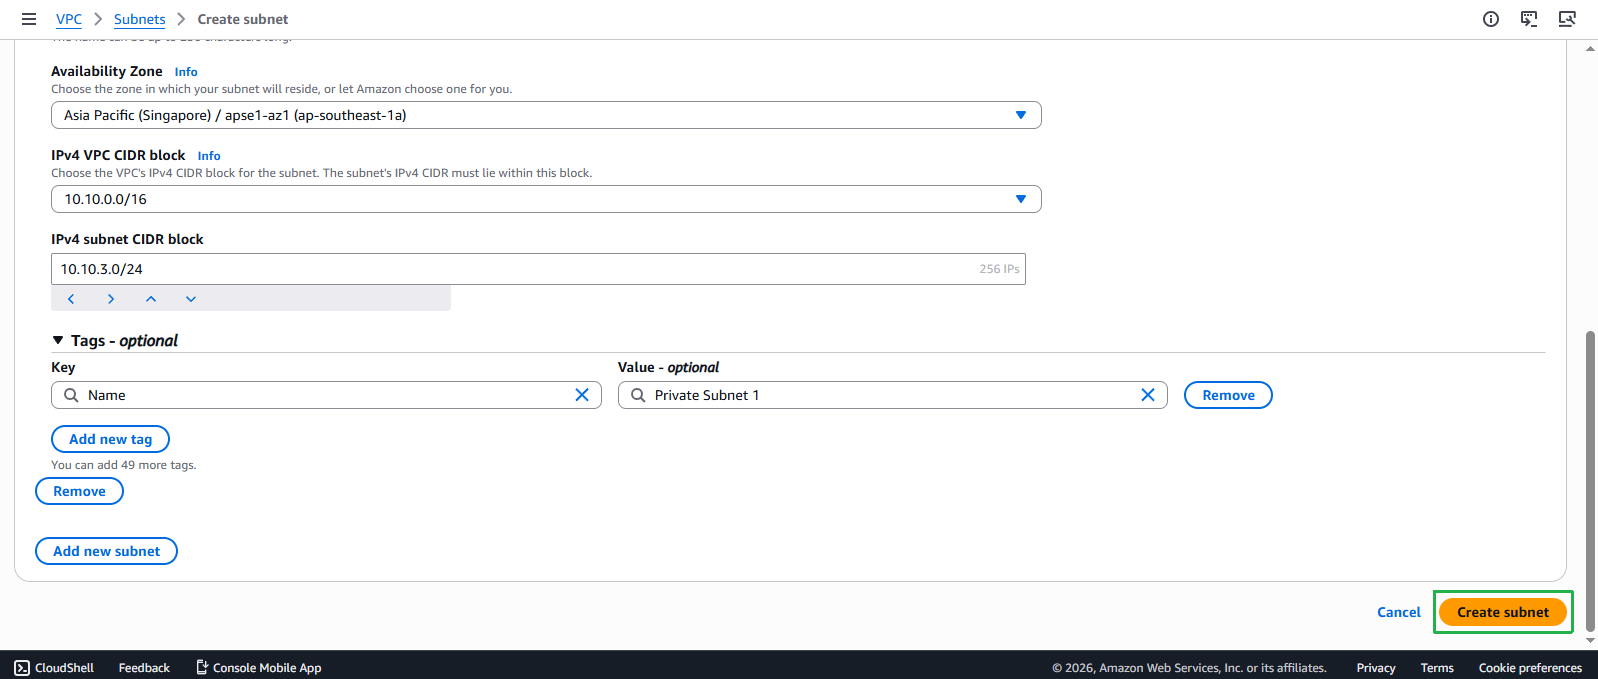
- Private Subnet 1:
- Subnet name:
Private Subnet 1 - CIDR:
10.10.3.0/24 - Availability Zone: ap-southeast-1b
- Subnet name:
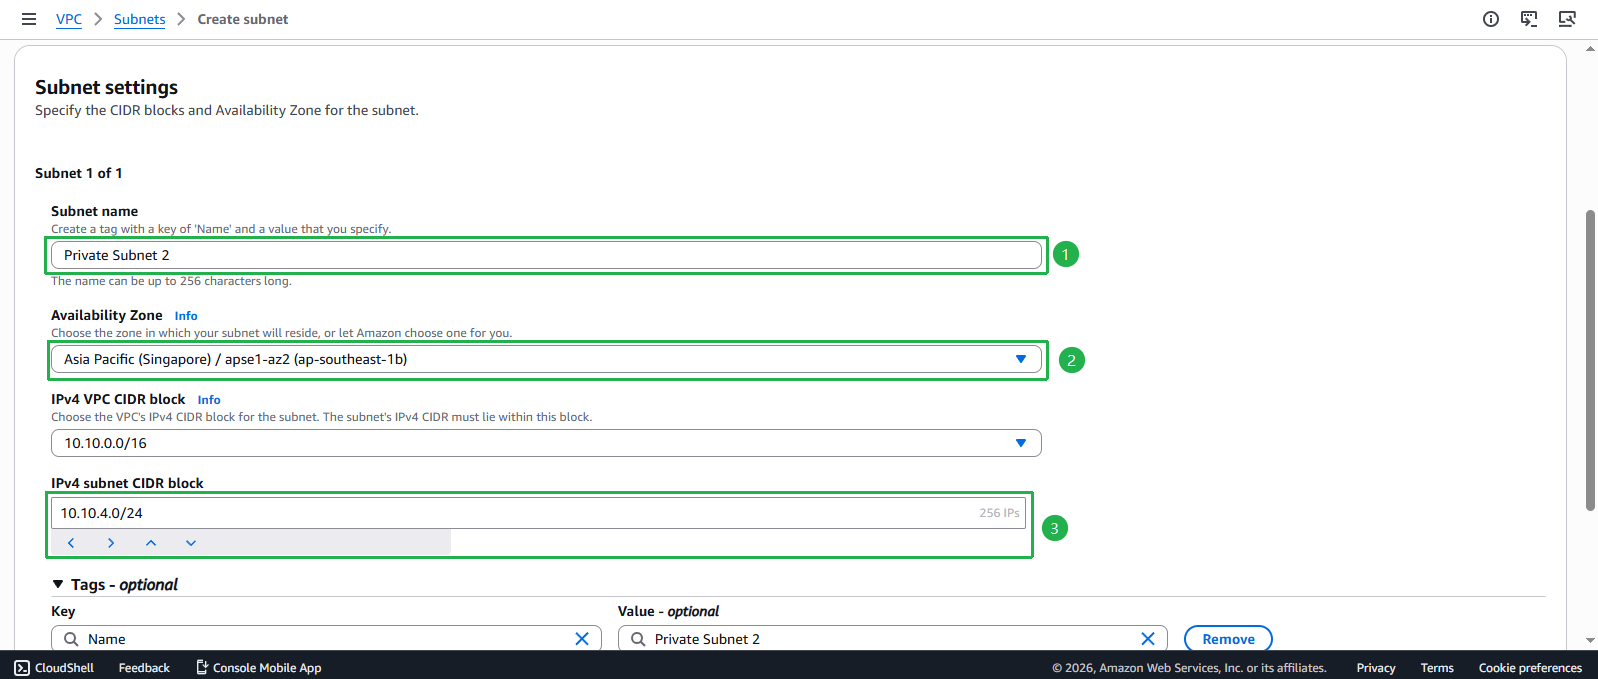
- Private Subnet 2:
- Subnet name:
Private Subnet 2 - CIDR:
10.10.4.0/24 - Availability Zone: us-west-1c
- Subnet name:
💡 Pro Tip
AWS displays both Availability Zone names and Availability Zone IDs in the console. AWS randomly maps AZ names (like ap-southeast-1a) to physical AZ IDs (like usw1-az1) across different AWS accounts to distribute workloads evenly. When designing multi-AZ architectures across accounts, always reference AZ IDs rather than AZ names for consistency.
Configuring Public Subnets
ℹ️ What Makes a Subnet “Public”?
A subnet becomes “public” when it has a route to an Internet Gateway and instances within it can receive public IP addresses. By default, newly created subnets do not automatically assign public IP addresses to instances launched within them.
💡 Pro Tip
The distinction between public and private subnets is determined by routing configuration and IP address assignment, not by any inherent subnet property. Both use the same subnet resource type in AWS.
- Enable automatic public IP assignment for public subnets:
- Select Public Subnet 1 from the subnet list
- Click Actions > Edit subnet settings
- Configure auto-assign IP settings:
- Under Auto-assign IP settings, check Enable auto-assign public IPv4 address
- This ensures that any EC2 instance launched in this subnet will automatically receive a public IP
- Click Save
- Repeat the same process for Public Subnet 2:
- Select Public Subnet 2 from the subnet list
- Click Actions > Edit subnet settings
- Check Enable auto-assign public IPv4 address
- Click Save to apply the changes
⚠️ Important Consideration
While we’ve enabled auto-assign public IP addresses for our public subnets, instances in these subnets will not have internet connectivity until we create and attach an Internet Gateway and configure the appropriate route tables in subsequent steps.