Cấu hình Customer Gateway
Cấu hình Customer Gateway
ℹ️ Tổng quan Đây là bước quan trọng nhất - cấu hình Libreswan IPsec trên EC2 Customer Gateway để thiết lập VPN tunnels với AWS.
Download VPN Configuration
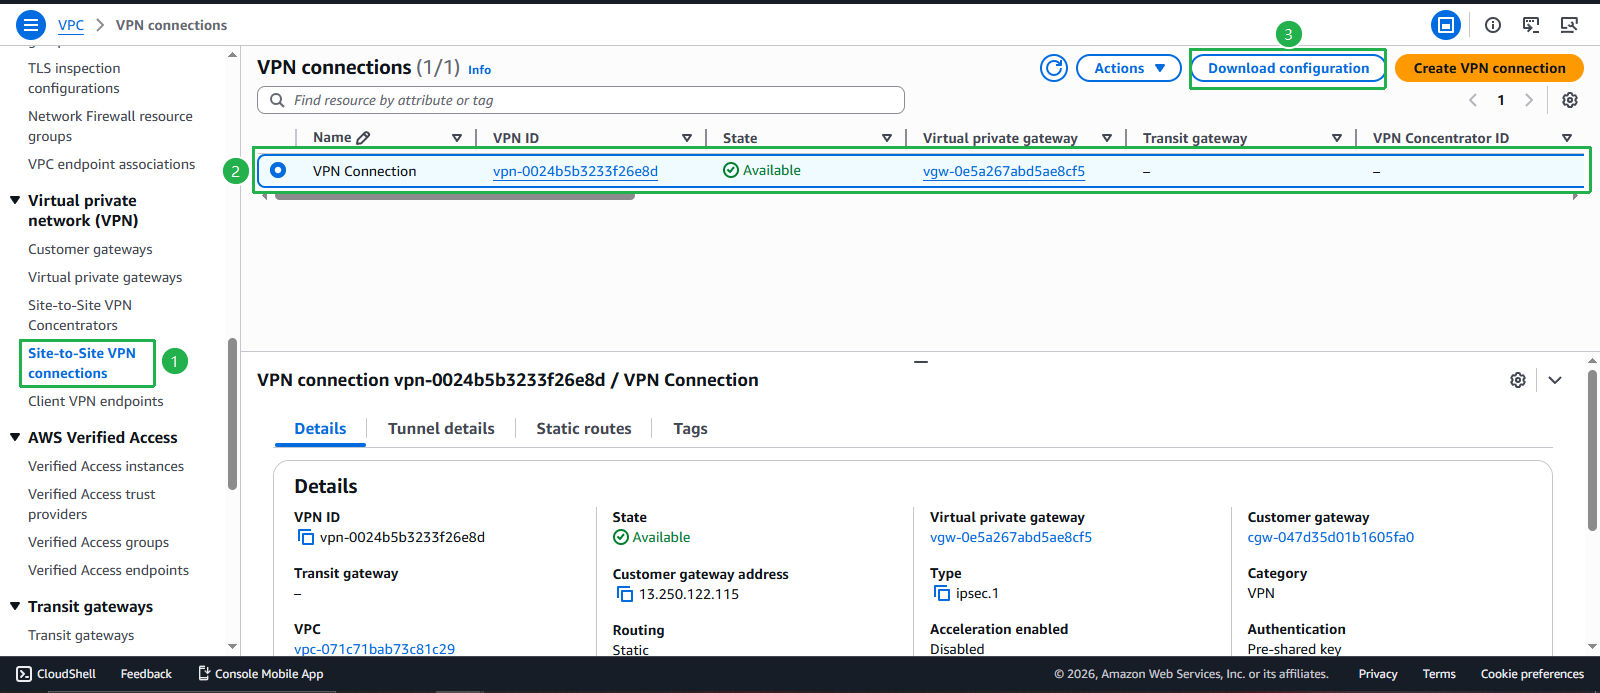
- Truy cập vào VPC
- Chọn Site-to-Site VPN Connection
- Chọn VPN Connection đã tạo
- Chọn Download Configuration
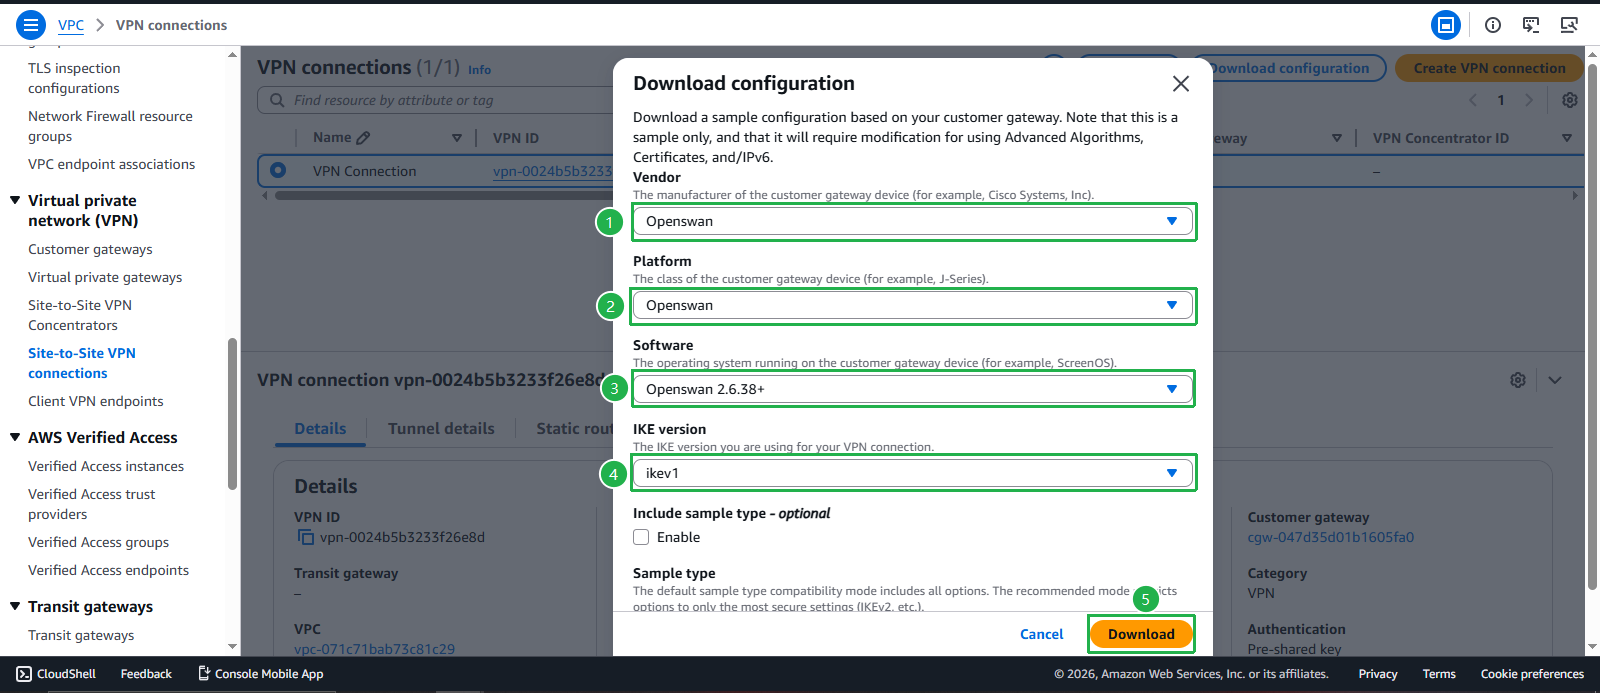
Trong hộp thoại Download Configuration
- Vendor: Chọn OpenSwan
- Platform: Chọn OpenSwan
- Software: Chọn OpenSwan 2.6.38+
- IKE version: Chọn ikev1
- Chọn Download
💡 Lưu ý: Libreswan là phiên bản kế thừa của OpenSwan, cấu hình tương thích
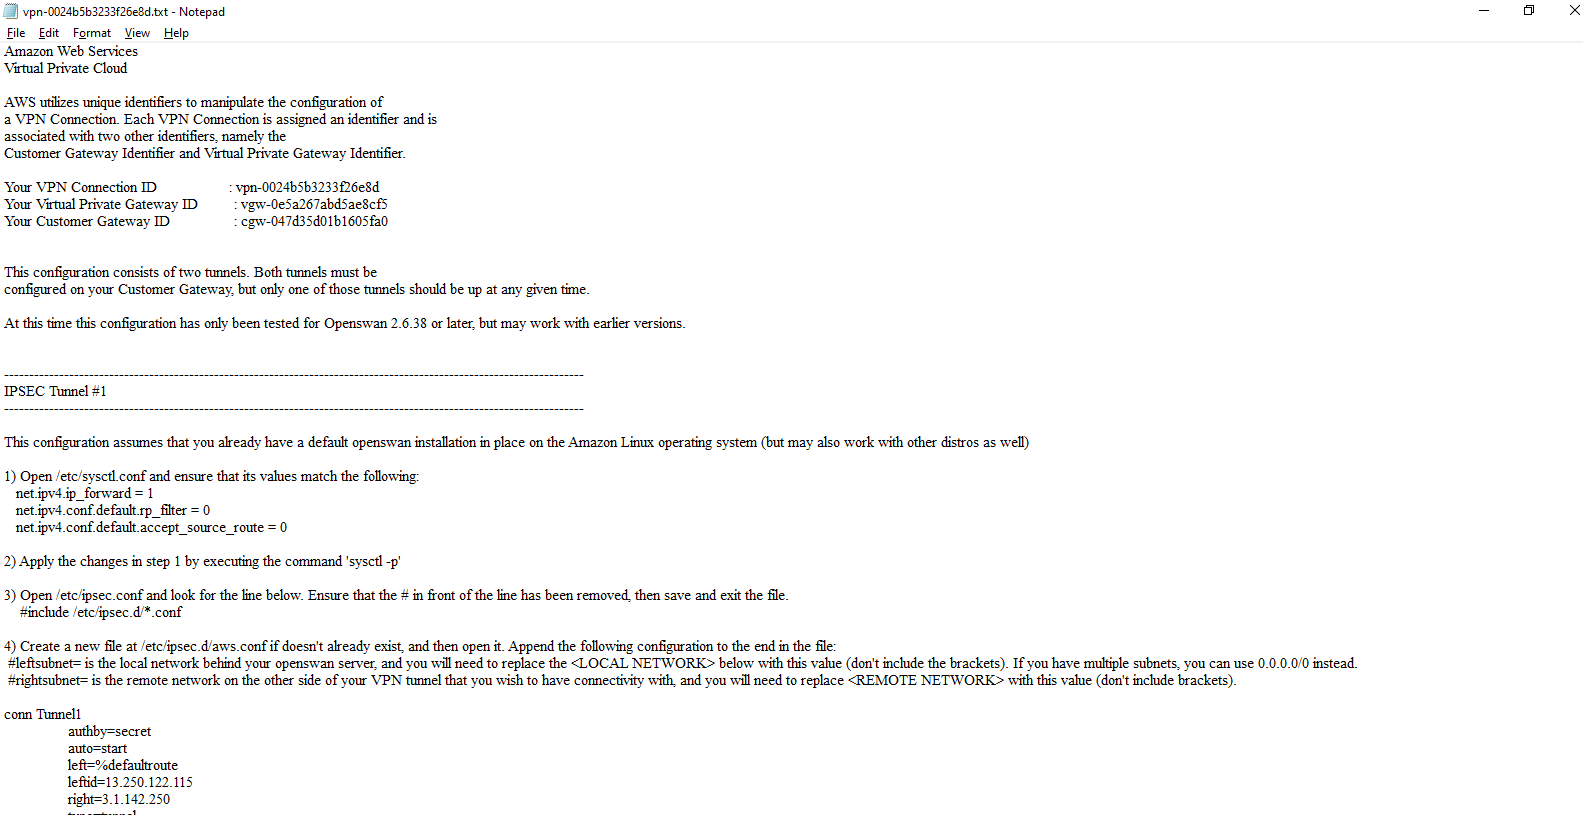
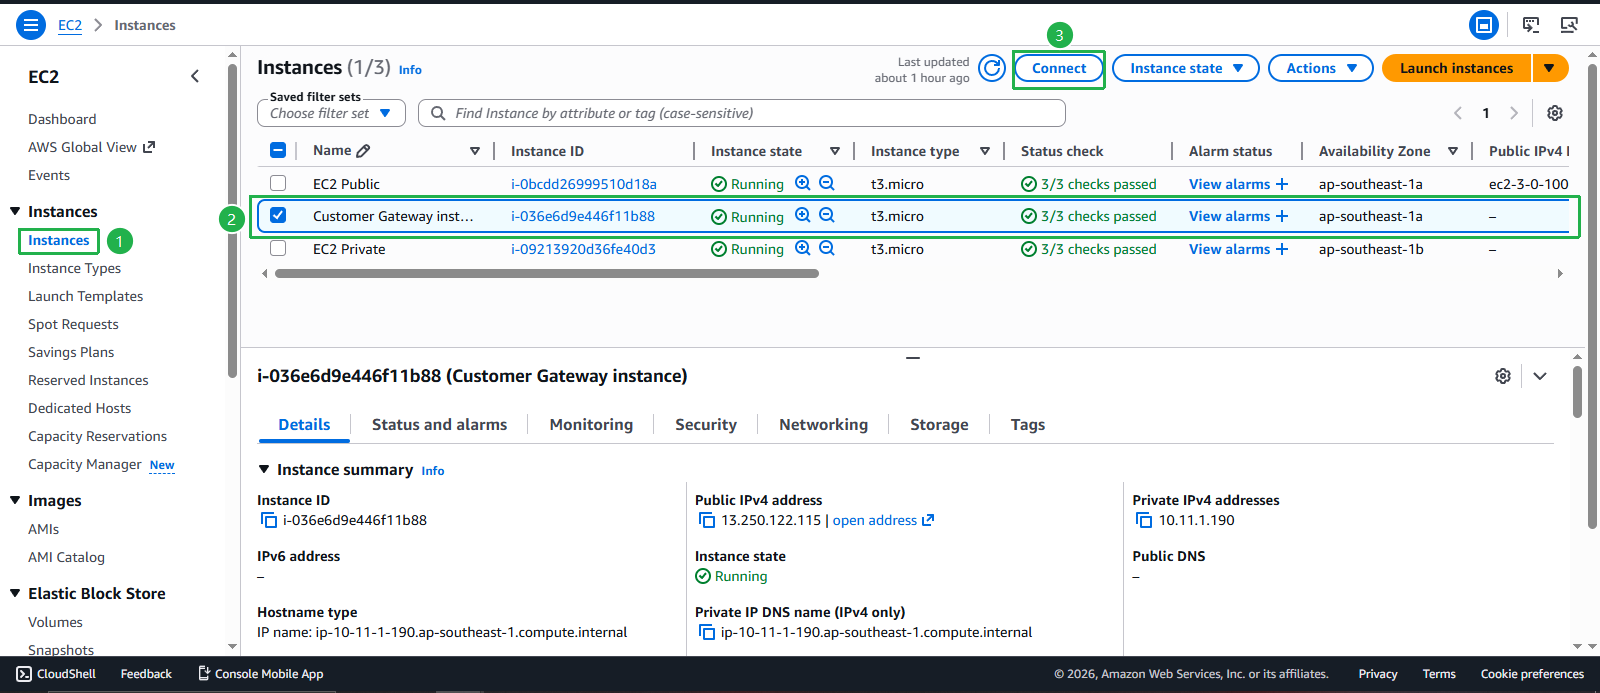
- Lưu file cấu hình và kết nối SSH vào EC2 Customer Gateway
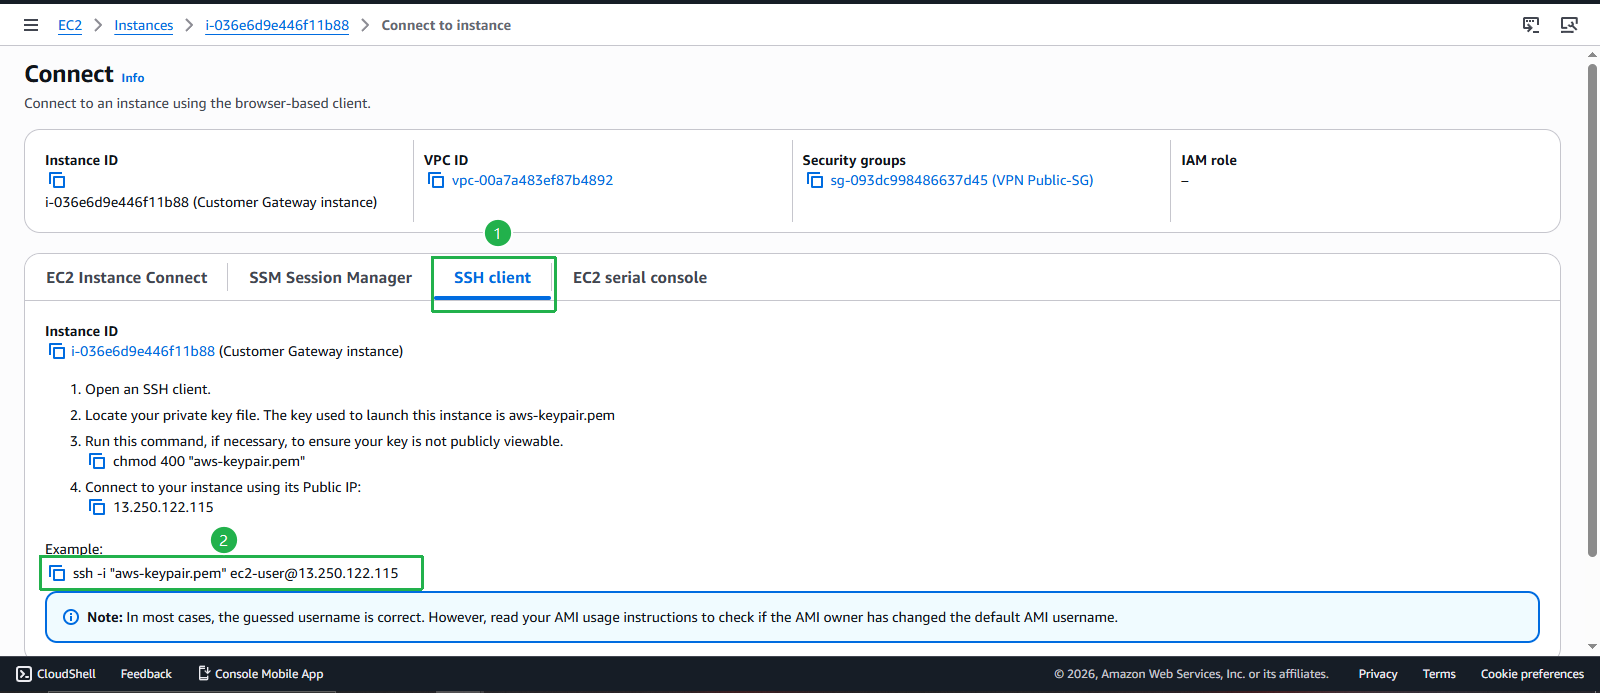
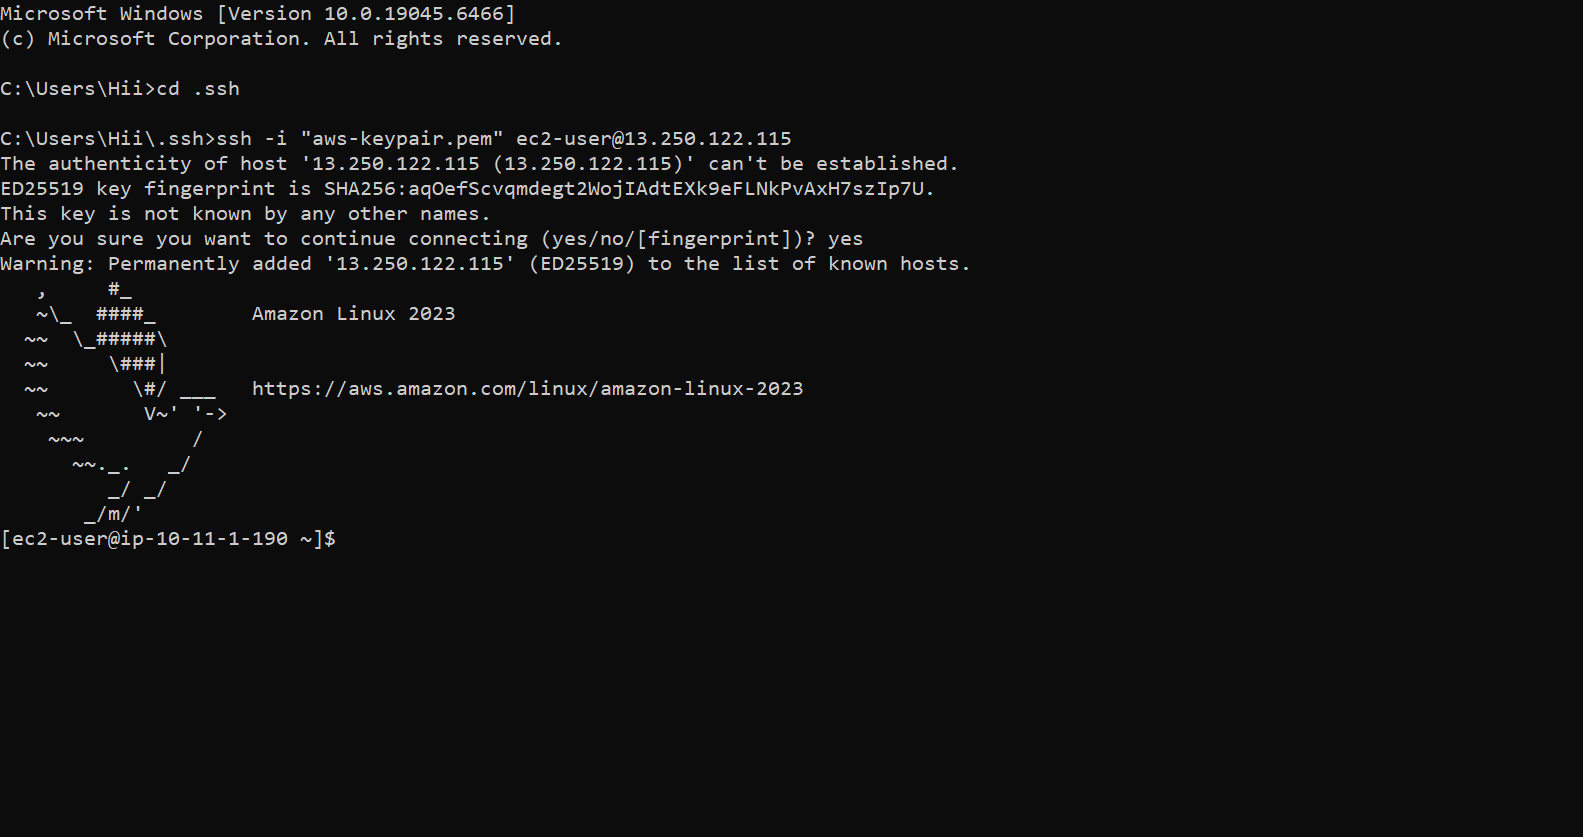
Cài đặt và Cấu hình Libreswan
- Cài đặt Libreswan (OpenSwan replacement)
sudo dnf install libreswan -y
💡 Libreswan: IPsec VPN implementation cho Linux, kế thừa từ OpenSwan
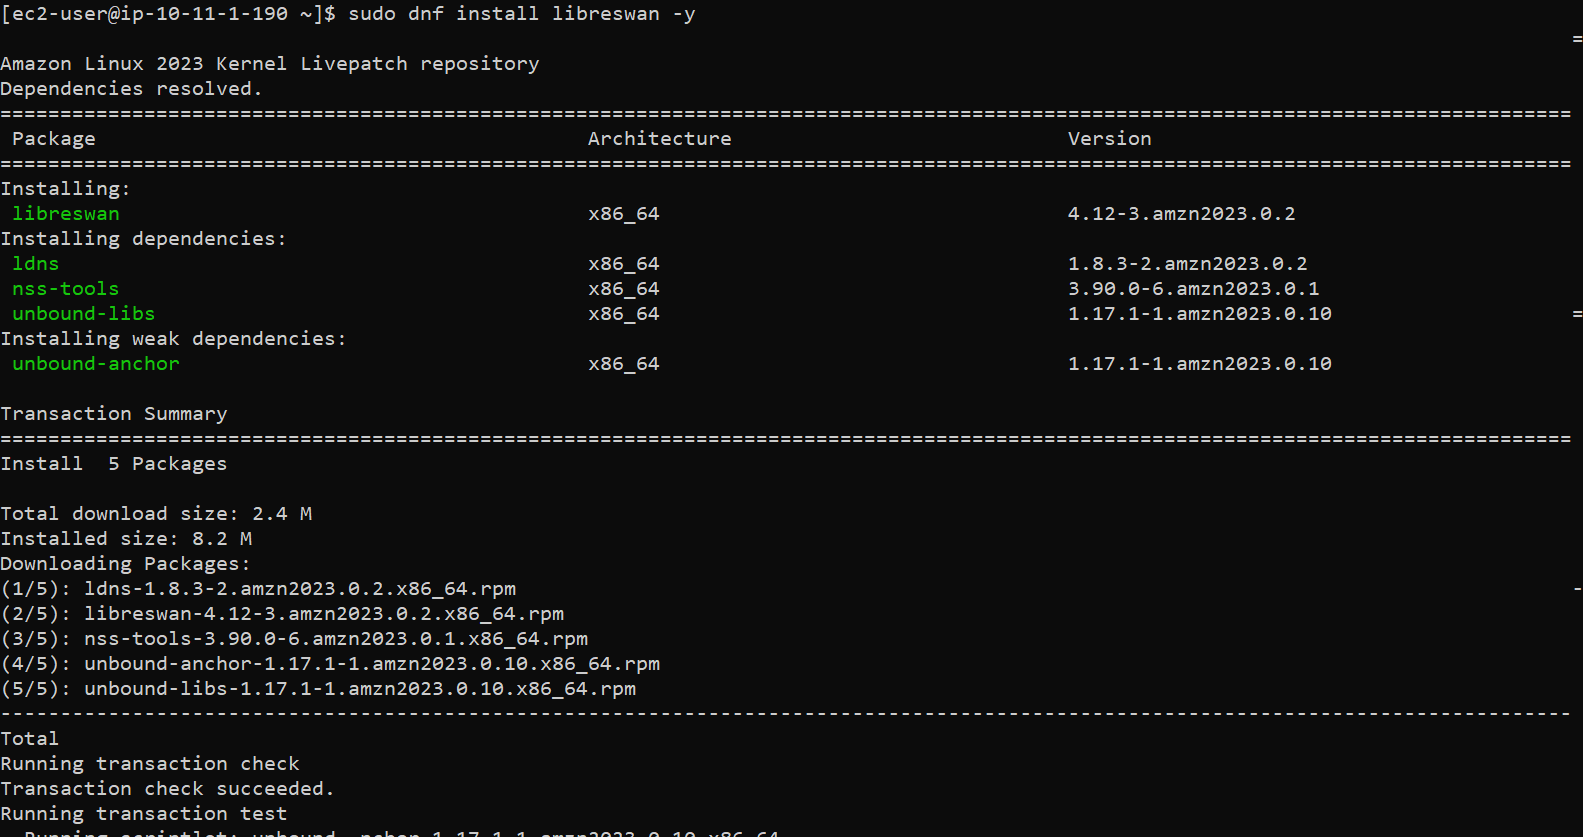
- Kiểm tra file /etc/ipsec.conf (file cấu hình chính)
sudo vi /etc/ipsec.conf
- Kiểm tra cấu hình mặc định
- Ấn ESC và :q! để thoát
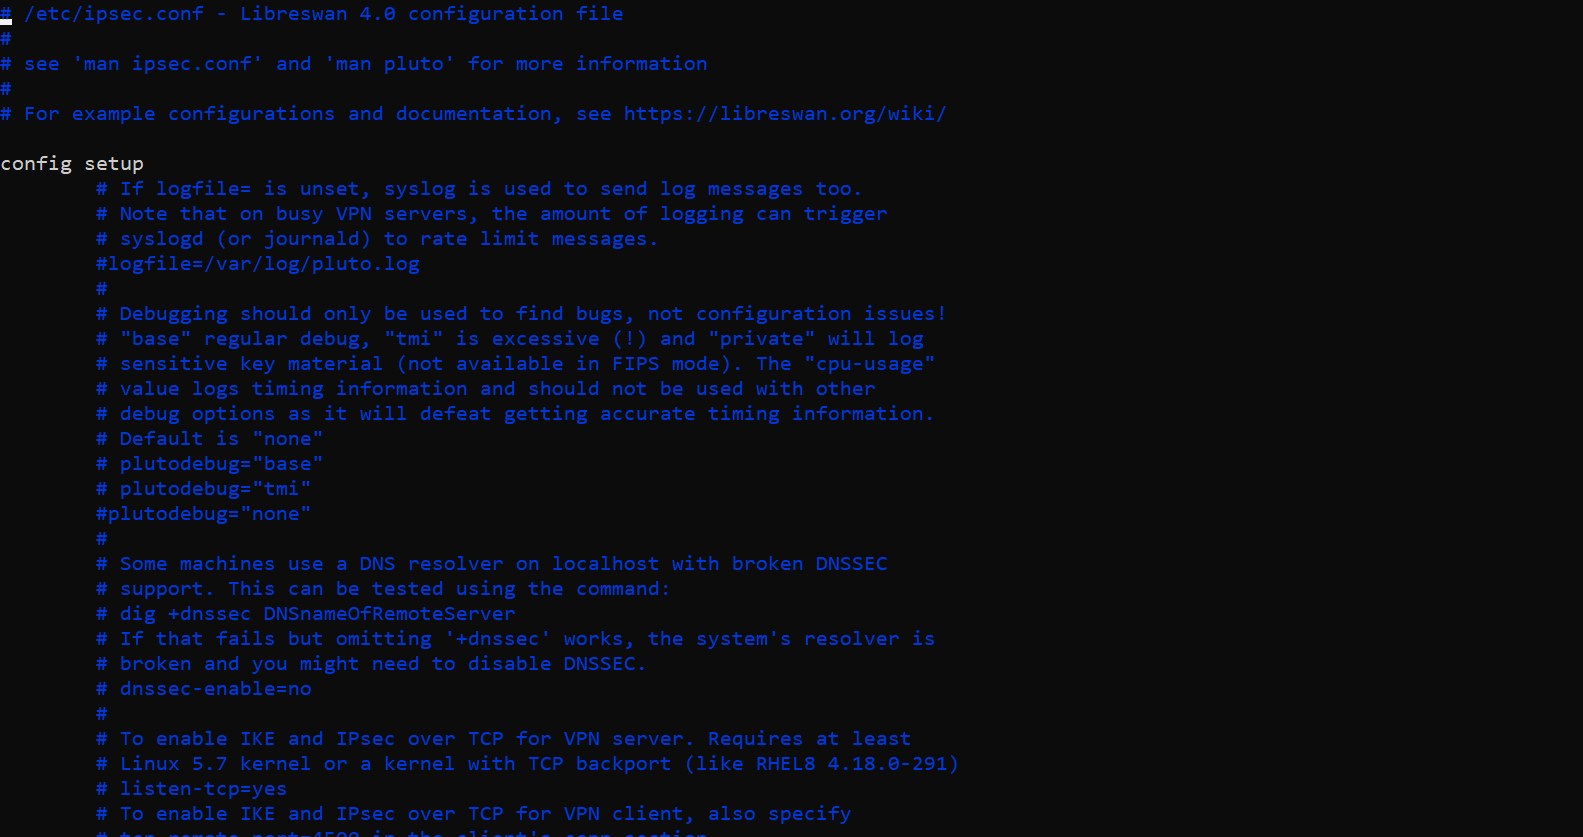
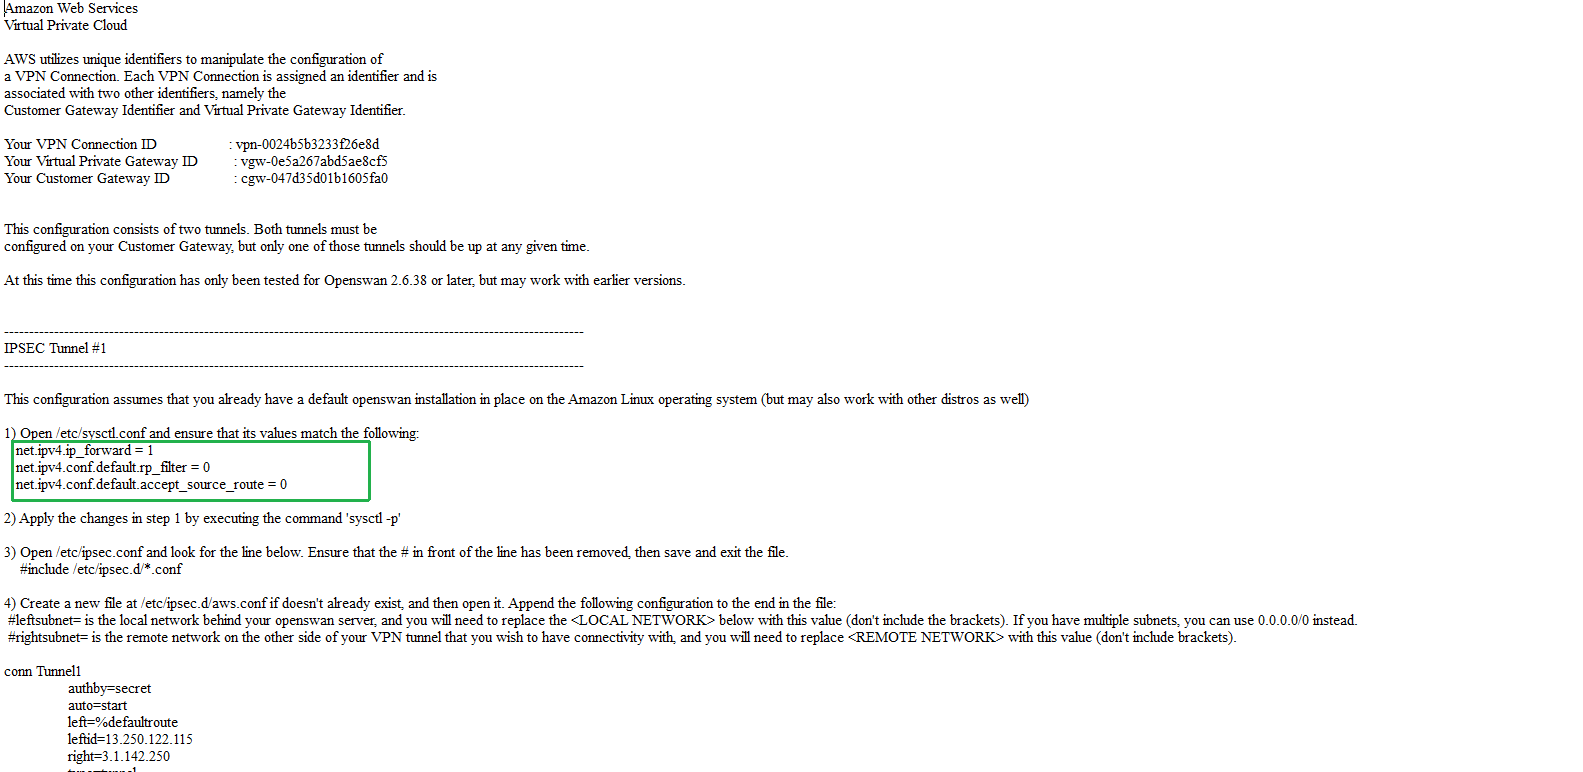
- Cấu hình IP forwarding trong /etc/sysctl.conf
sudo vi /etc/sysctl.conf
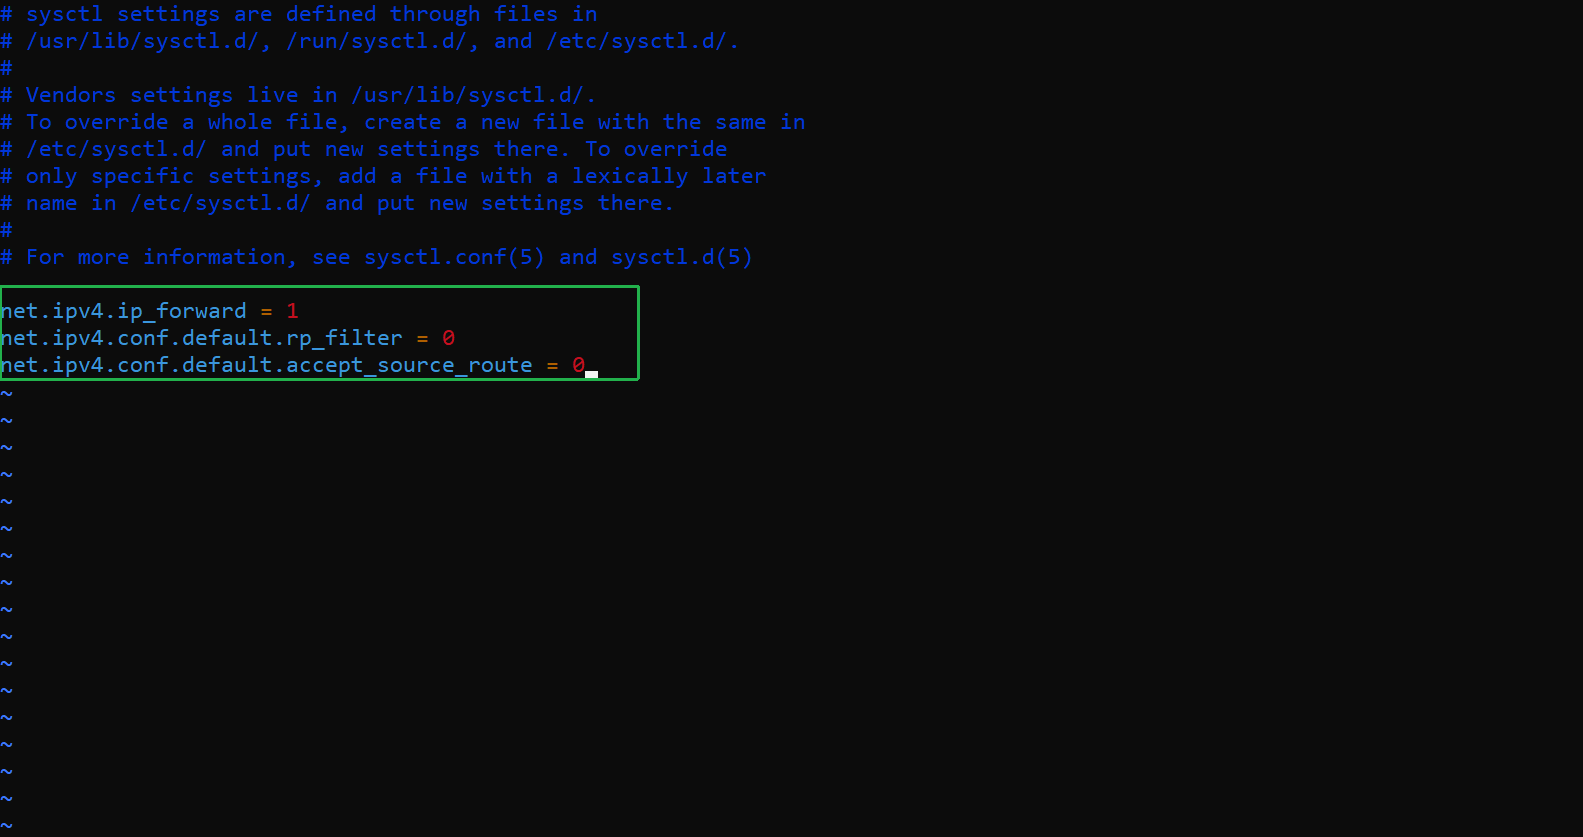
- Ấn i để edit, thêm vào cuối file:
net.ipv4.ip_forward = 1
net.ipv4.conf.all.accept_redirects = 0
net.ipv4.conf.all.send_redirects = 0
⚠️ Quan trọng: IP forwarding bắt buộc để Customer Gateway có thể route traffic giữa VPN tunnel và local network
- Ấn ESC và :wq! để lưu
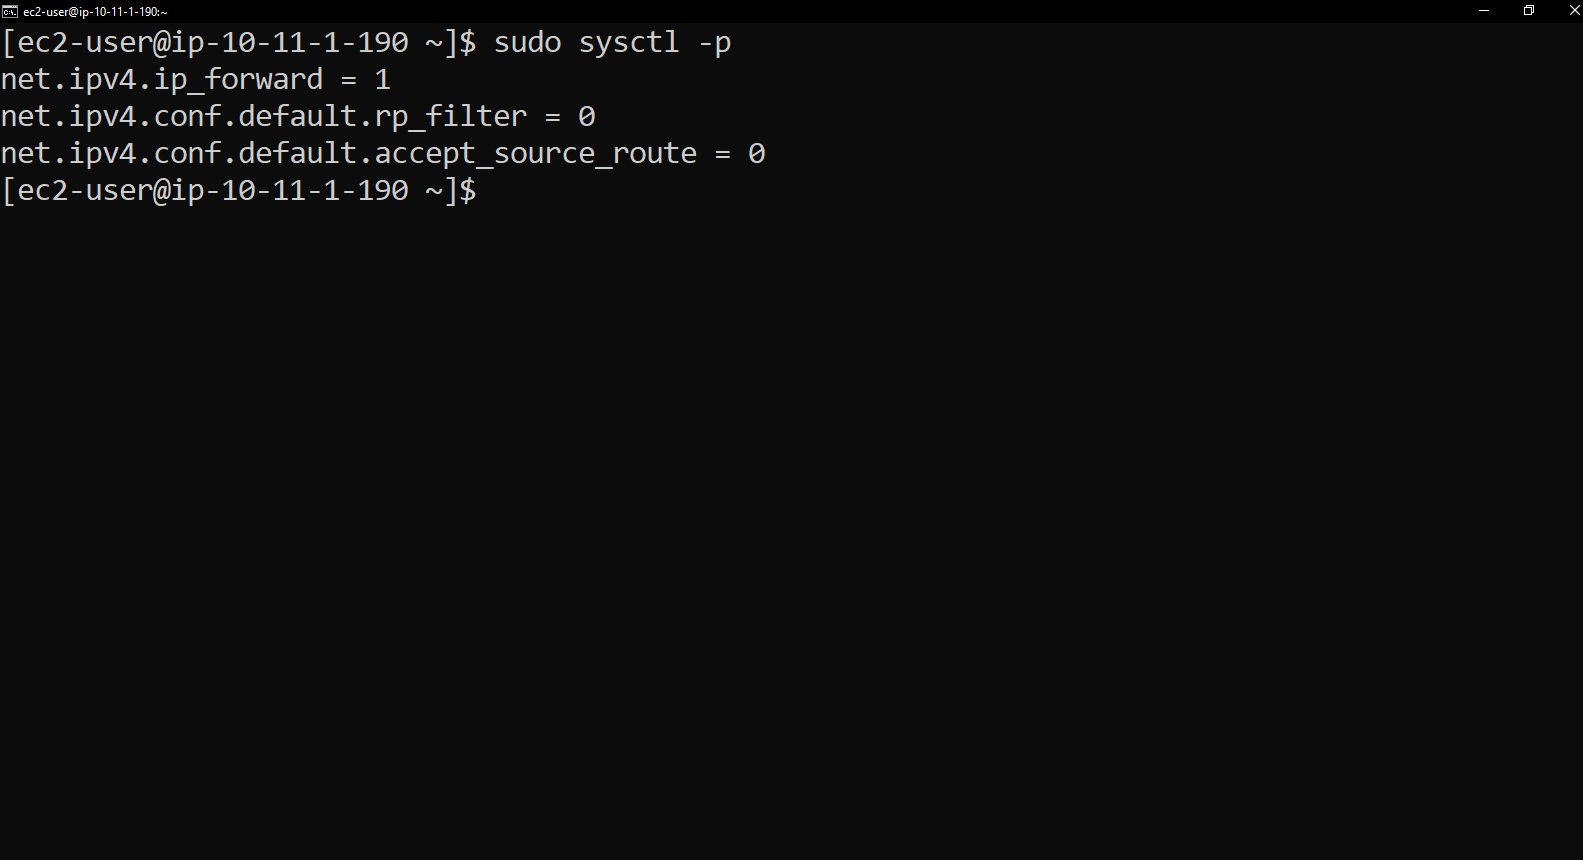
- Áp dụng cấu hình sysctl
sudo sysctl -p
Cấu hình VPN Tunnels
- Tạo file cấu hình /etc/ipsec.d/aws.conf cho 2 VPN tunnels
sudo vi /etc/ipsec.d/aws.conf
- Ấn i để edit
- Thêm cấu hình cho 2 Tunnels (lấy thông tin từ file VPN Configuration đã download)
🔑 Các thông số quan trọng:
- leftid: Public IP của EC2 Customer Gateway
- right: Public IP của AWS VPN Tunnel endpoint
- leftsubnet: CIDR của VPN VPC (10.11.0.0/16)
- rightsubnet: CIDR của AWS VPC (10.10.0.0/16)
- overlapip=yes: Bắt buộc vì chỉ có 1 public IP
- auto=start: Tự động khởi động tunnel
💡 Lưu ý quan trọng:
- Bỏ dòng
auth=esp(không cần cho Amazon Linux) - Sửa
modp1024thànhmodp2048(bảo mật cao hơn) - Sửa
auto=routethànhauto=start
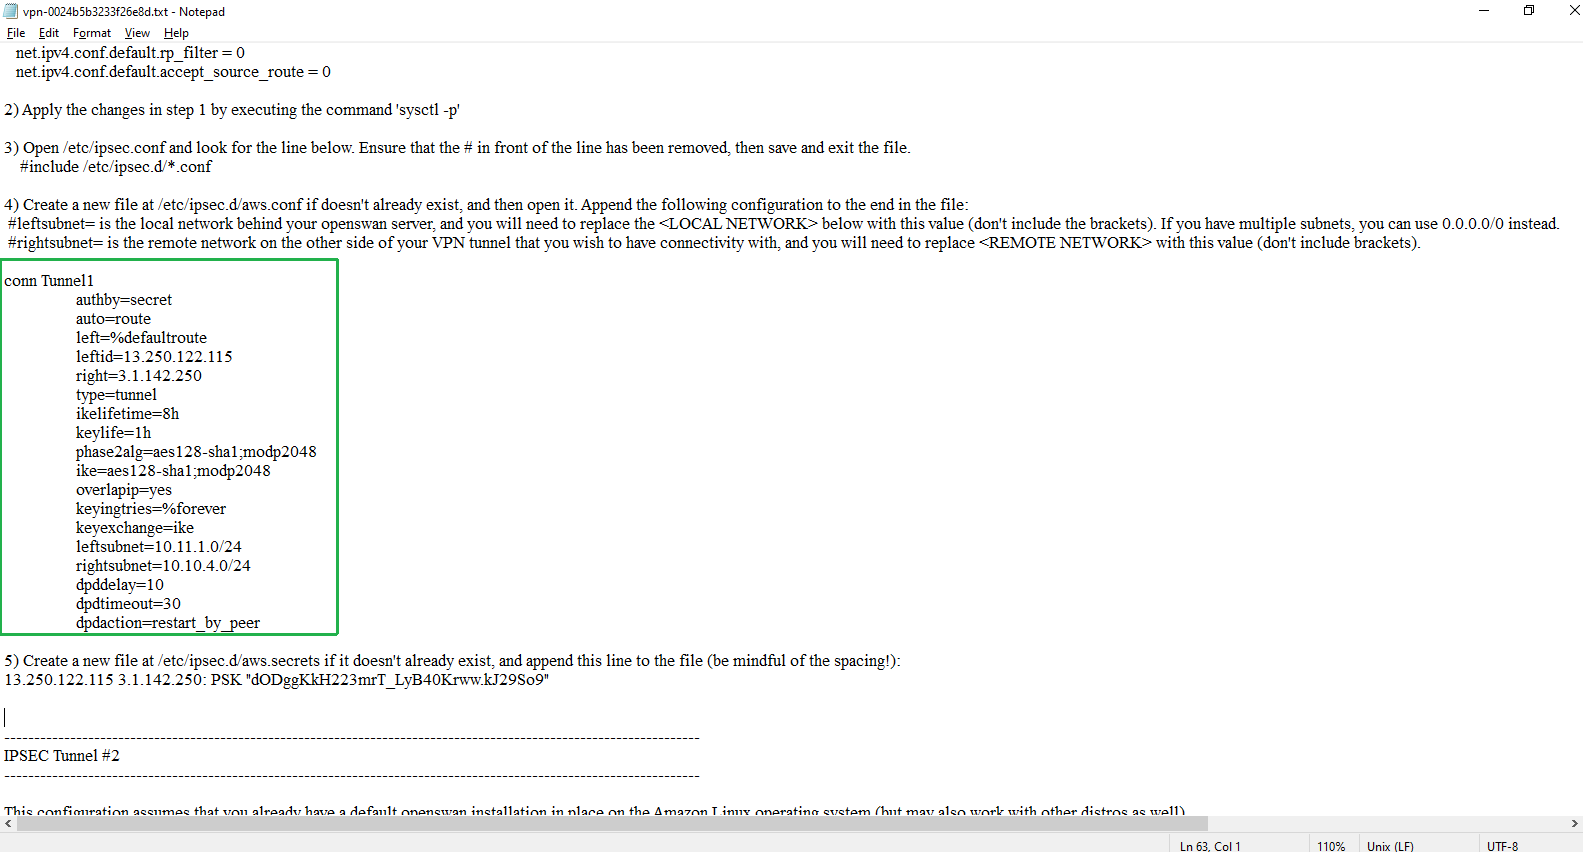
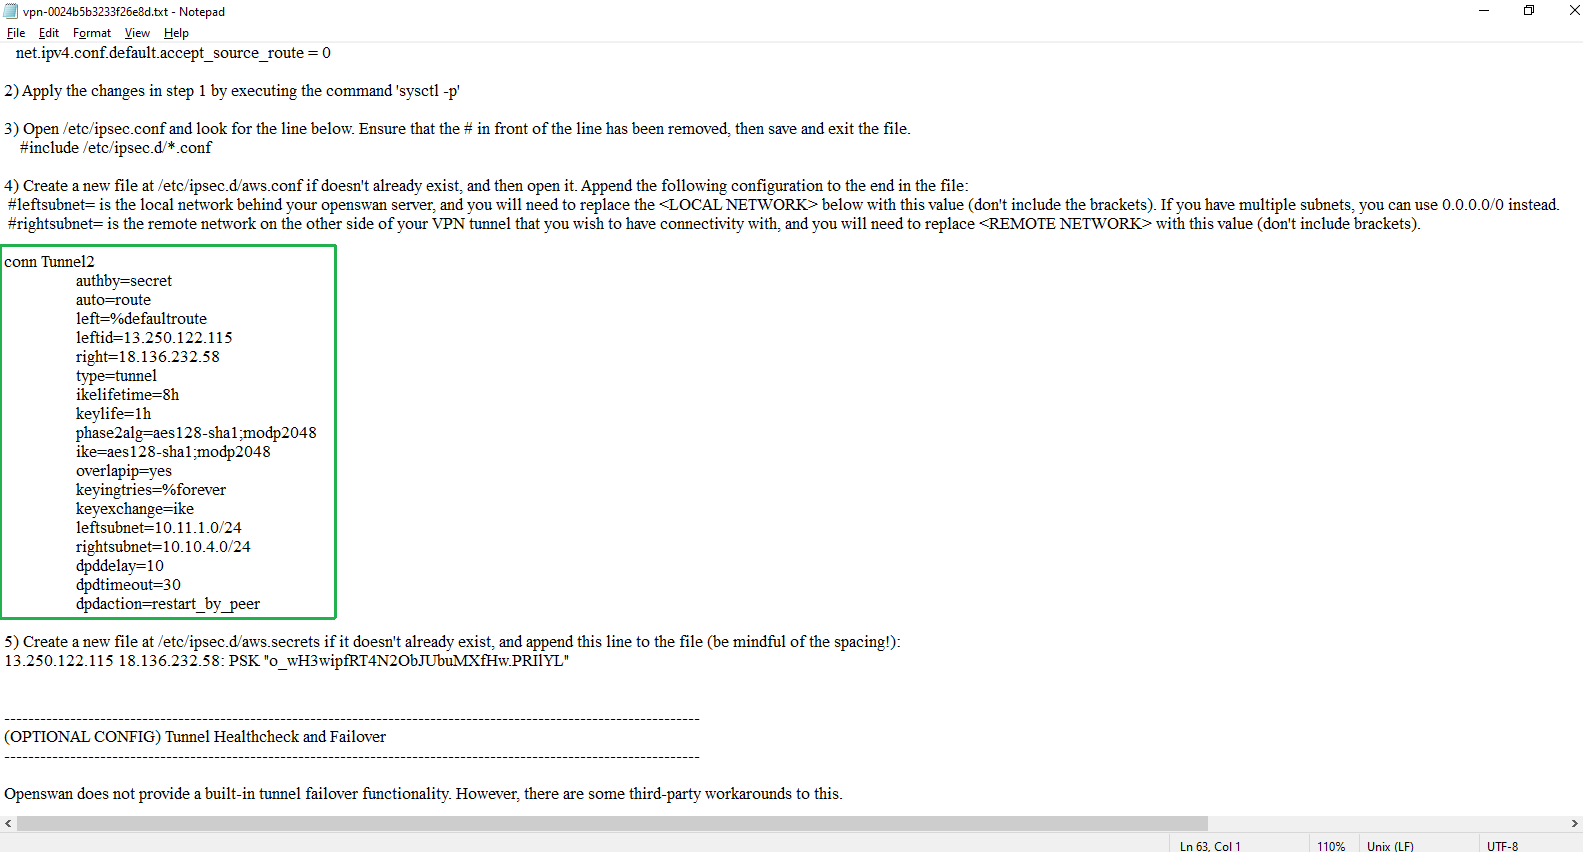
- Kiểm tra kỹ cấu hình
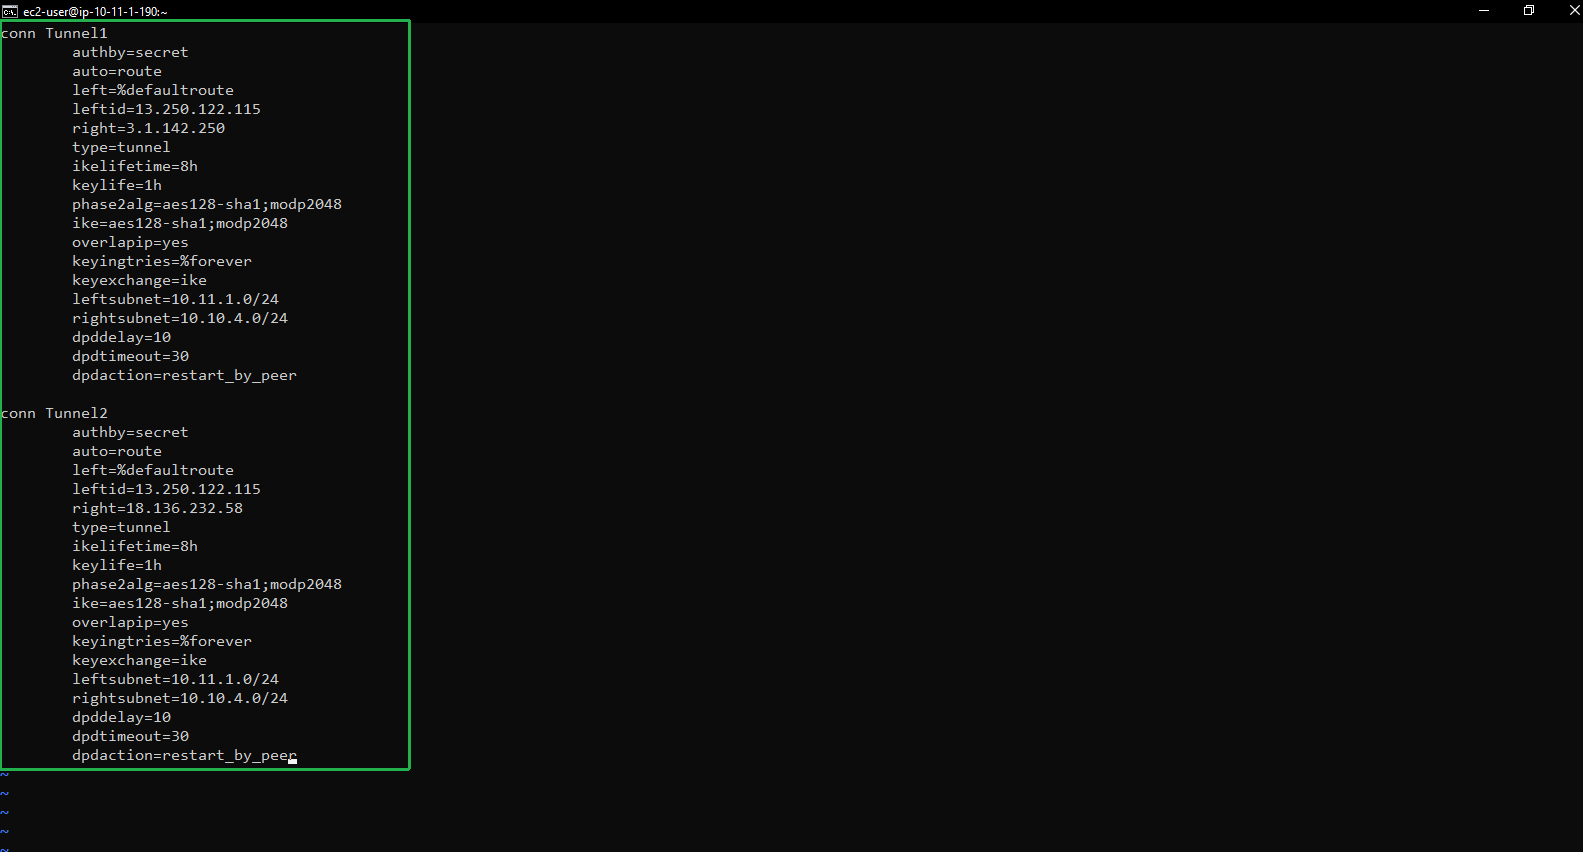
- Ấn ESC và :wq! để lưu
- Tham khảo file cấu hình AWS đã download
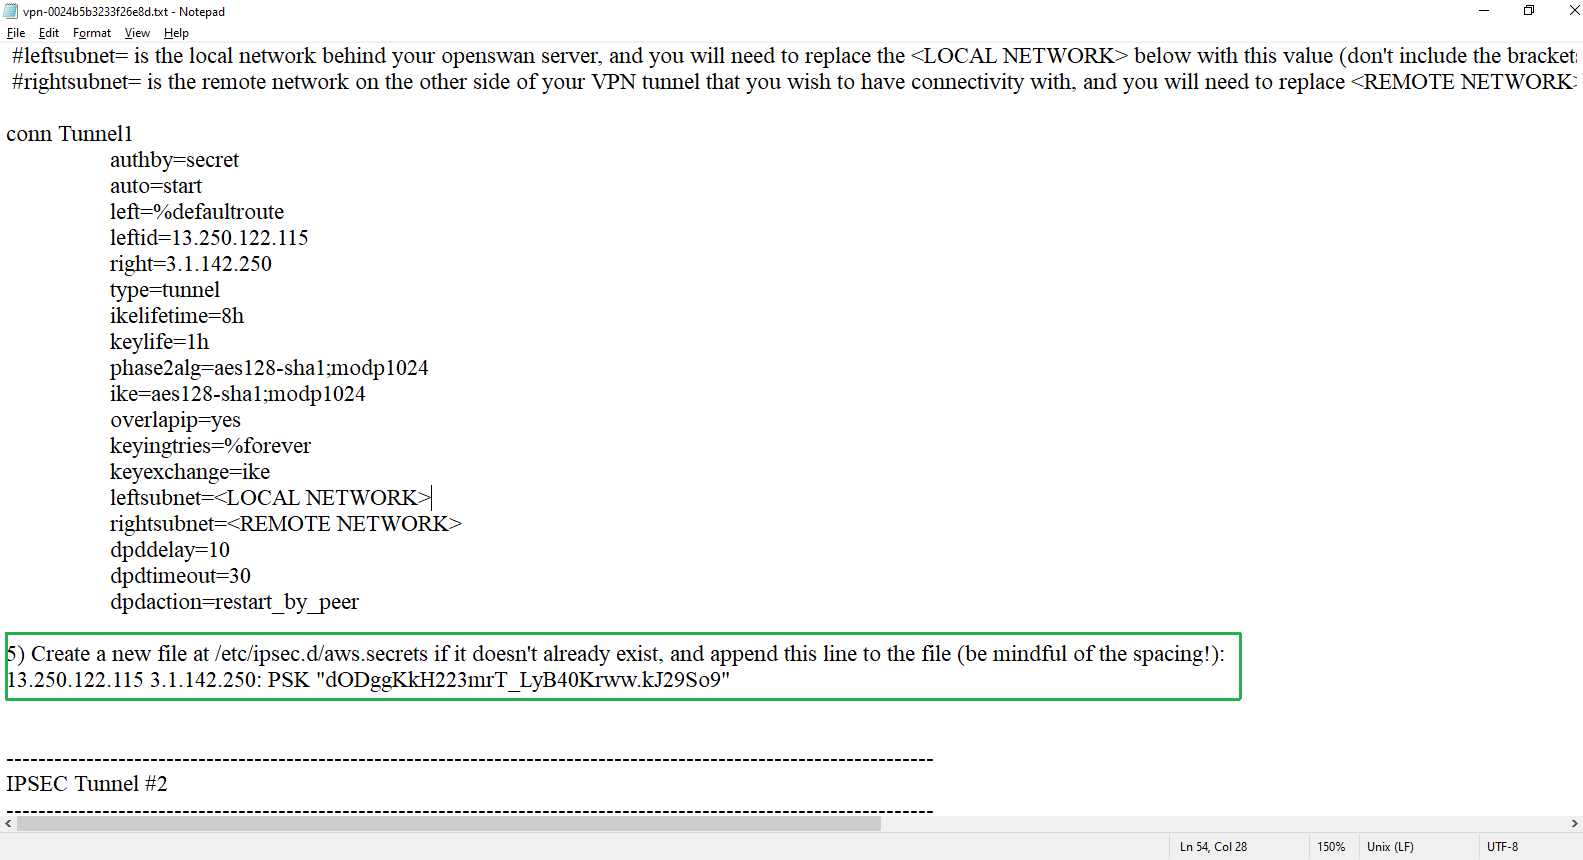
Cấu hình Pre-Shared Keys
- Tạo file /etc/ipsec.d/aws.secrets cho authentication
sudo touch /etc/ipsec.d/aws.secrets
- Edit file secrets
sudo vi /etc/ipsec.d/aws.secrets
- Ấn i để edit
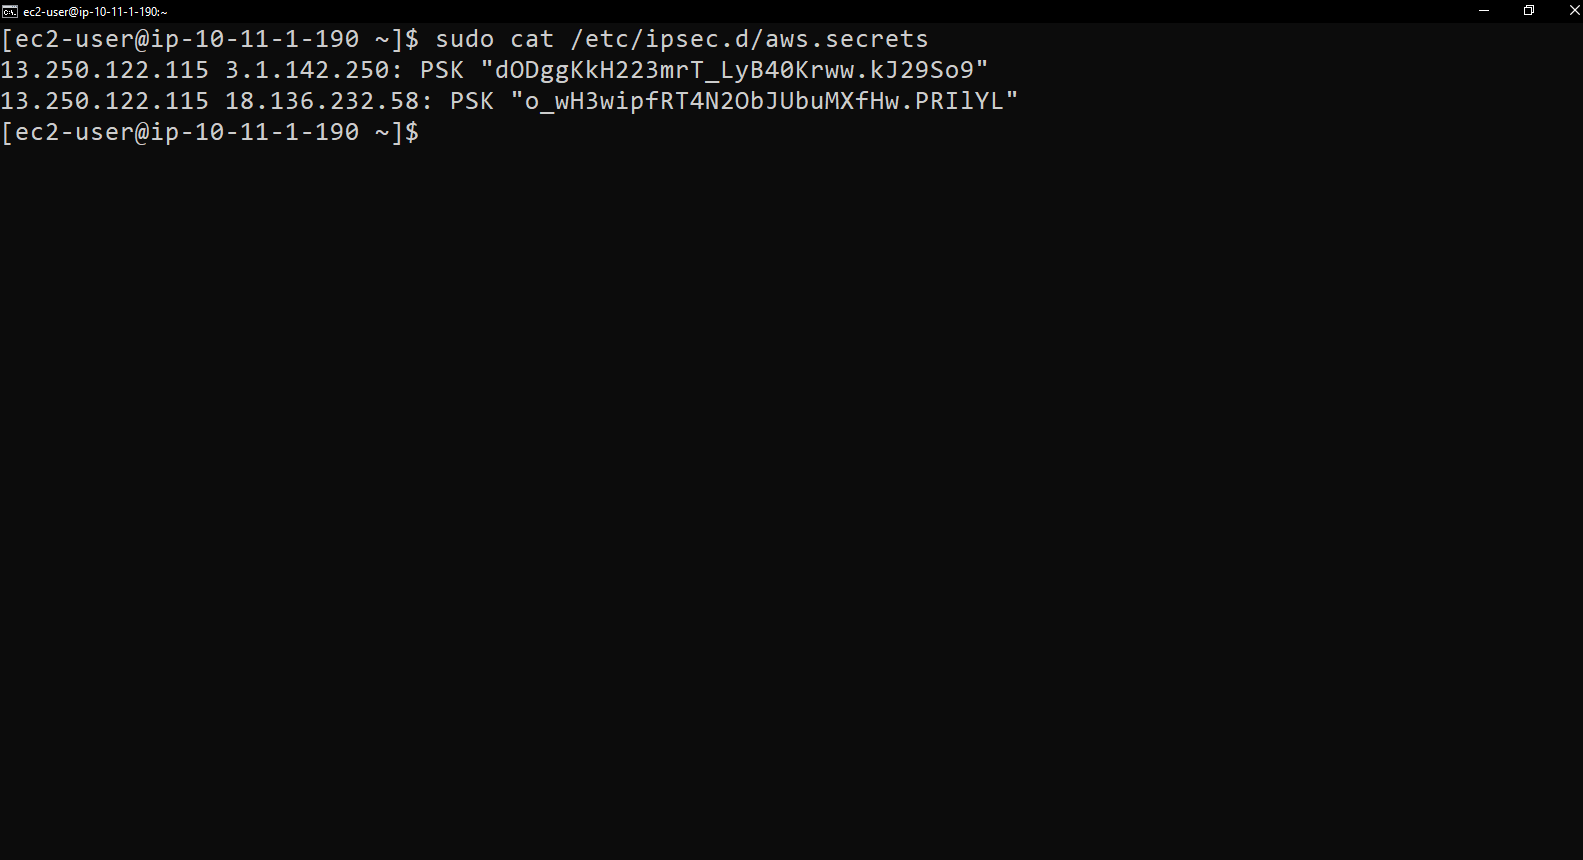
- Thêm Pre-Shared Keys cho cả 2 tunnels (lấy từ file VPN Configuration - Step 5 của mỗi tunnel)
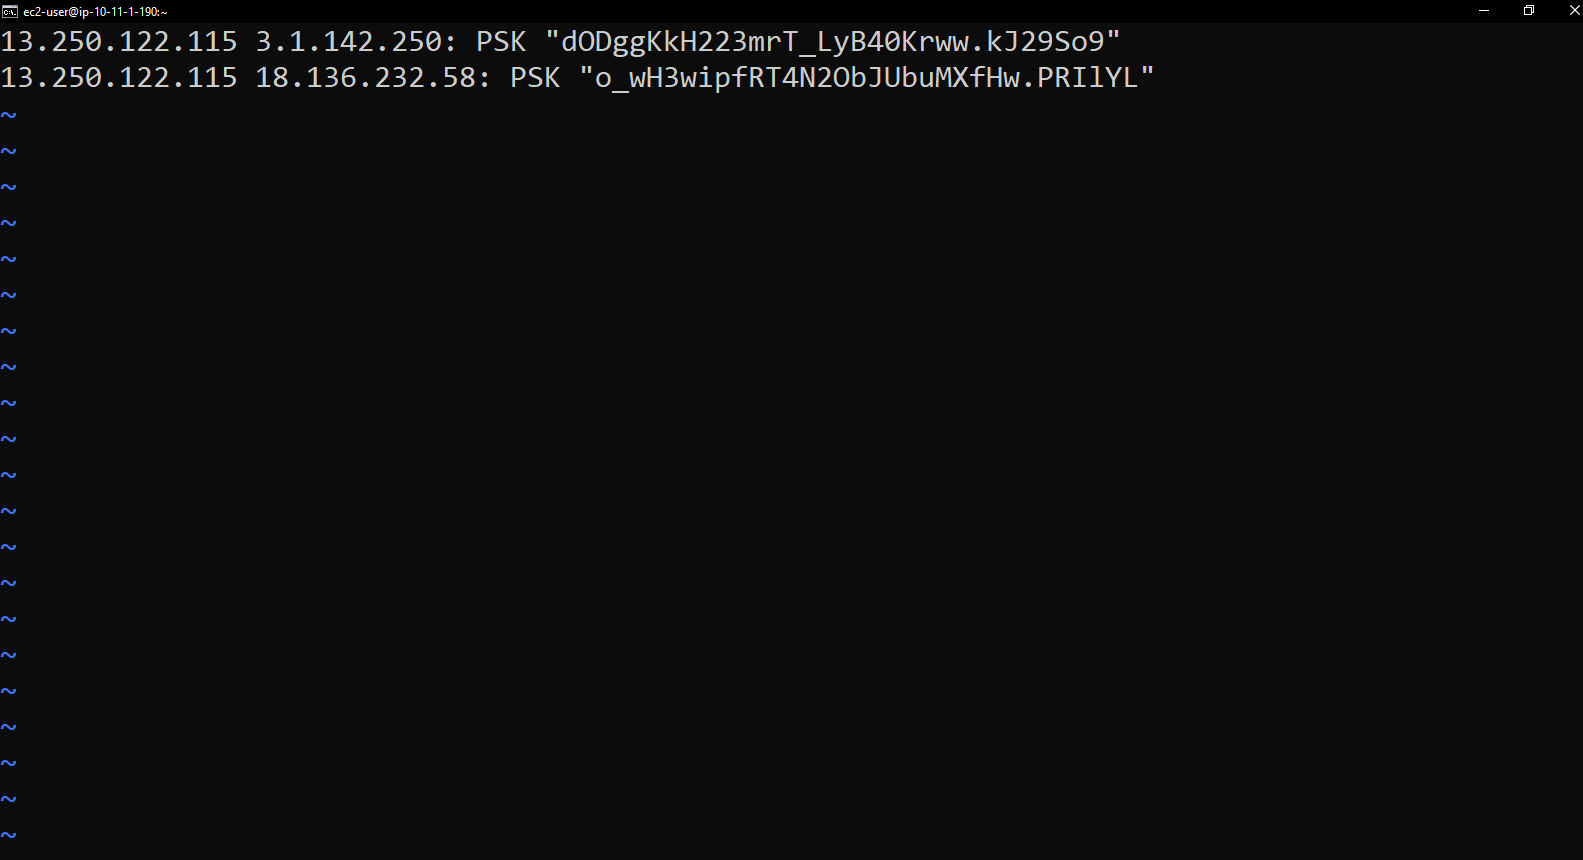
🔐 Format:
<Customer Gateway Public IP> <AWS VPN Endpoint IP>: PSK "<pre-shared-key>"
Ấn ESC và :wq! để lưu
Kiểm tra file:
sudo cat /etc/ipsec.d/aws.secrets
Khởi động VPN Tunnels
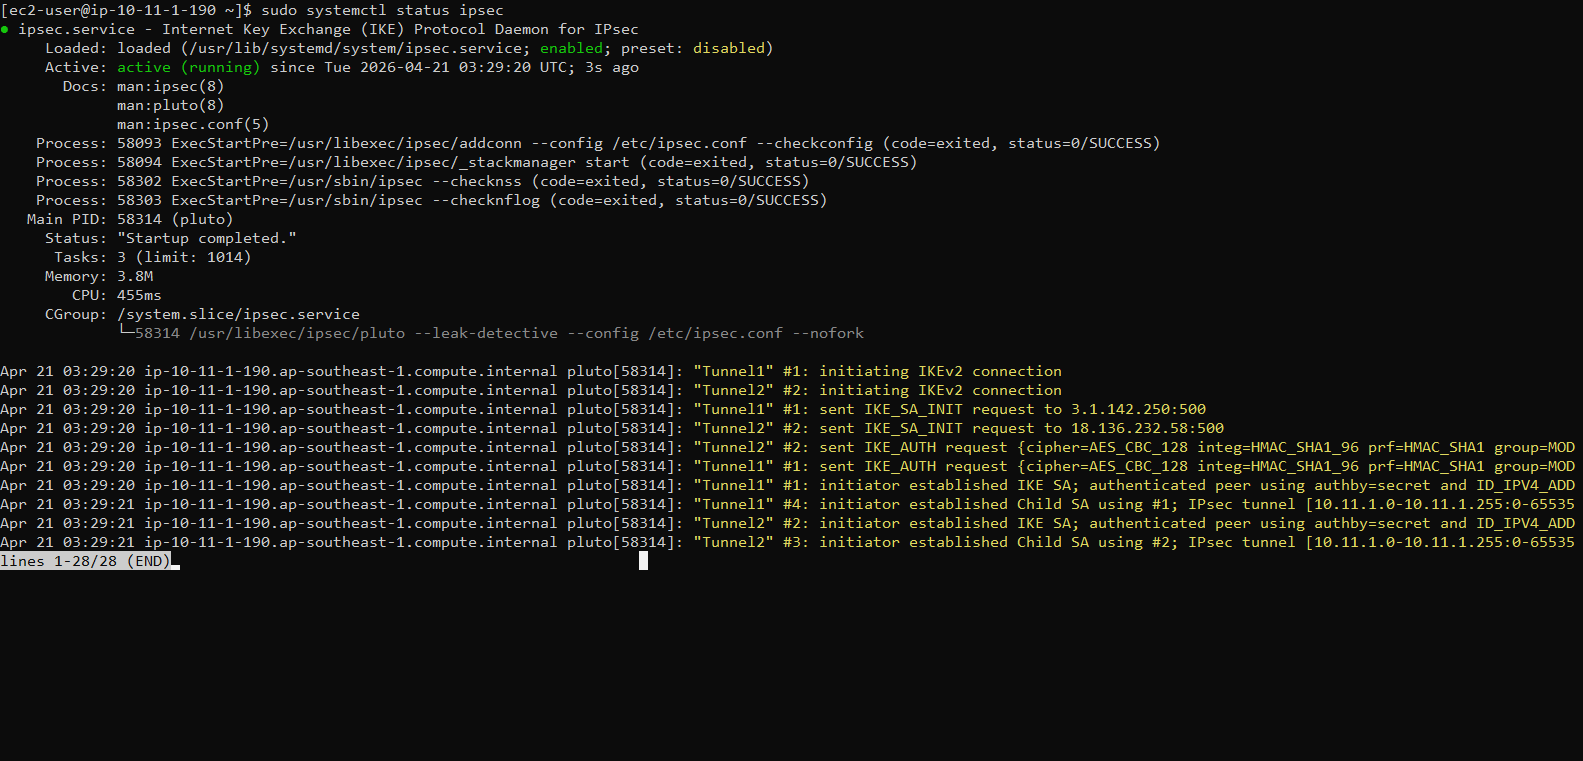
- Khởi động và enable IPsec service
sudo systemctl restart systemd-networkd
sudo systemctl enable ipsec
sudo systemctl start ipsec
sudo systemctl status ipsec
✅ Kết quả mong đợi: Service status = active (running)
- Nếu cần restart:
sudo systemctl restart systemd-networkd
sudo systemctl restart ipsec
💡 Kiểm tra tunnel status:
sudo ipsec status
- Nên thấy ít nhất 1 tunnel UP (ESTABLISHED)
Test VPN Connectivity
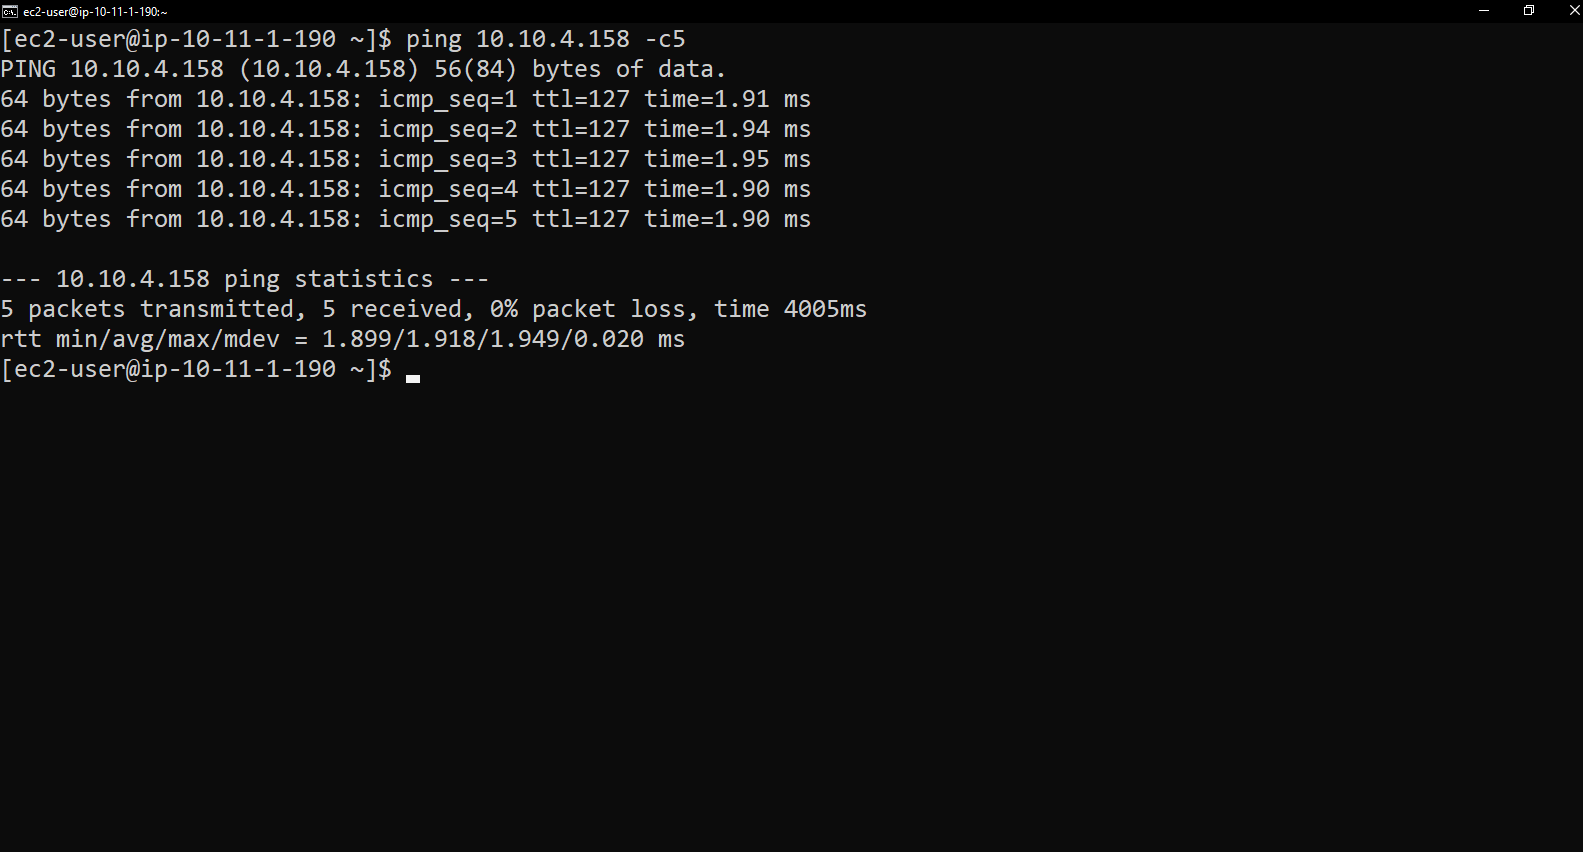
- Test ping từ Customer Gateway đến EC2 Private
ping <EC2-Private-IP> -c5
✅ Thành công: Nhận được ping replies qua VPN tunnel
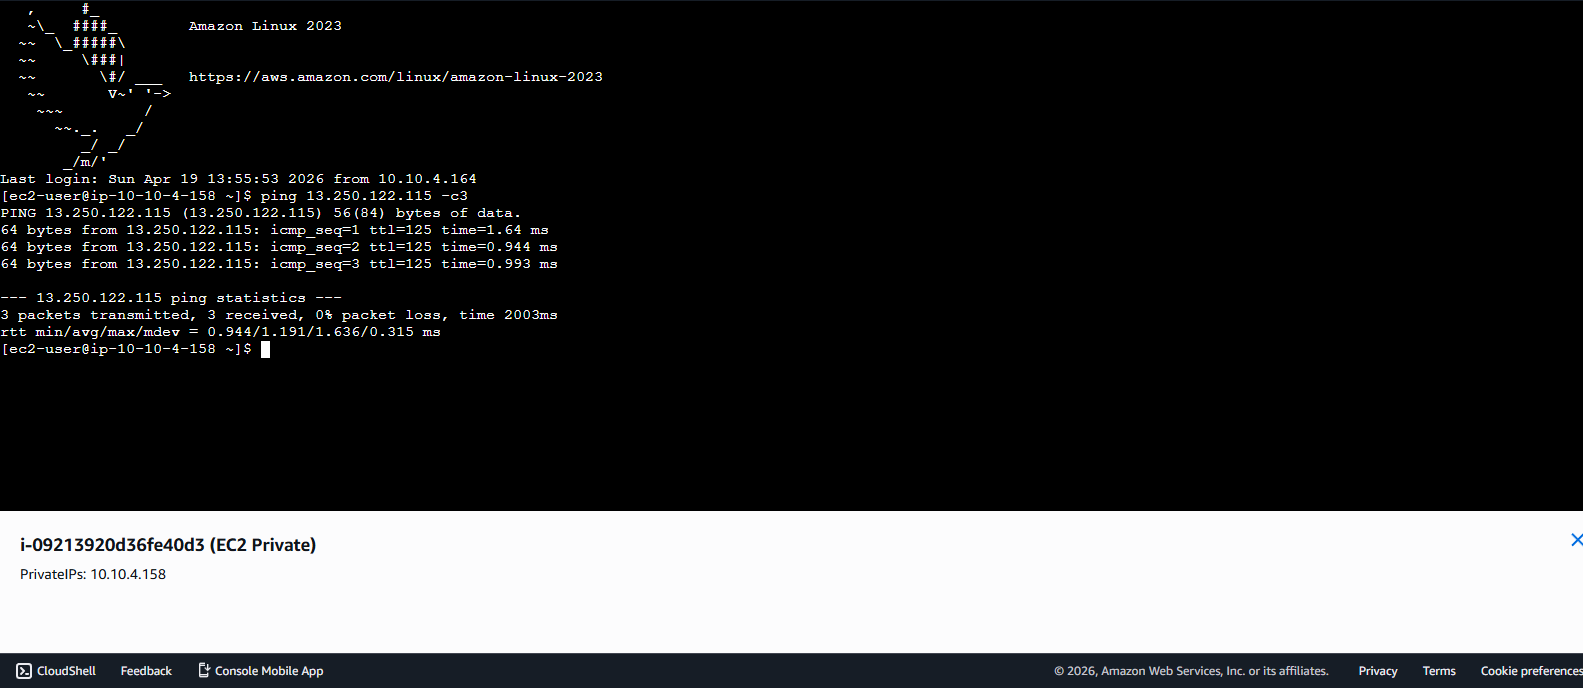
- Test ping từ EC2 Private đến Customer Gateway
ping <Customer-Gateway-Private-IP> -c5
✅ Thành công: Kết nối 2 chiều qua VPN hoạt động!
🏗️ Kiến trúc VPN Hoàn chỉnh
AWS VPC (10.10.0.0/16)
├── EC2 Private (10.10.4.x)
    ↓
Virtual Private Gateway
    ↓
VPN Tunnel (IPsec) - ESTABLISHED ✅
    ├── Tunnel 1: UP
    └── Tunnel 2: Standby
    ↓
Customer Gateway (Libreswan)
├── Public IP: x.x.x.x
└── Private IP: 10.11.1.x
    ↓
VPN VPC (10.11.0.0/16)
💡 Troubleshooting Tips:
- Kiểm tra Security Groups (ports 500, 4500 UDP)
- Xem logs:
sudo journalctl -u ipsec -f - Kiểm tra status:
sudo ipsec status - Verify routes:
ip route show - Nếu ping không được:
sudo ip route add 10.10.4.0/24 dev ens5
🔒 Security Notes:
- Pre-shared keys phải được bảo vệ cẩn thận
- File permissions:
chmod 600 /etc/ipsec.d/aws.secrets - Rotate keys định kỳ trong production
- Monitor tunnel status với CloudWatch
✅ Hoàn thành: VPN Site-to-Site đã được cấu hình thành công và hoạt động!