Create Route Table
Creating Route Tables for Your VPC
ℹ️ What is a Route Table?
A route table contains a set of rules (routes) that determine where network traffic from your subnet or gateway is directed. Each subnet in your VPC must be associated with a route table, which controls the routing for the subnet.
Step-by-Step Route Table Creation
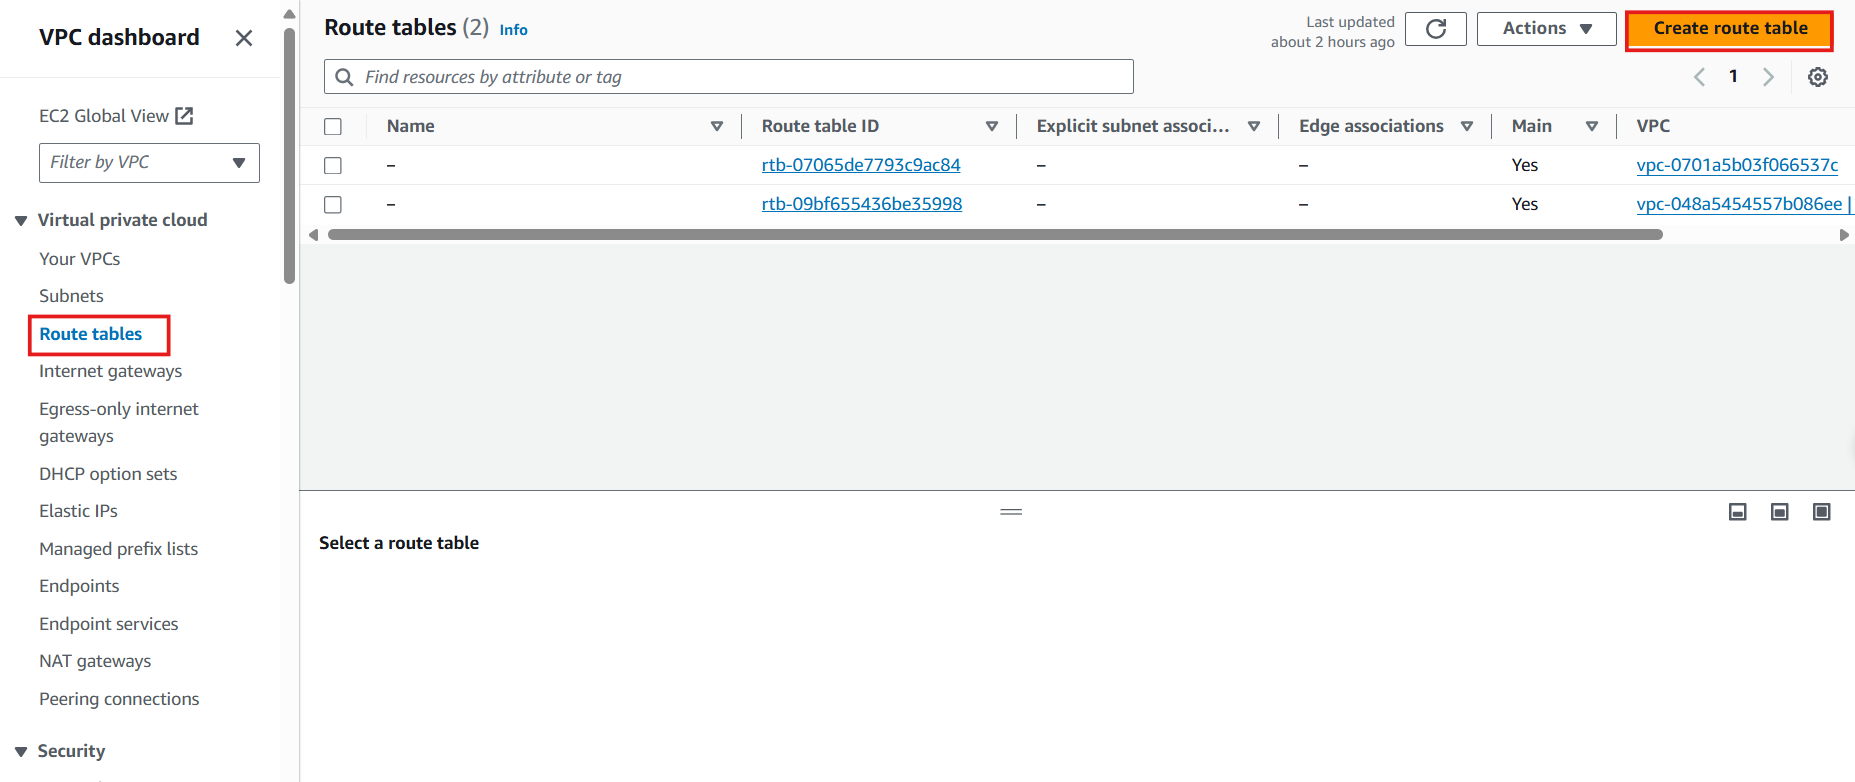
- Access the Route Table interface:
- Navigate to the VPC console
- Select Route Tables from the left navigation panel
- Click Create route table
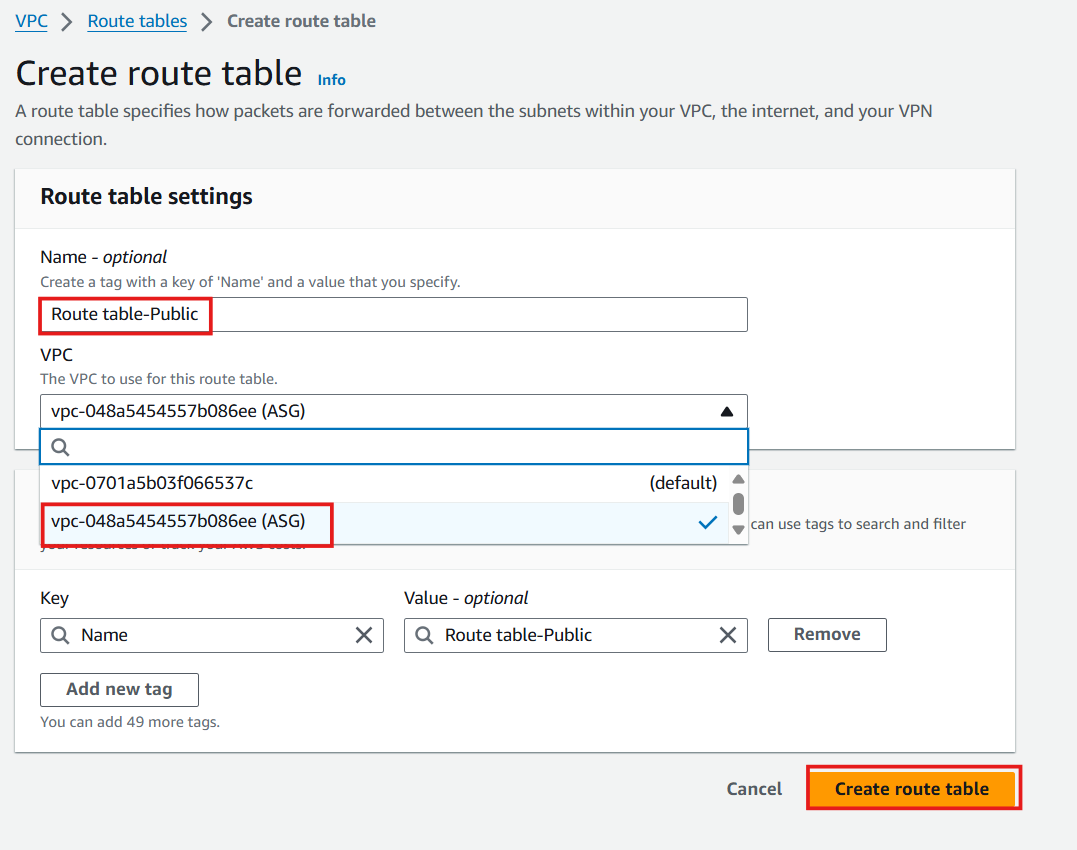
- Configure your Route Table:
- Enter Name:
Route table-Public - Select VPC: Choose the ASG VPC from the dropdown
- Click Create route table
- Enter Name:
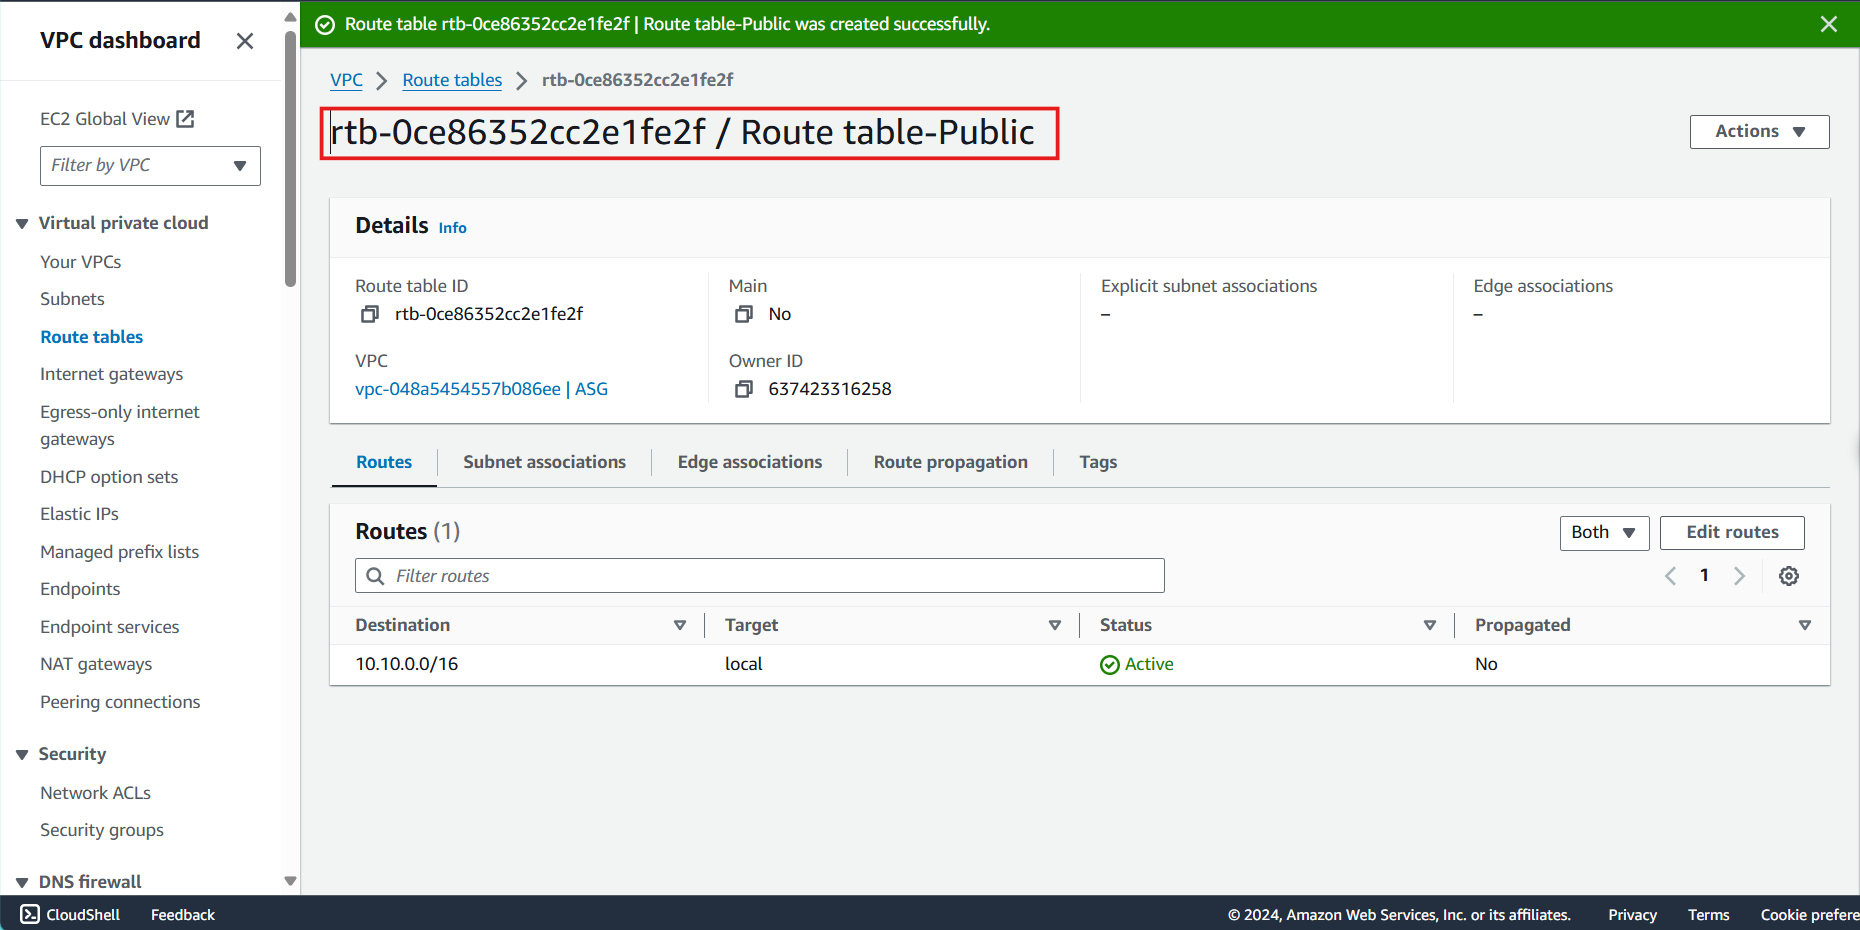
- Verify successful Route Table creation:
- You should see a success message
- Your new Route Table will appear in the list
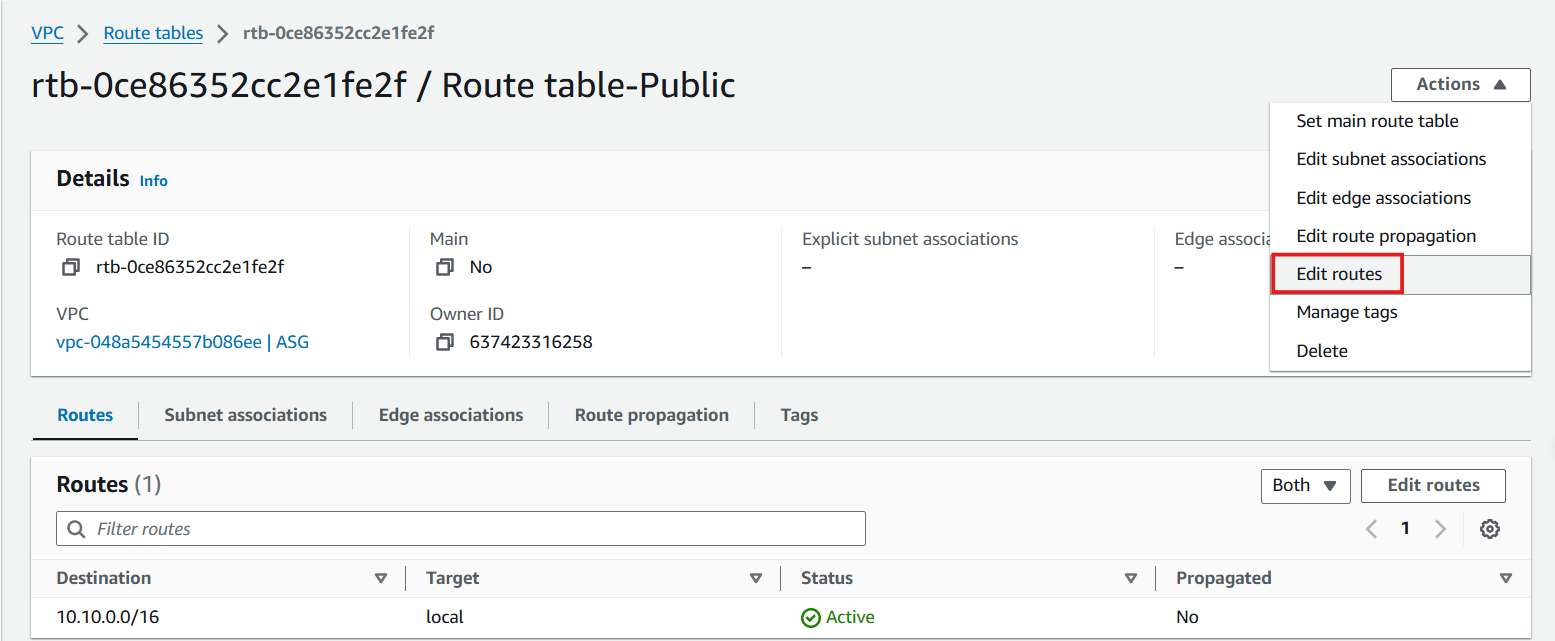
- Modify the routes in your Route Table:
- Select your newly created Route Table
- Click Actions dropdown
- Select Edit routes
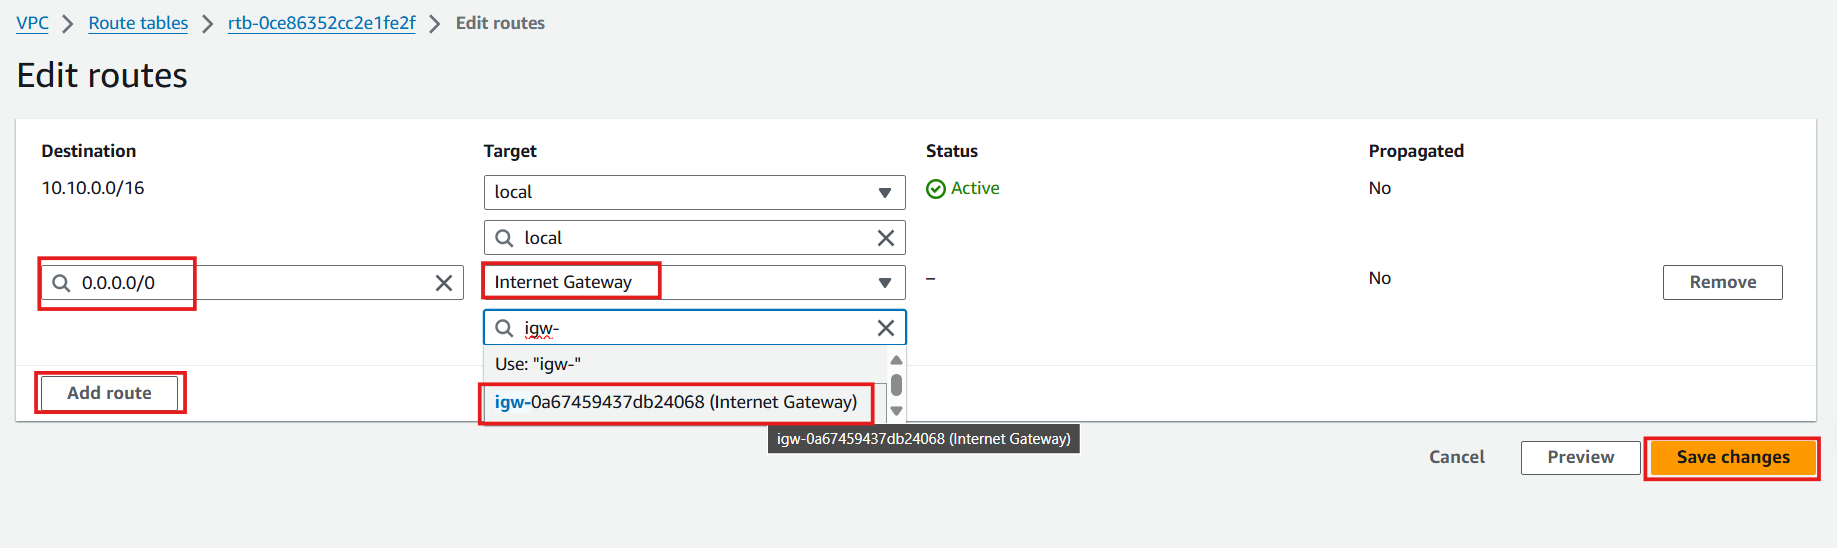
- Add an Internet route:
- Click Add route
- For Destination, enter
0.0.0.0/0(represents all IPv4 traffic) - For Target, select Internet Gateway and choose your Internet Gateway
- Click Save changes
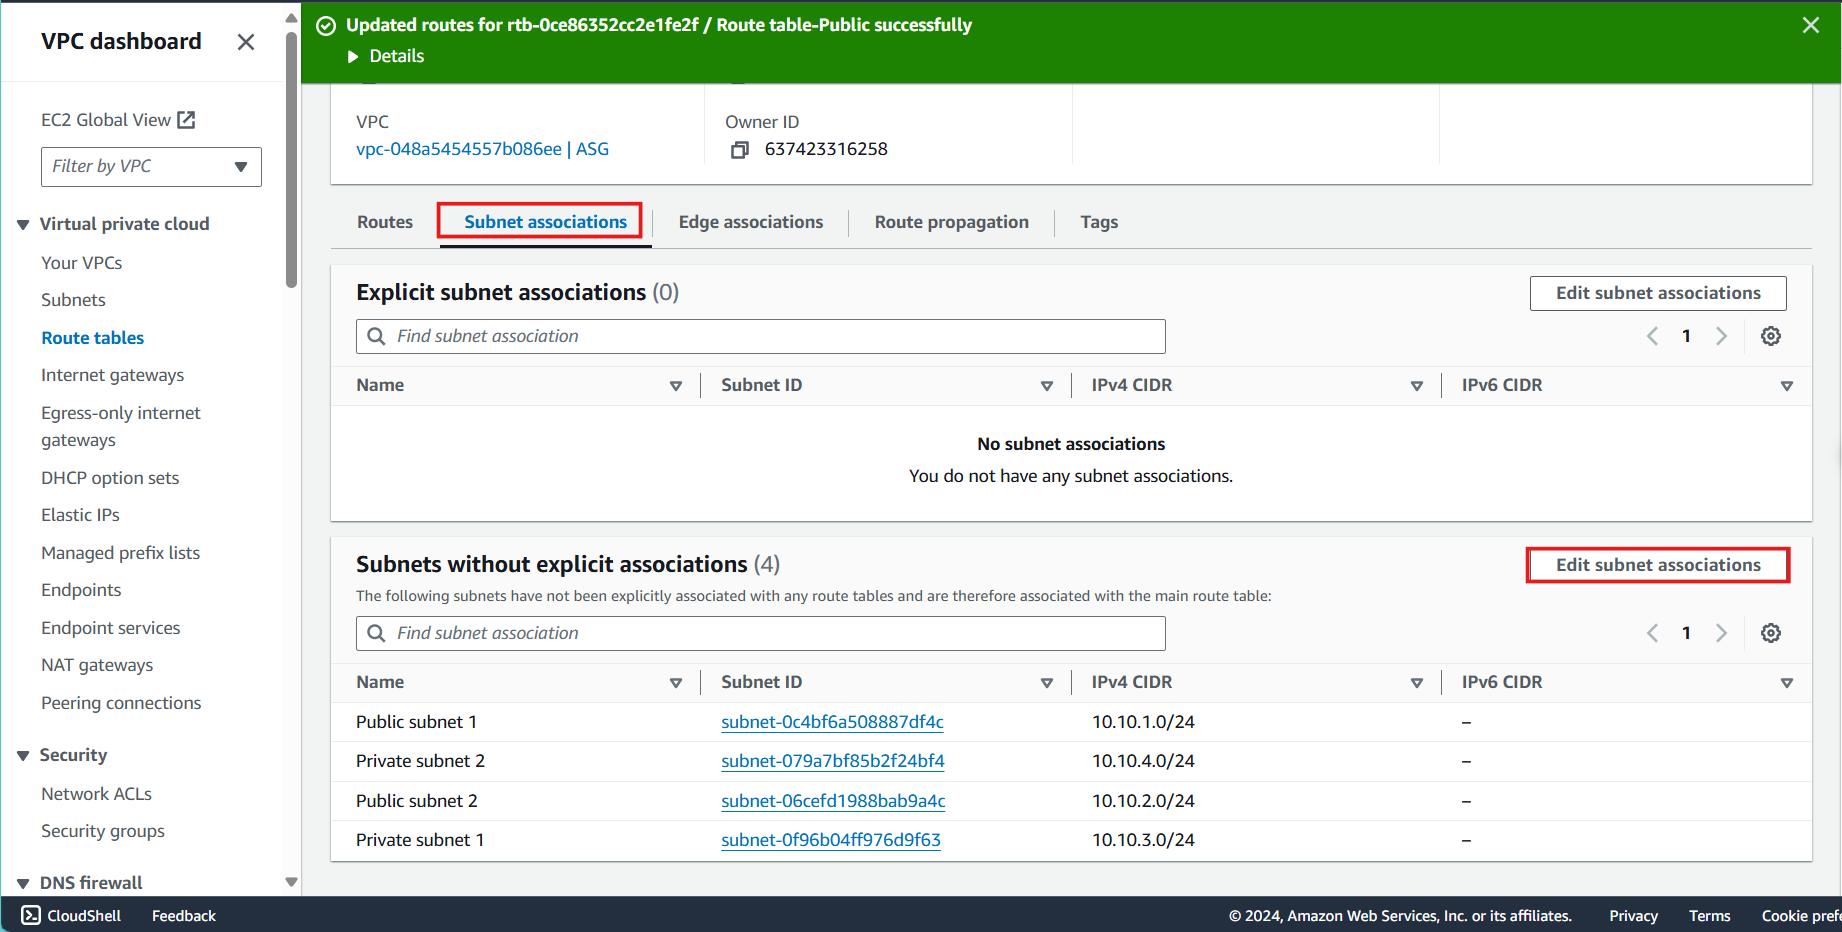
- Associate the Route Table with your public subnets:
- Select the Subnet associations tab
- Click Edit subnet associations
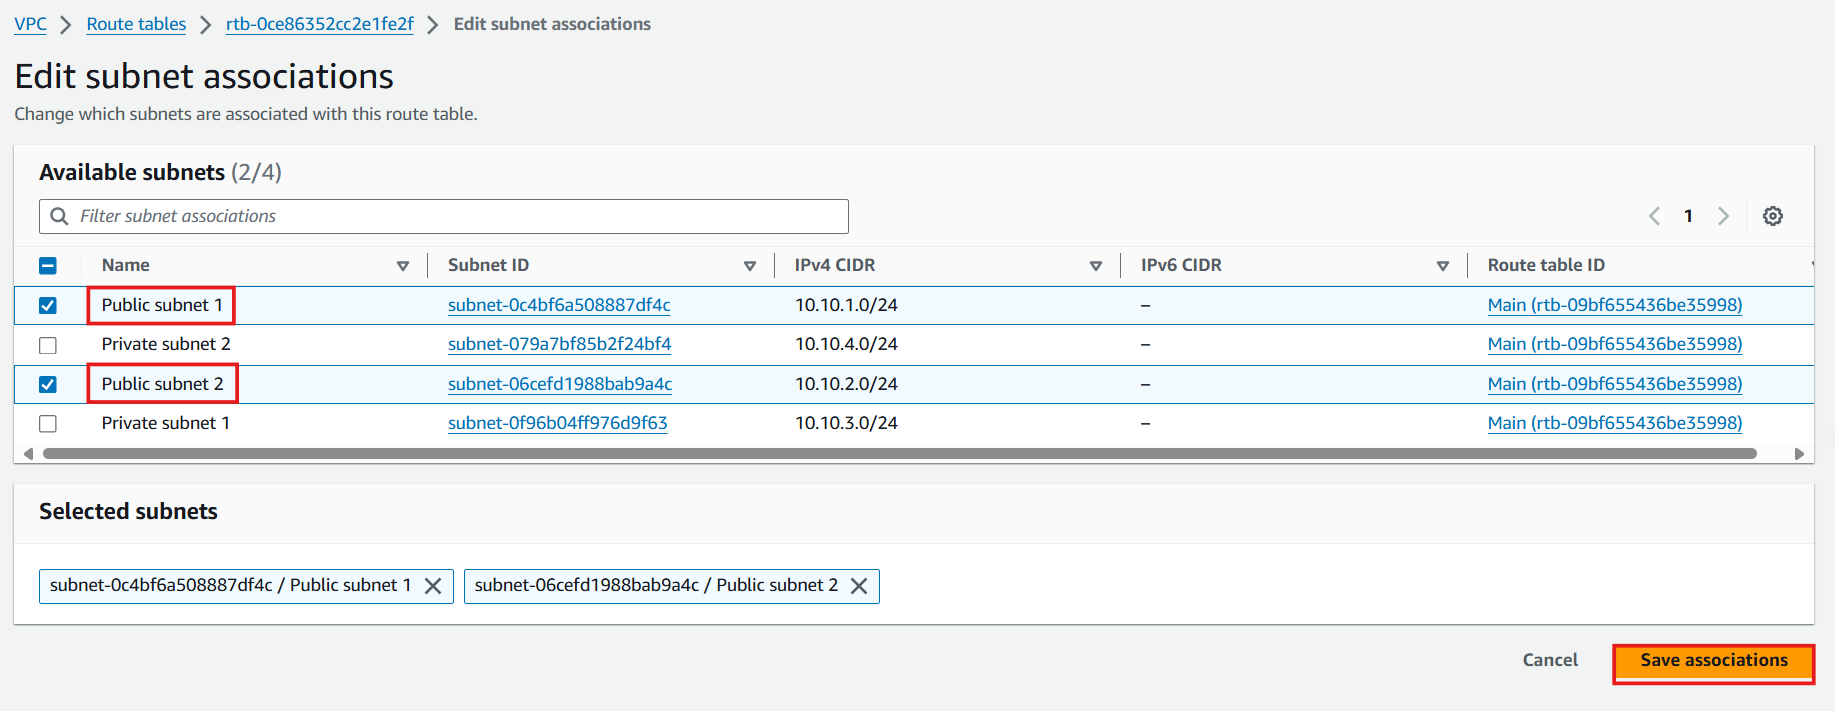
- Select the appropriate subnets:
- Adjust the column width if needed for better visibility
- Select the 2 public subnets you created earlier
- Click Save associations
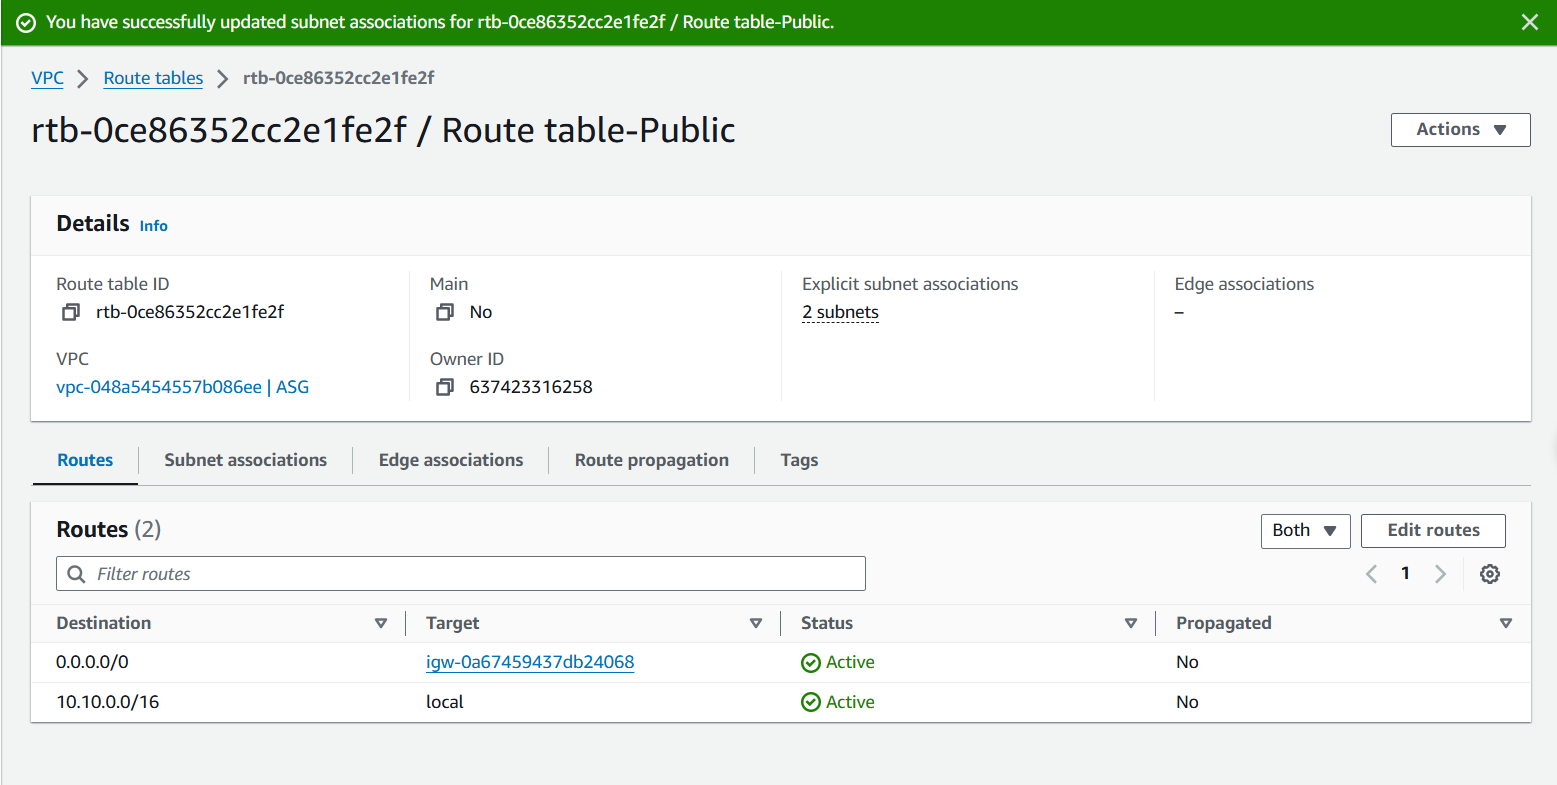
- Confirm your subnet associations:
- Review the associated subnets in the Subnet associations tab
- The public subnets are now configured to route internet traffic through the Internet Gateway
💡 Pro Tip
By default, every VPC comes with a main route table that all subnets use unless explicitly associated with a different route table. It’s a best practice to leave the main route table in its default state and create custom route tables for specific routing needs.
⚠️ Important Consideration
For security reasons, keep your private subnets associated with route tables that don’t have an internet gateway route. If you need outbound internet access from private subnets, consider using a NAT Gateway instead.