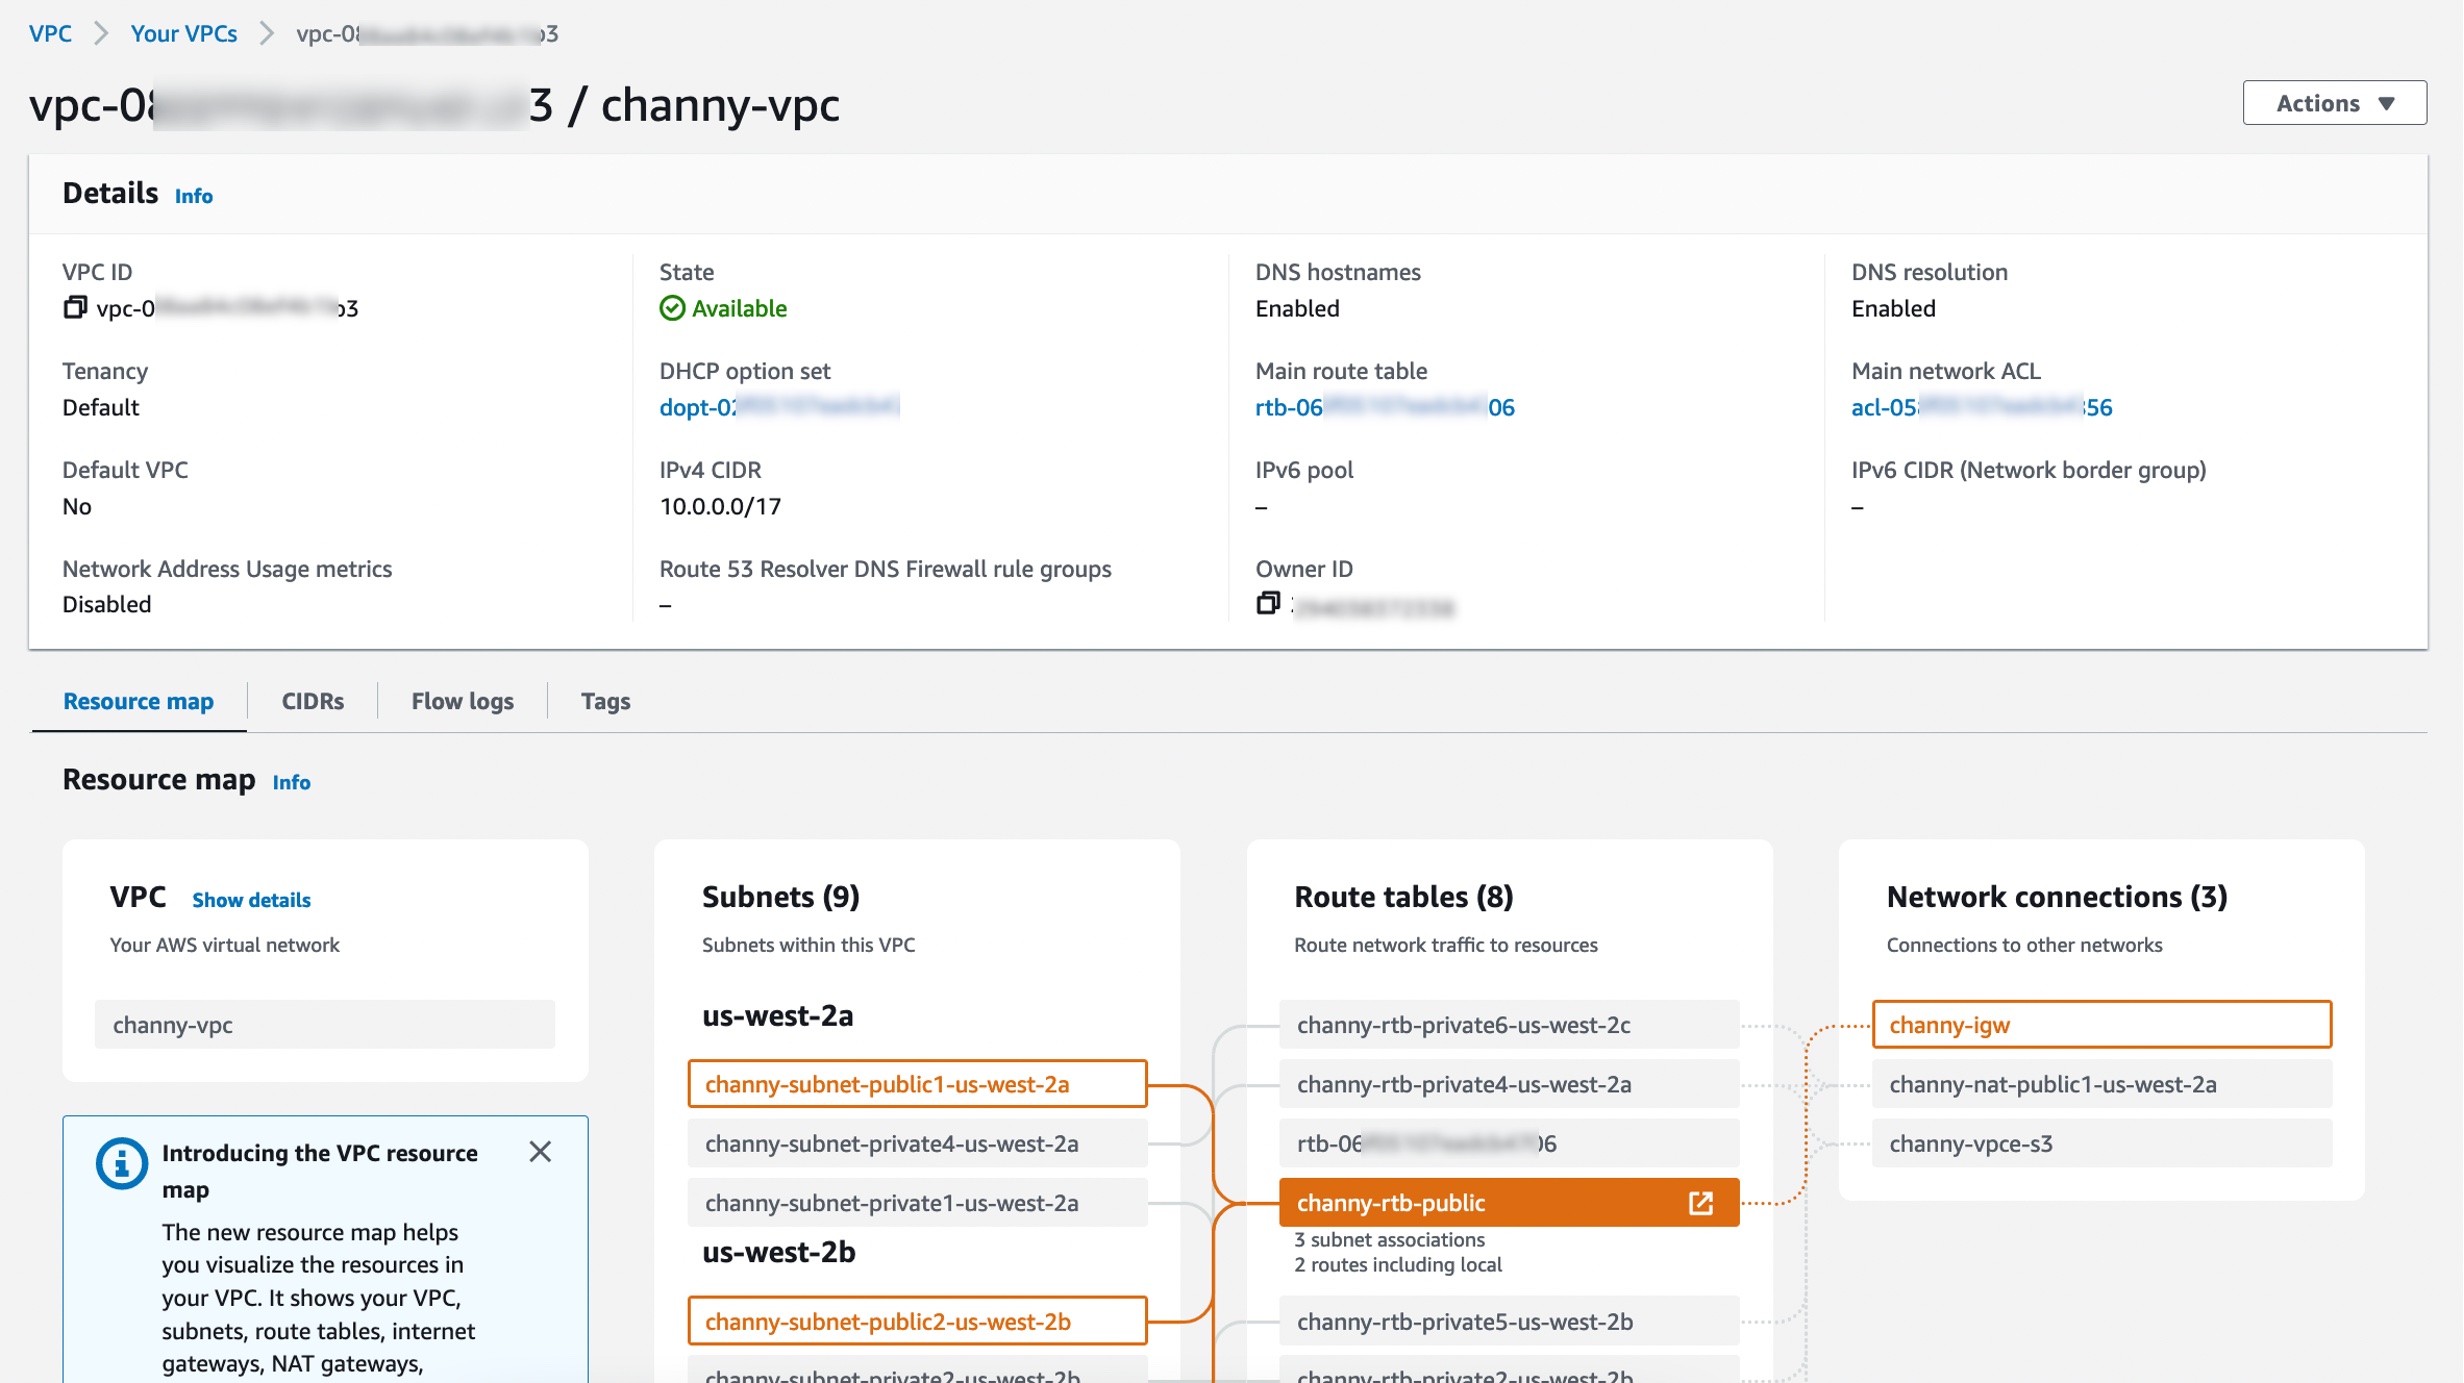
VPC Resource Map
VPC Resource Map
To begin, follow these steps to access the VPC Resource Map in the VPC console:
- Select an existing VPC.
- In the details section, go to the “Resource map” tab.
- Here, you can observe the resources within your VPC and the relationships among them.

Hovering over a resource highlights connected lines and related resources. Clicking on a resource reveals brief details and a link to view further information about that resource.
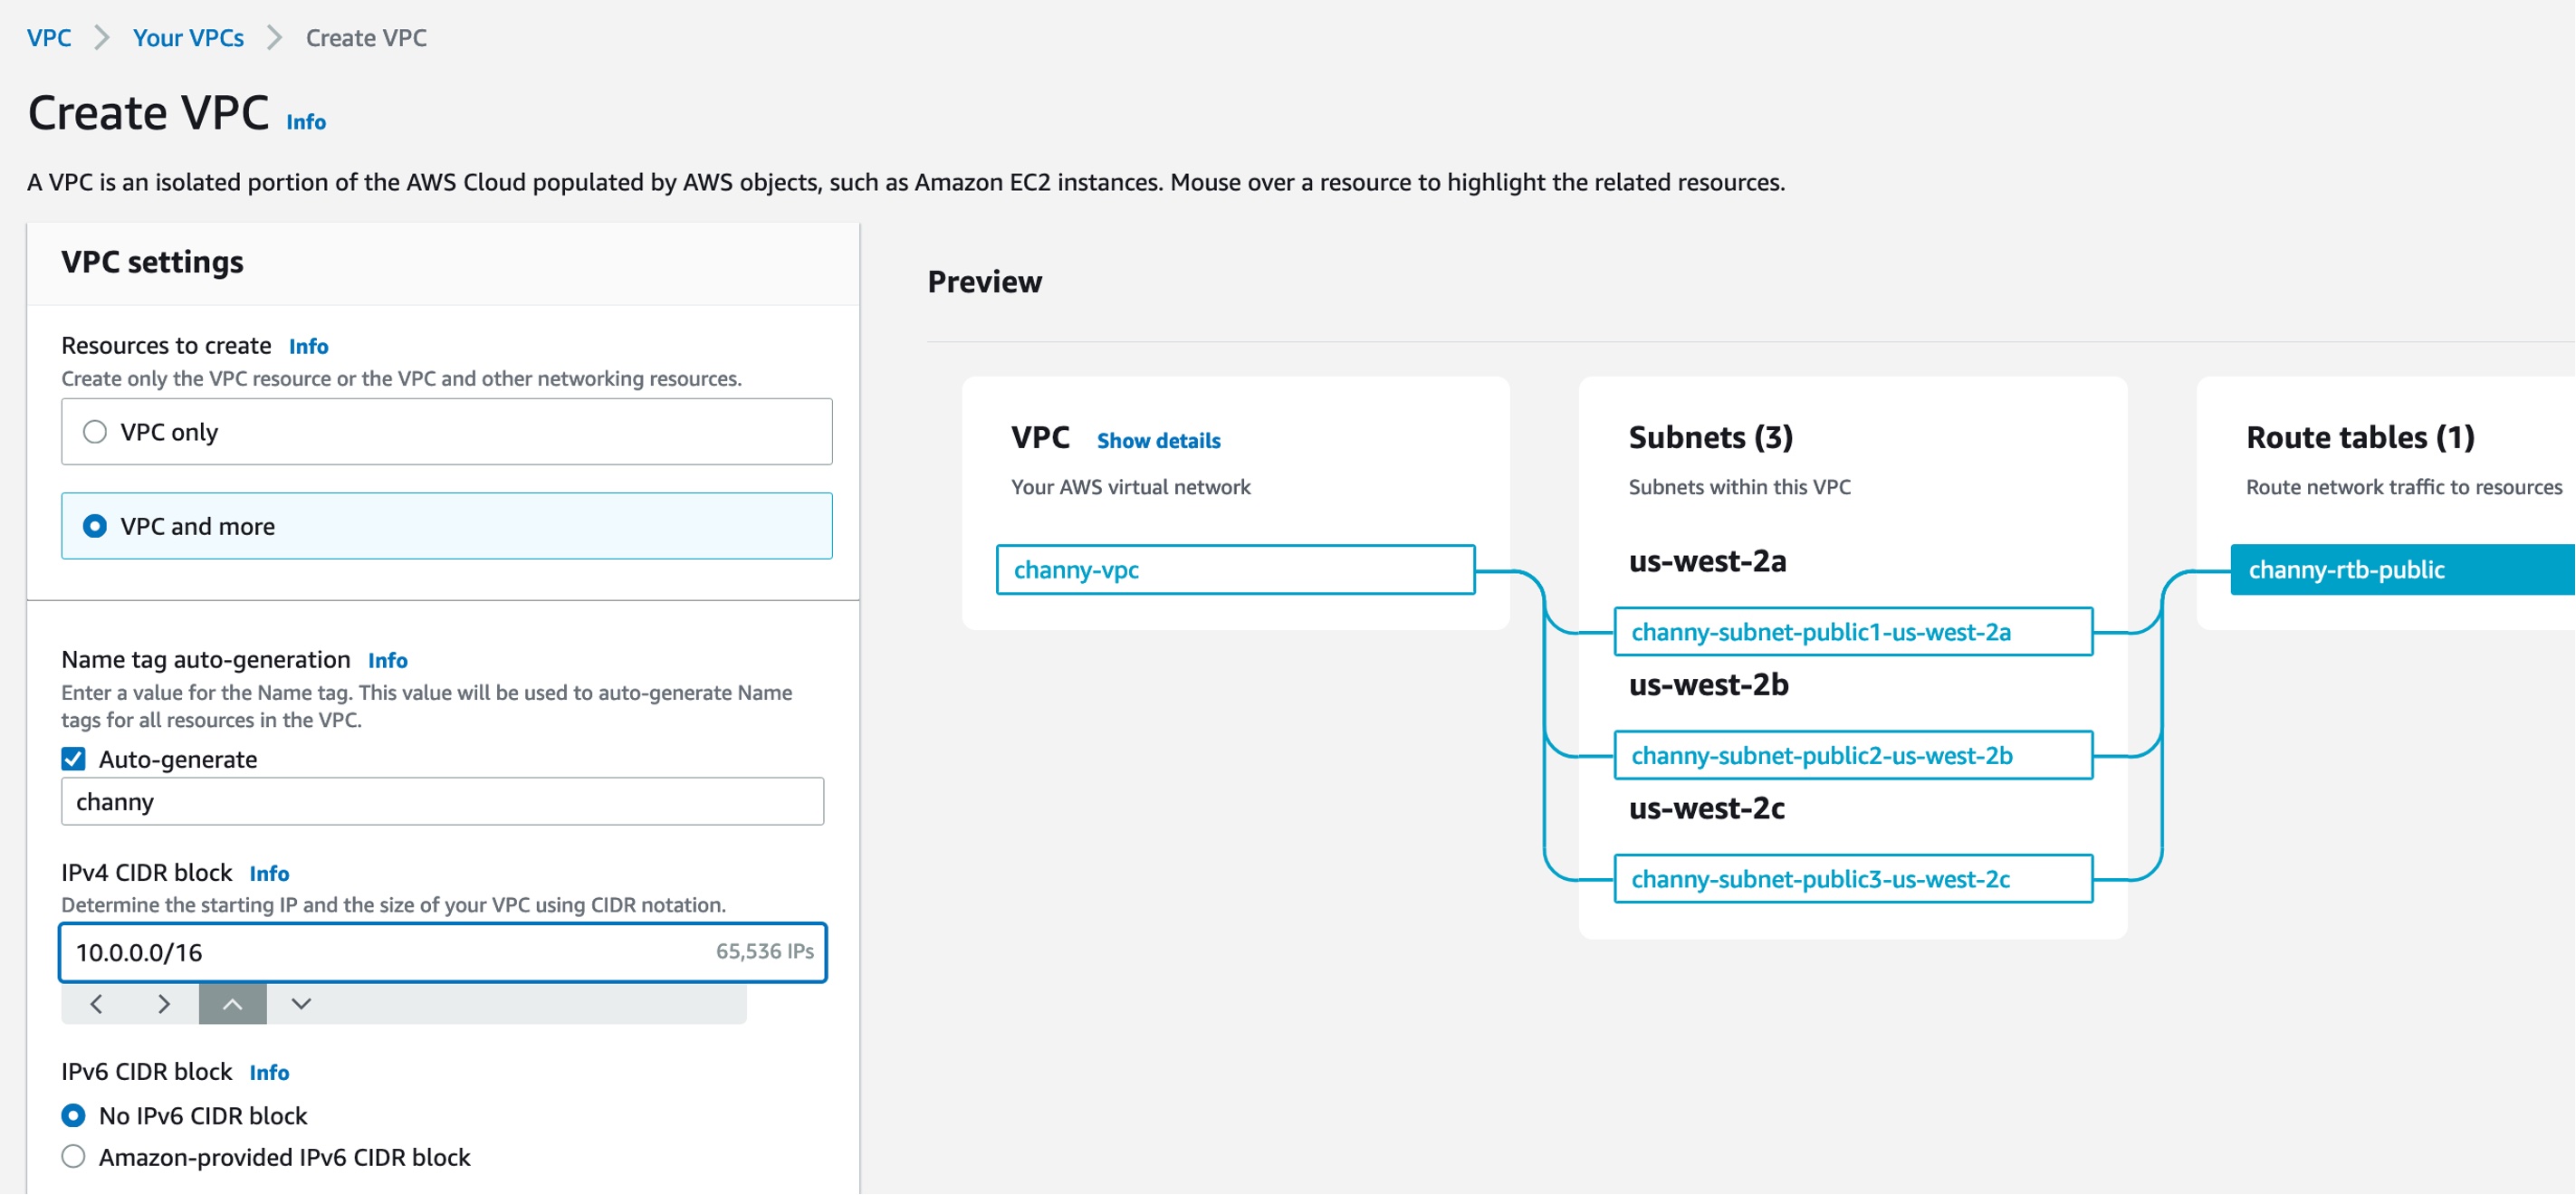
Getting Started with VPC Creation Experience
Enhance your workflow for creating a new high-availability three-tier VPC using the VPC creation experience:
- Choose Create VPC and then select VPC and more in the VPC console.
- Preview all VPC resources you’re about to create on a single page.
-
Name tag auto-generation: Define a prefix for Name tags, influencing the tags for all previewed VPC resources. Customize individual Name tags by clicking on each resource.
-
Adjust the default CIDR value (10.0.0.0/16) by clicking the IPv4 CIDR block field and using the CIDR joystick. Move through CIDR blocks within the /16 network mask.
-
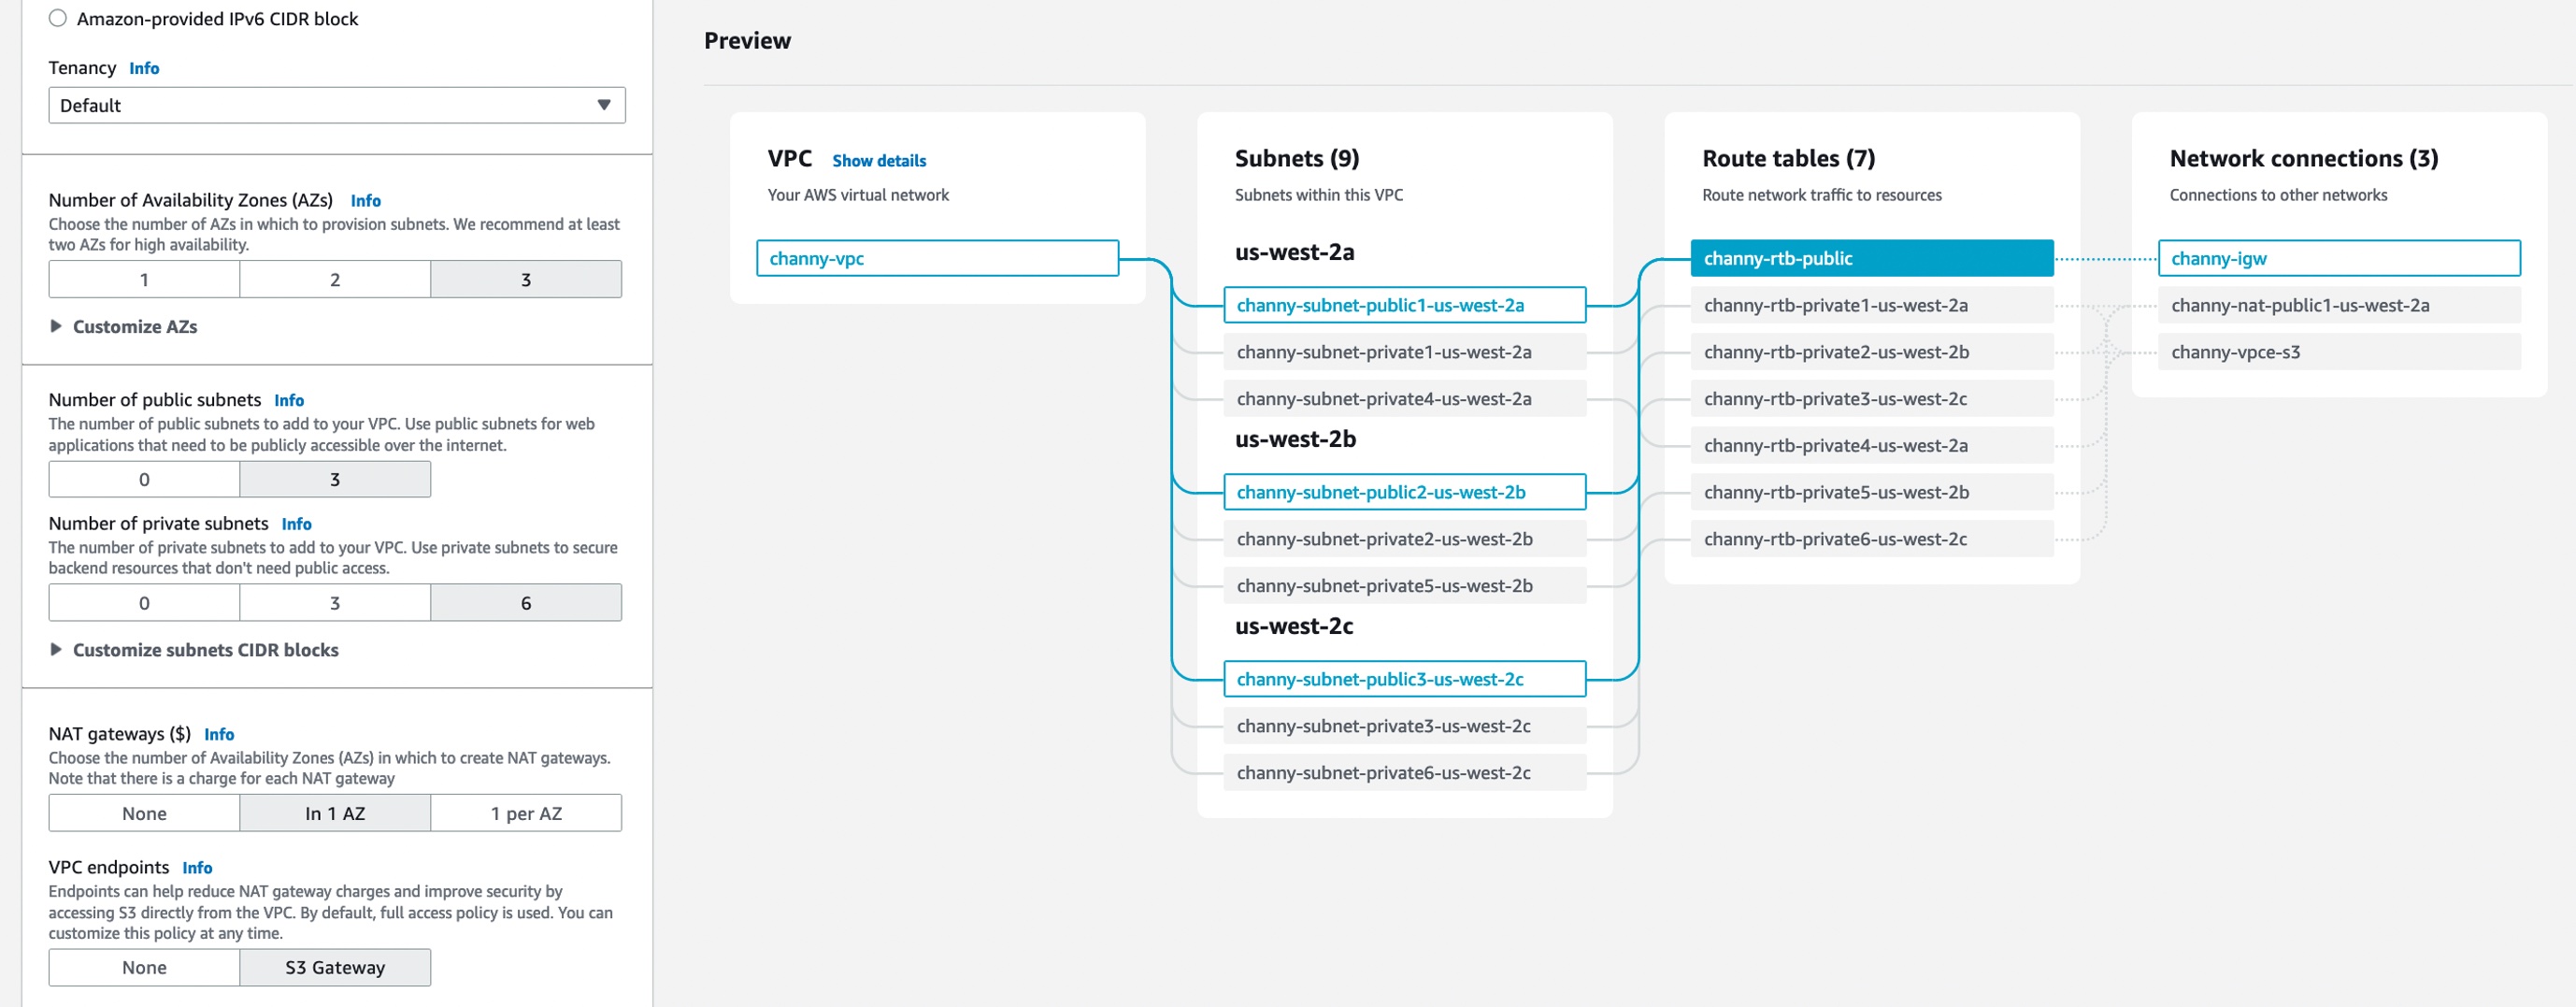
Choose the number of Availability Zones (AZs) up to 3, affecting the count of public and private subnets to be created.
-
For a three-AZ high-availability VPC, select 6 private subnets. In the preview, verify the relationships and routes in the subnets.
-
Add NAT gateways and VPC endpoints as needed. Set the number of NAT gateways per AZ for high availability. Opt for the S3 Gateway endpoint for more secure Amazon S3 traffic routing.
-
Easily assign additional tags to VPC resources. Click “Add new tag,” provide a Key (e.g., “environment”) and Value (e.g., “test”).
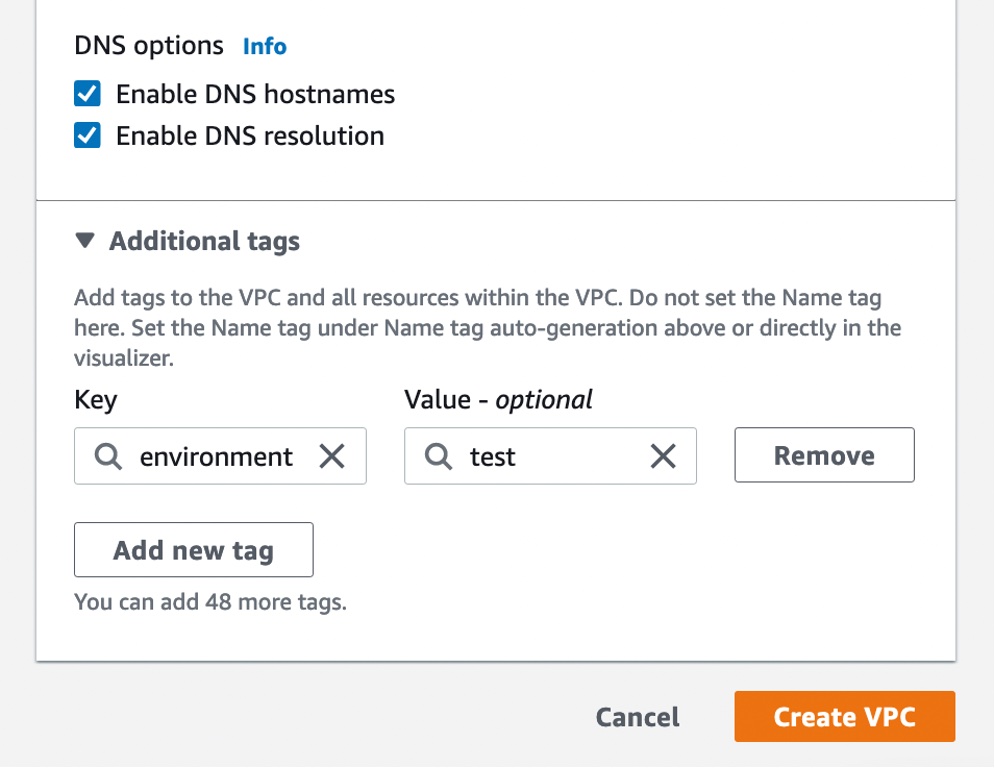
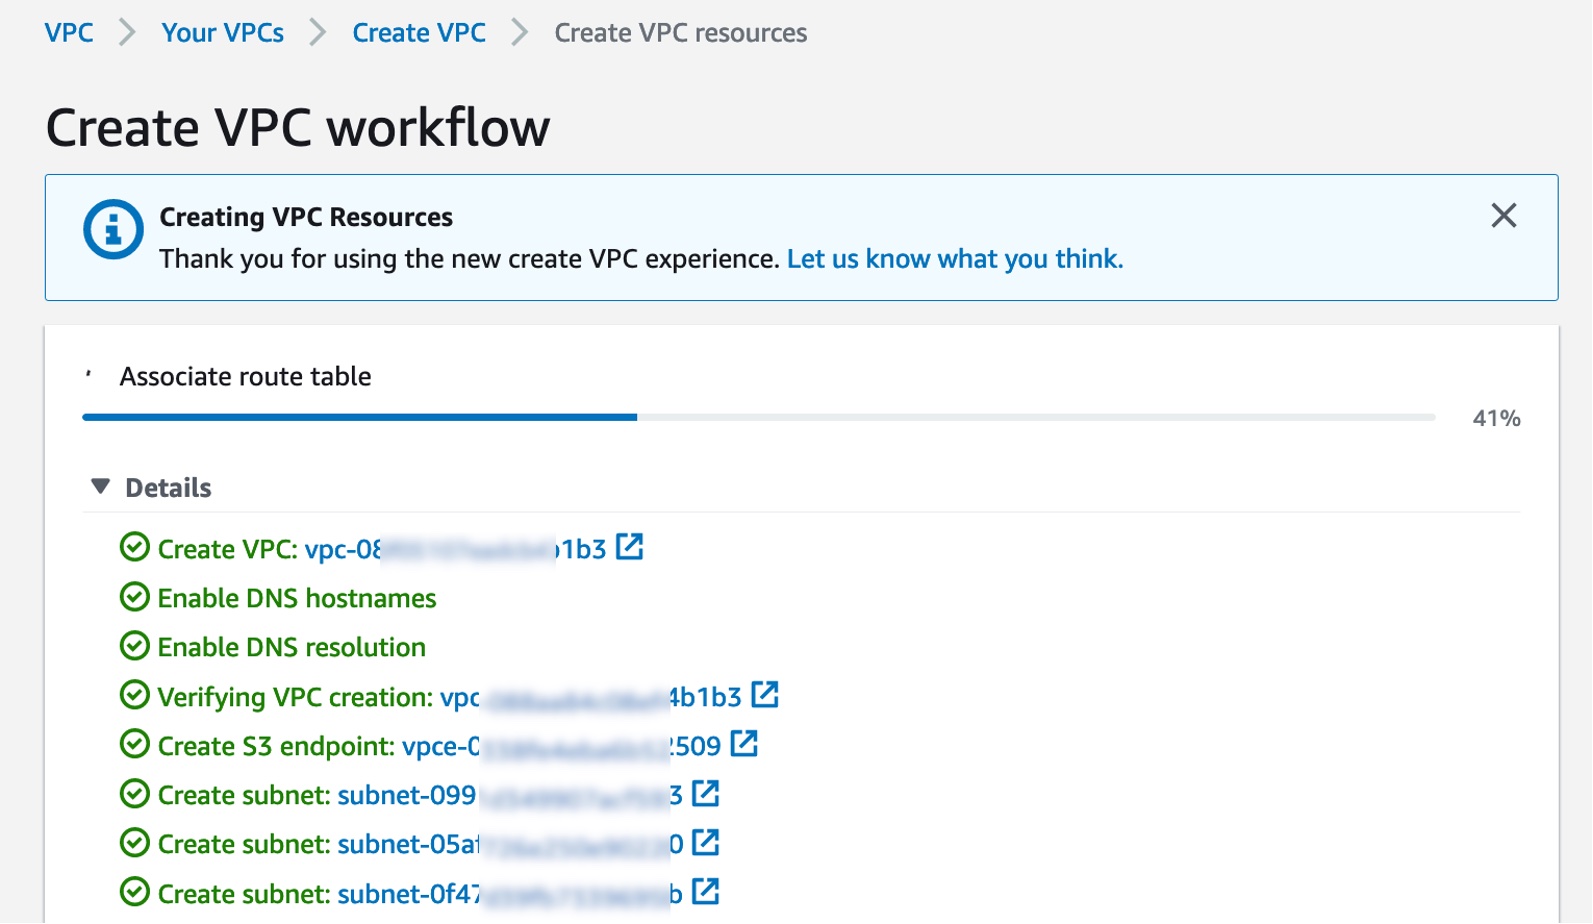
- At the bottom of the page, select “Create VPC” and monitor the resource creation process, including the IDs of the resources being generated. Validate resources before proceeding.
- Once resources are created, click “View VPC” to access the VPC resource map and visualize the setup.