Create NAT Gateway
Create NAT Gateway for High Availability
ℹ️ Production Best Practice
For production workloads, deploy NAT Gateways in multiple Availability Zones to eliminate single points of failure and ensure high availability for your private subnet resources.
Create First NAT Gateway
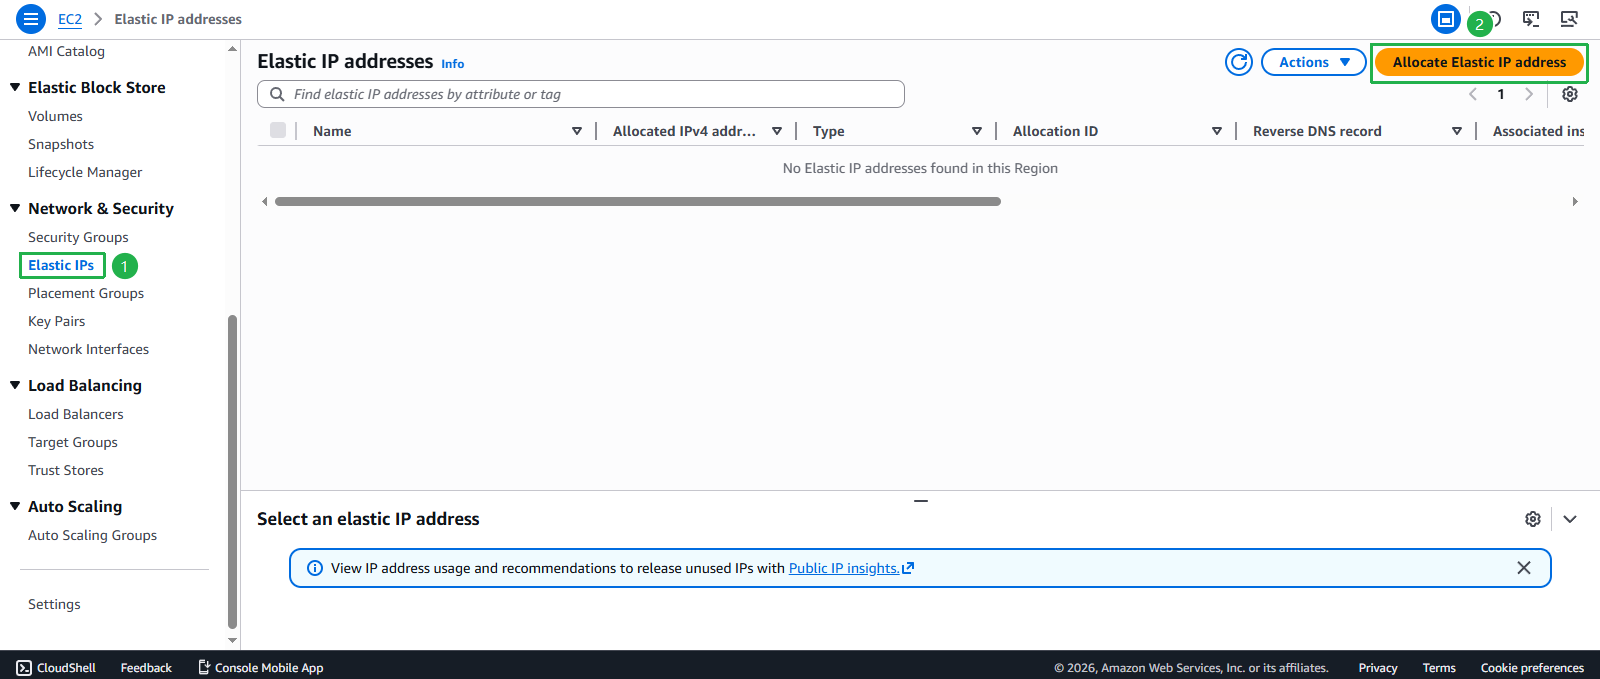
- Access EC2 console:
- Navigate to EC2 service
- Select Elastic IPs from the left navigation panel
- Click Allocate Elastic IP address
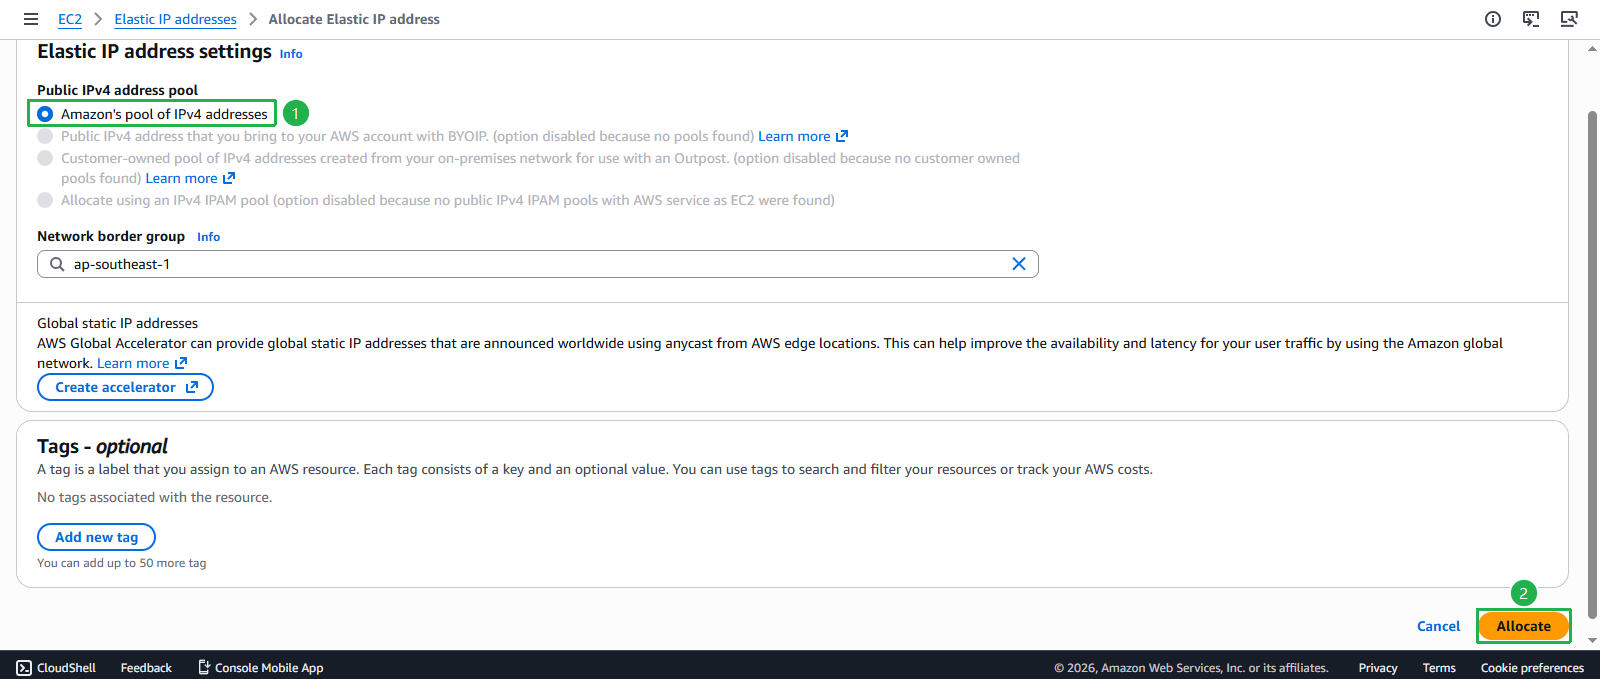
- In the Allocate Elastic IP address interface:
- Public IPv4 address pool: Select Amazon’s pool of IPv4 addresses
- Network Border Group: Keep default (your region)
- Tags (optional): Add Name tag with value
EIP-NAT-Gateway - Click Allocate
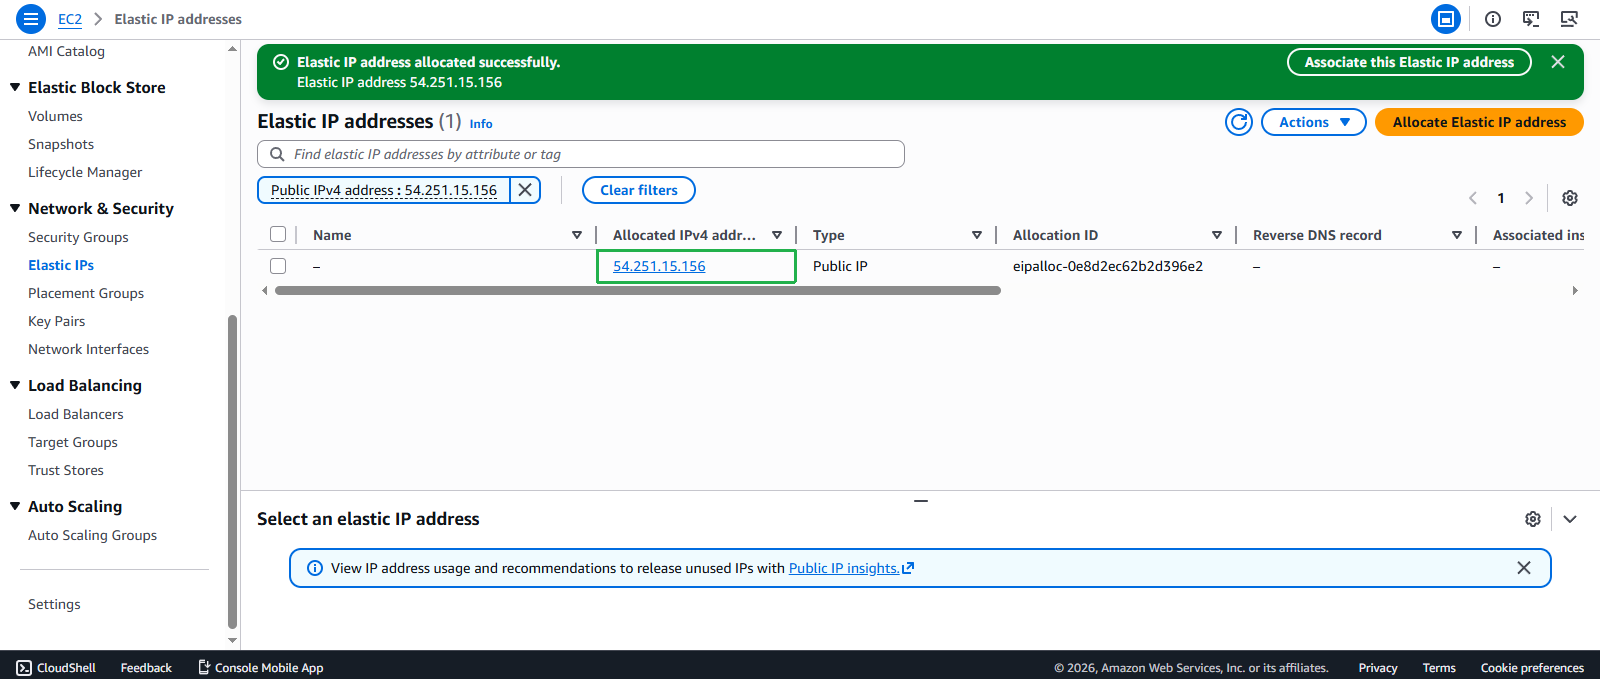
- Verify Elastic IP allocation:
- You should see a success message
- Note the allocated Elastic IP address
- This IP will be used for the NAT Gateway
Create NAT Gateway
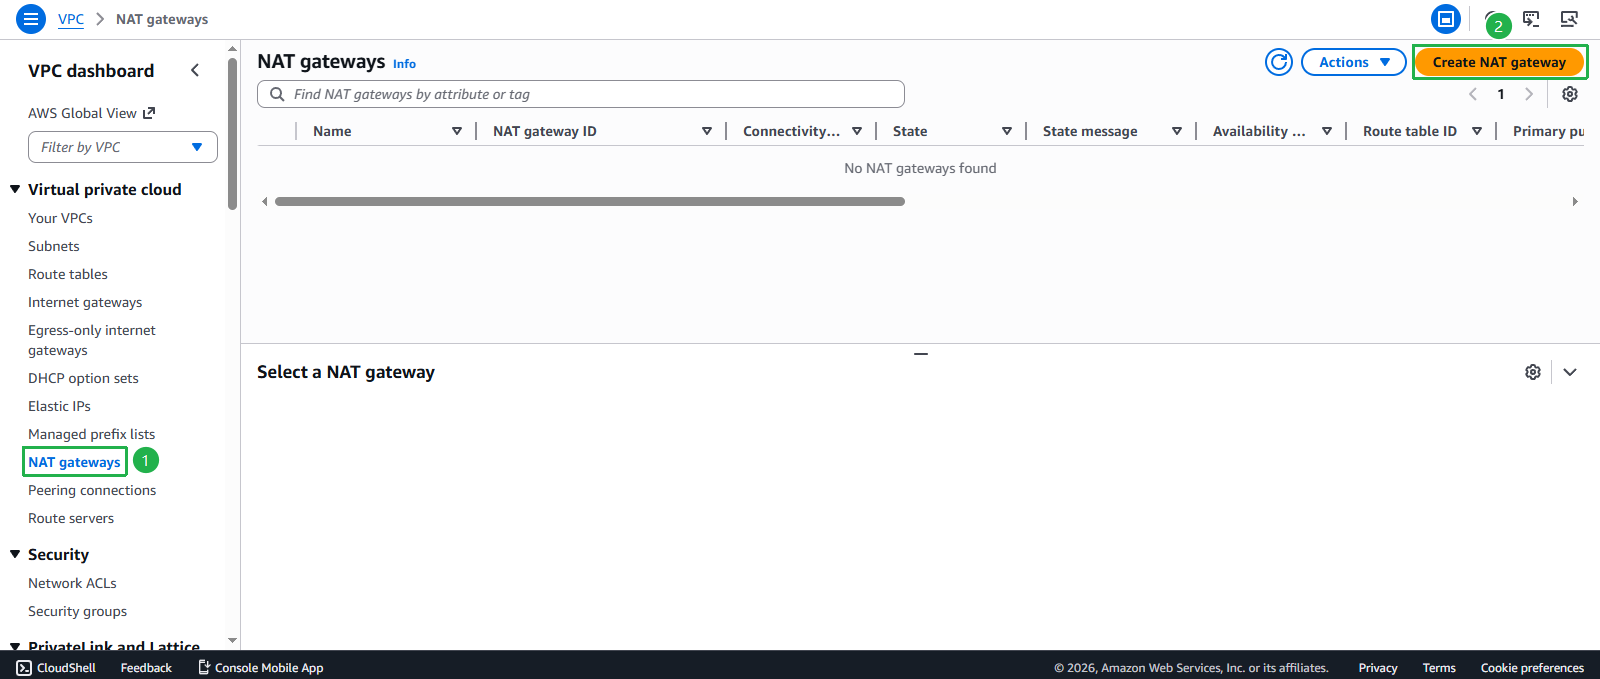
- Access VPC console:
- Navigate to VPC service
- Select NAT Gateways from the left navigation panel
- Click Create NAT gateway
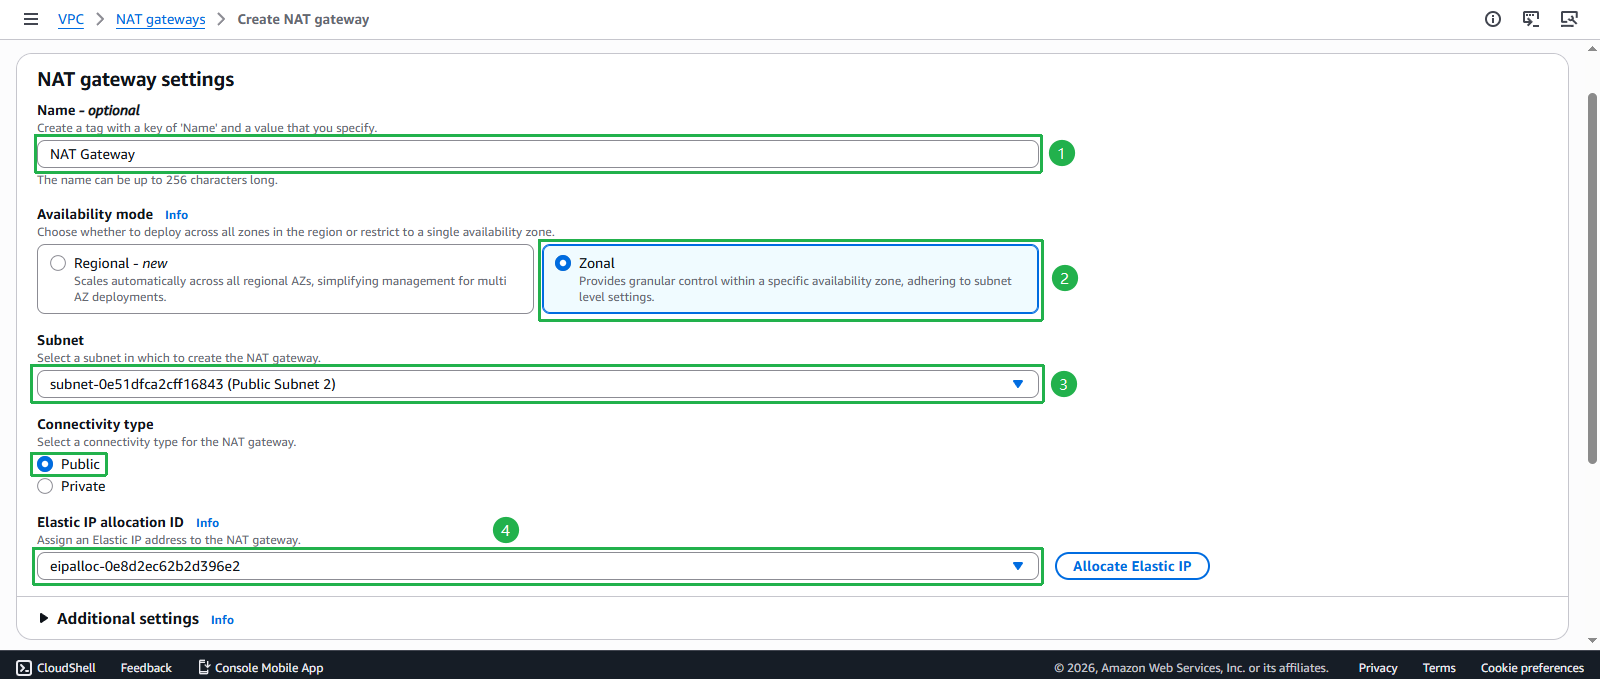
- Configure NAT Gateway:
- Name: Enter
NAT-Gateway - Subnet: Select Public Subnet 2 (NAT Gateway must be in a public subnet)
- Connectivity type: Select Public
- Elastic IP allocation ID: Select the Elastic IP you just created
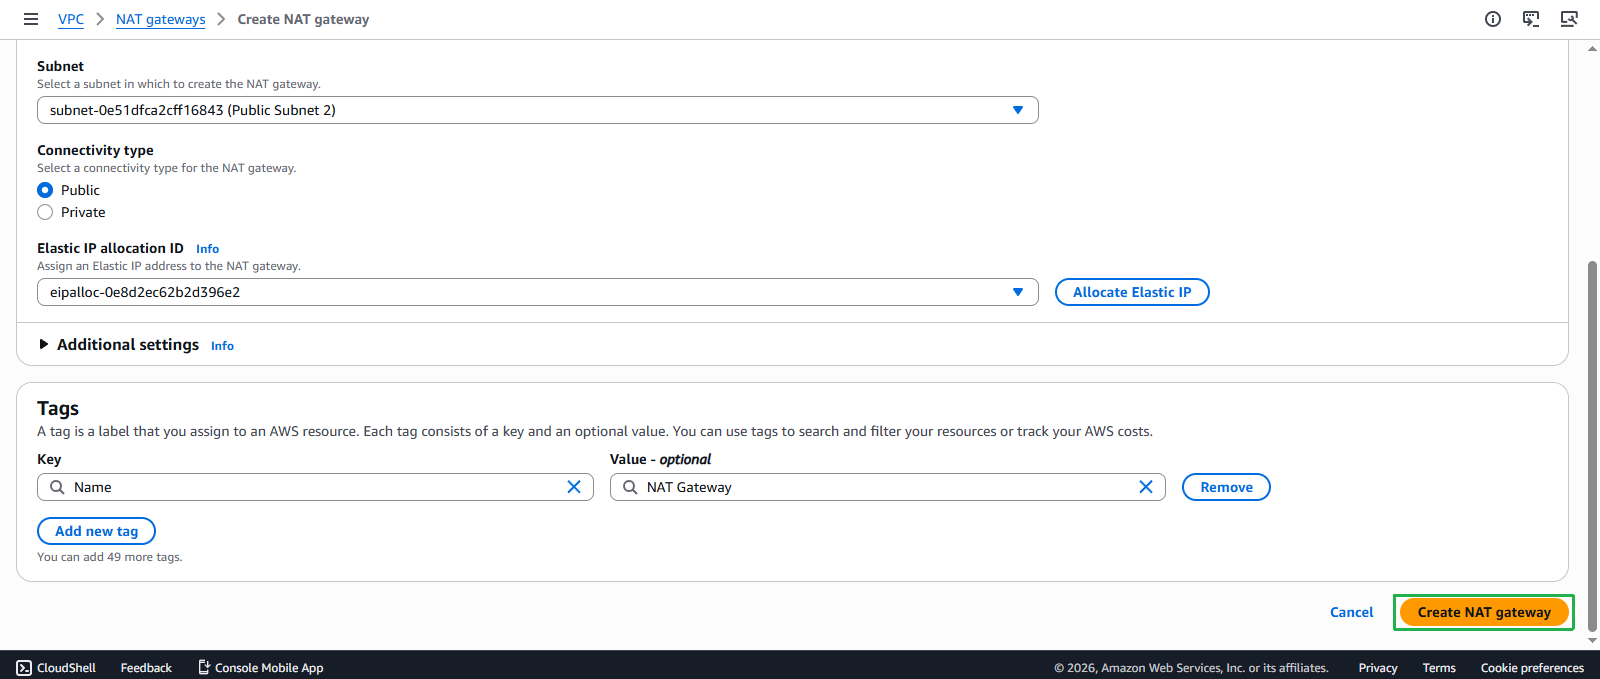
- Click Create NAT gateway
- Name: Enter
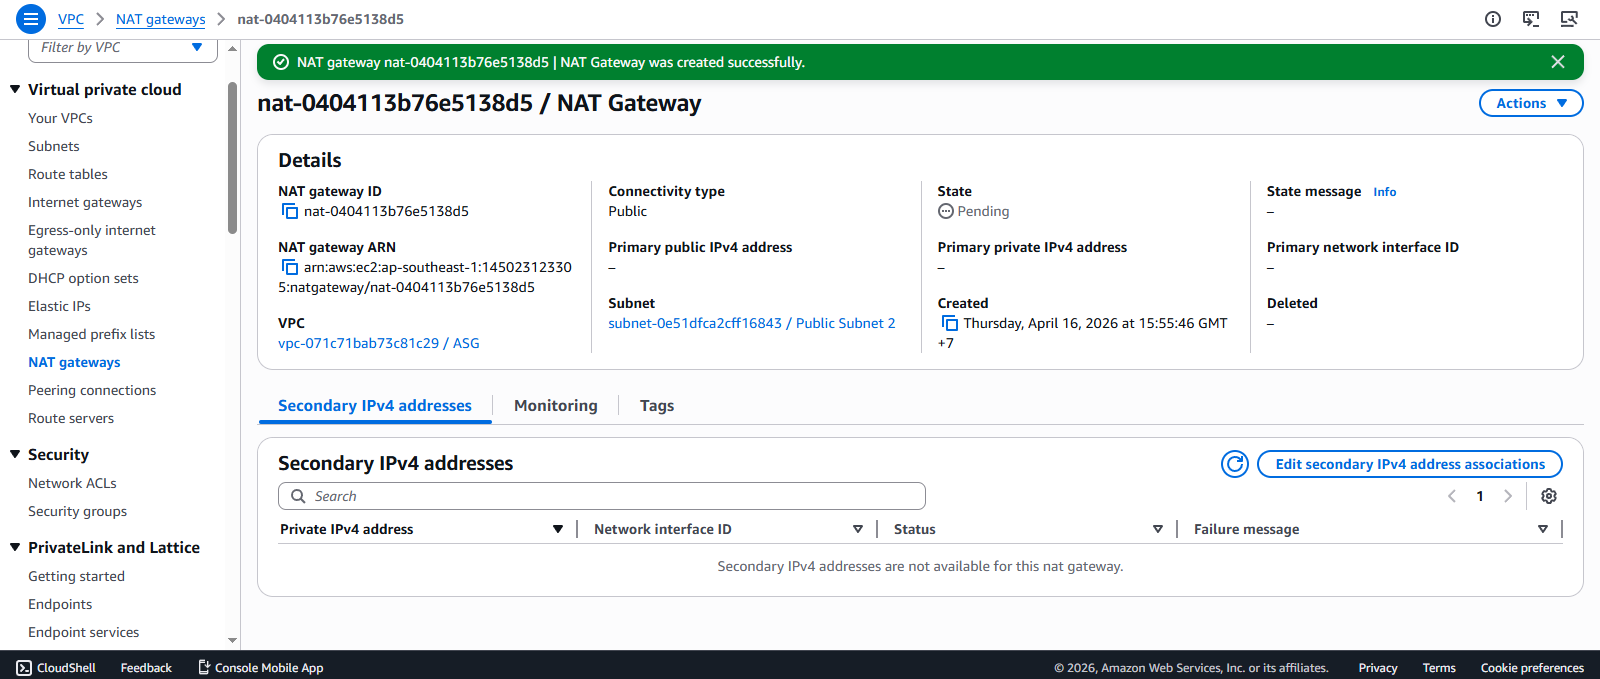
- Wait for NAT Gateway to become available:
- NAT Gateway creation takes 2-5 minutes
- Monitor the State column
- Wait until state changes to Available
- Do not proceed until NAT Gateway is fully available
Create Route Tables for Private Subnets
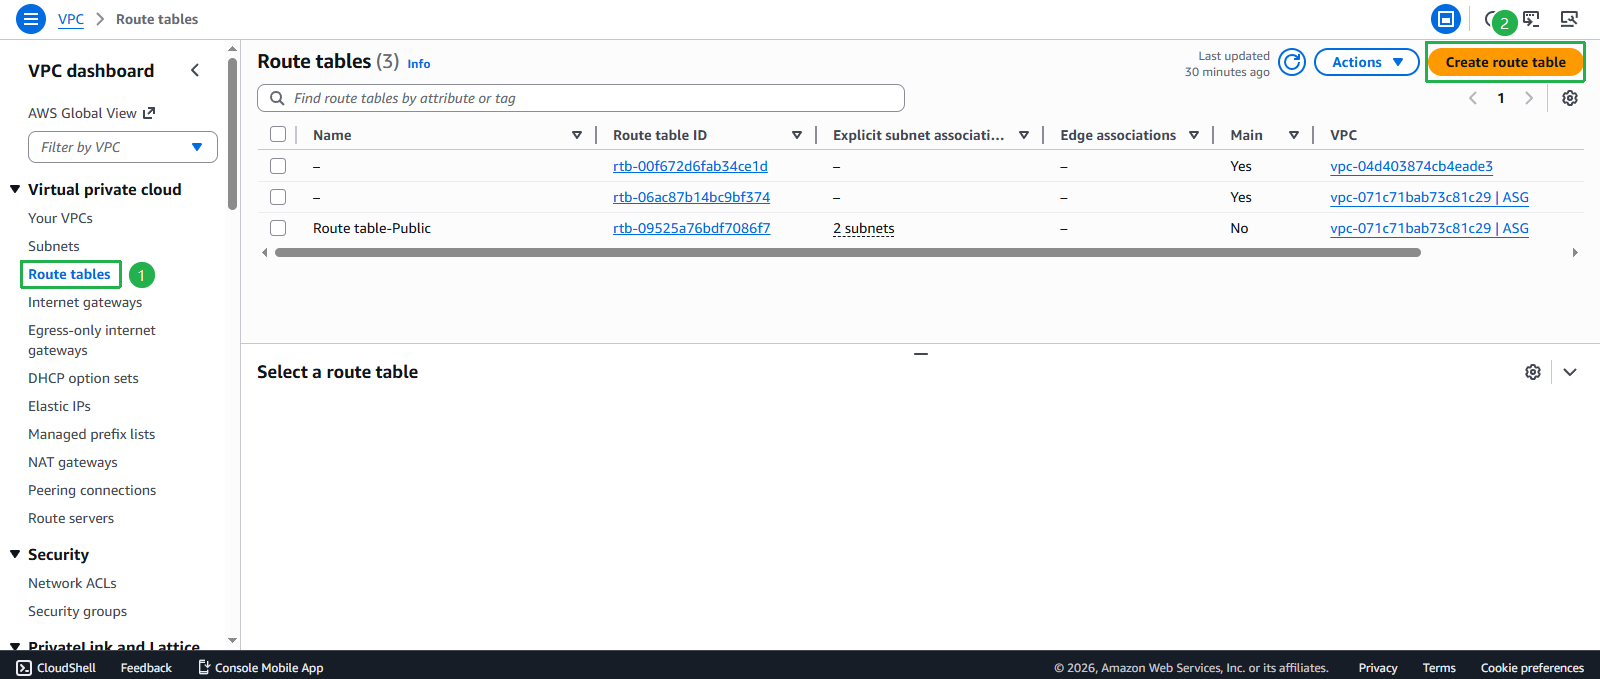
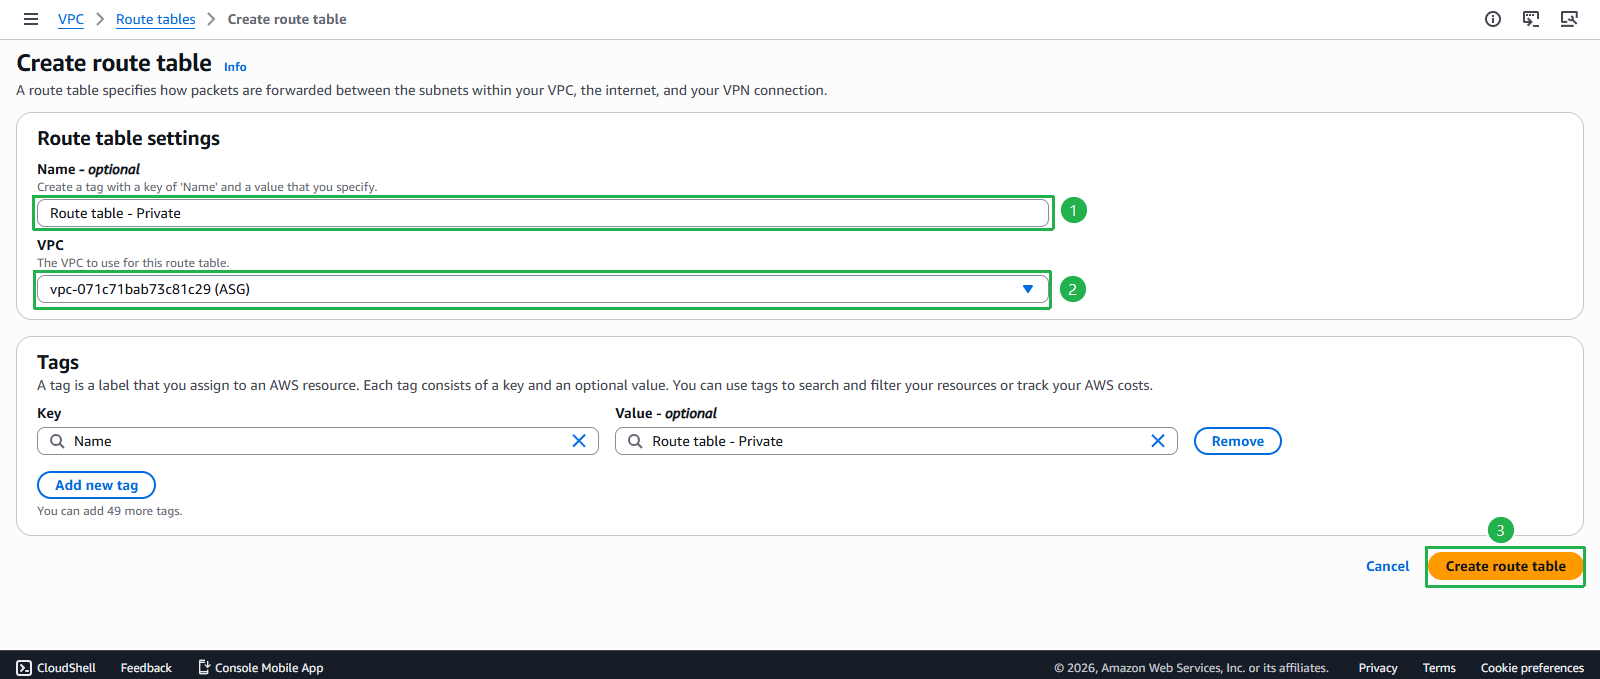
- In the VPC interface:
- Select Route Tables from the left navigation panel
- Click Create route table
- Configure private route table:
- Name: Enter
Route-table-Private - VPC: Select ASG VPC
- Click Create route table
- Name: Enter
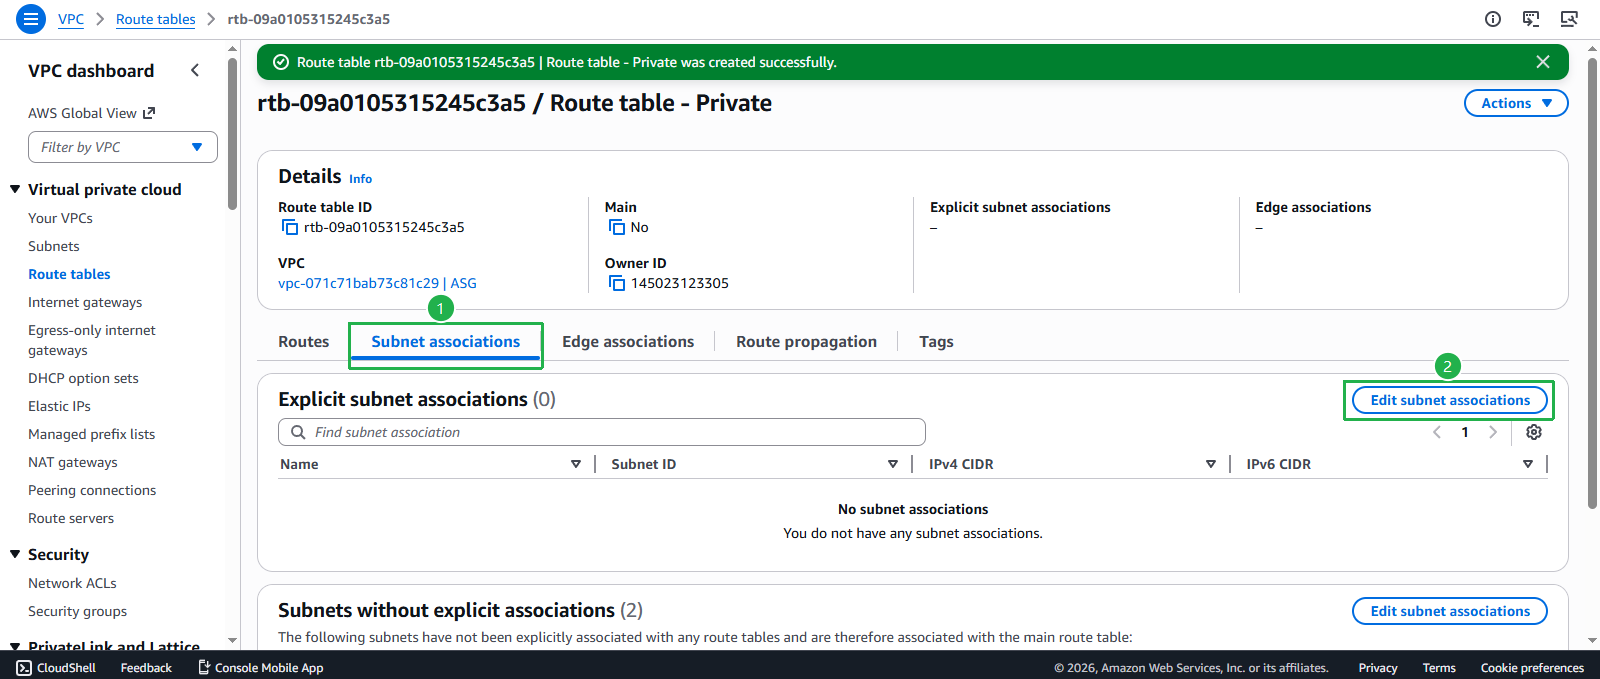
- Verify route table creation:
- You should see a success message
- The new route table appears in the list
Associate Subnets with Route Table
- Configure subnet associations:
- Select Route-table-Private
- Click the Subnet Associations tab
- Click Edit subnet associations
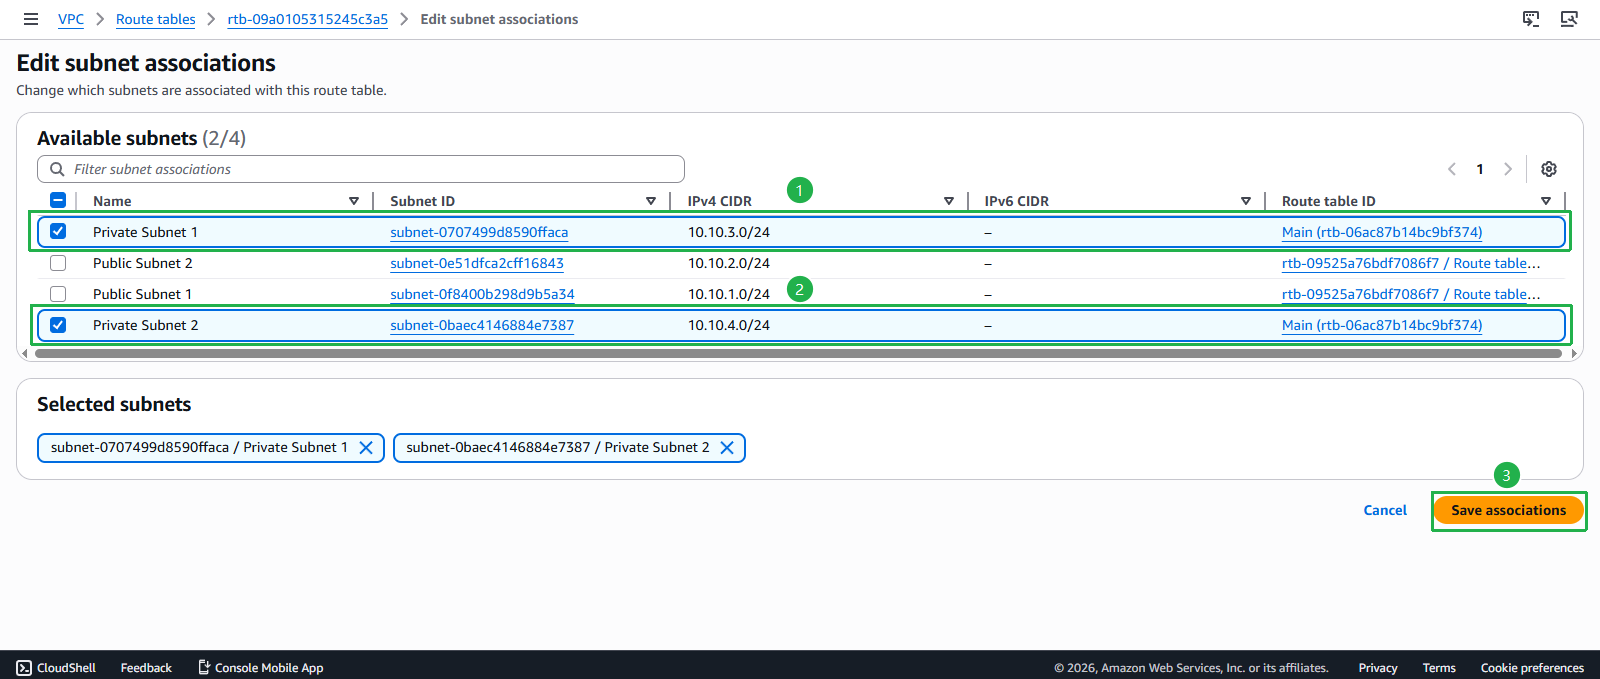
- Select private subnets:
- Check both Private Subnet 1 and Private Subnet 2
- Click Save associations
Configure Routes to NAT Gateway
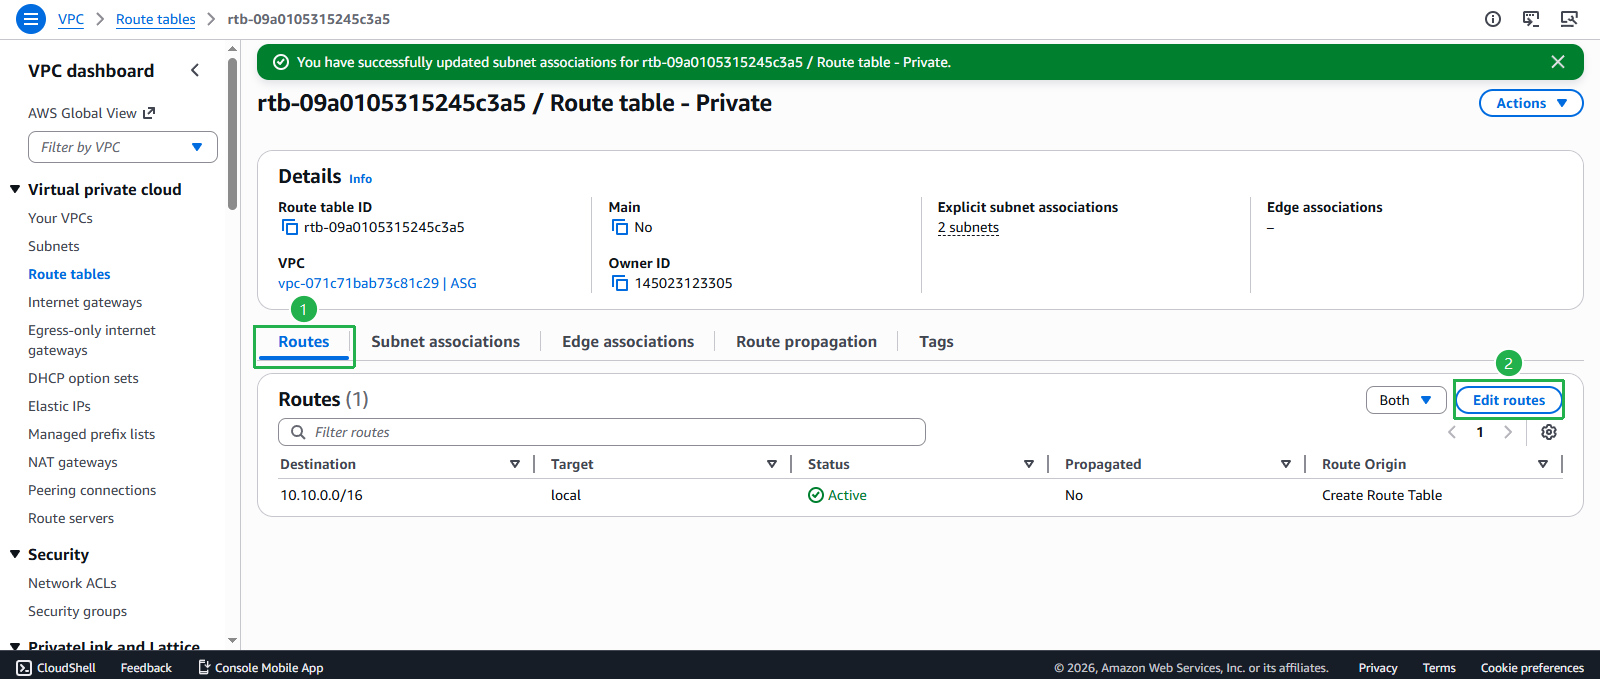
- Add route to NAT Gateway:
- Select Route-table-Private
- Click the Routes tab
- Click Edit routes
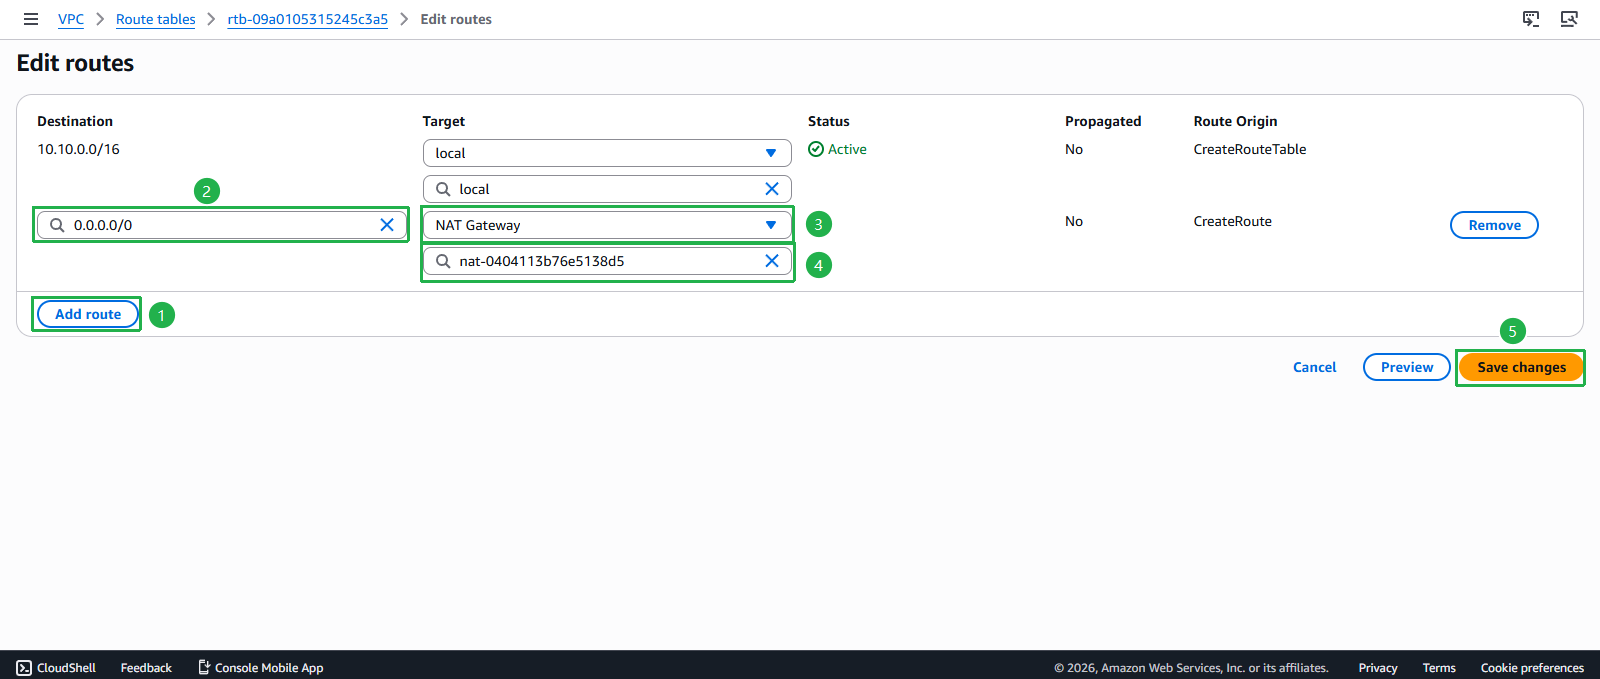
- Create internet route via NAT Gateway:
- Click Add route
- Destination: Enter
0.0.0.0/0(all internet traffic) - Target: Select NAT Gateway and choose your NAT-Gateway
- Click Save changes
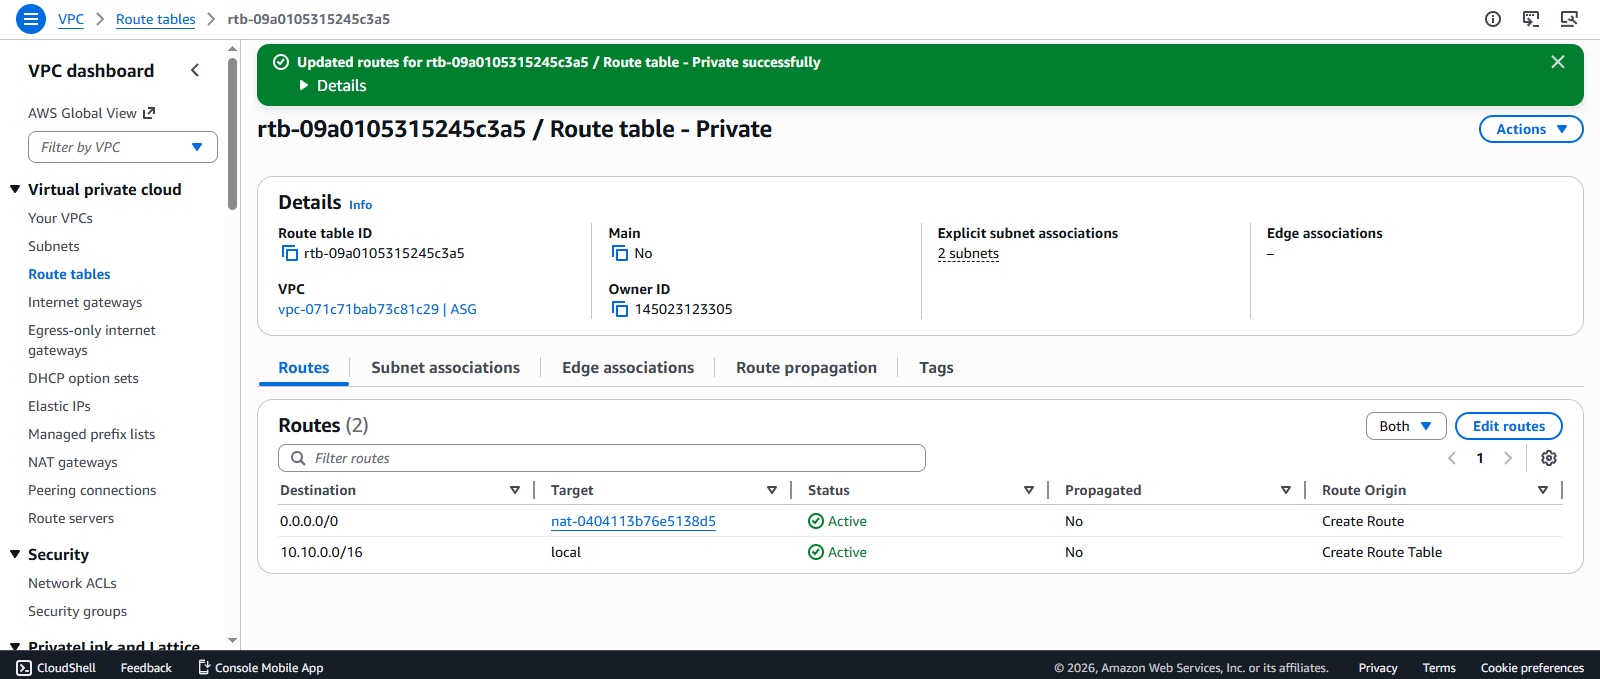
- Verify route table configuration:
- Confirm the route to 0.0.0.0/0 via NAT Gateway is present
- Both private subnets are now associated with this route table
- Private instances can now access the internet through NAT Gateway
🏗️ Architecture Benefits:
- Outbound Internet Access: Private instances can initiate connections to the internet
- Security: Inbound connections from the internet are blocked
- Single NAT Gateway: Cost-effective for development/testing environments
- Scalability: NAT Gateway can handle up to 45 Gbps of bandwidth
💰 Cost Considerations:
- Hourly Charges: NAT Gateway incurs hourly charges (~$0.045/hour)
- Data Processing: Additional charges for data processed (~$0.045/GB)
- High Availability: For production, consider deploying NAT Gateways in multiple AZs
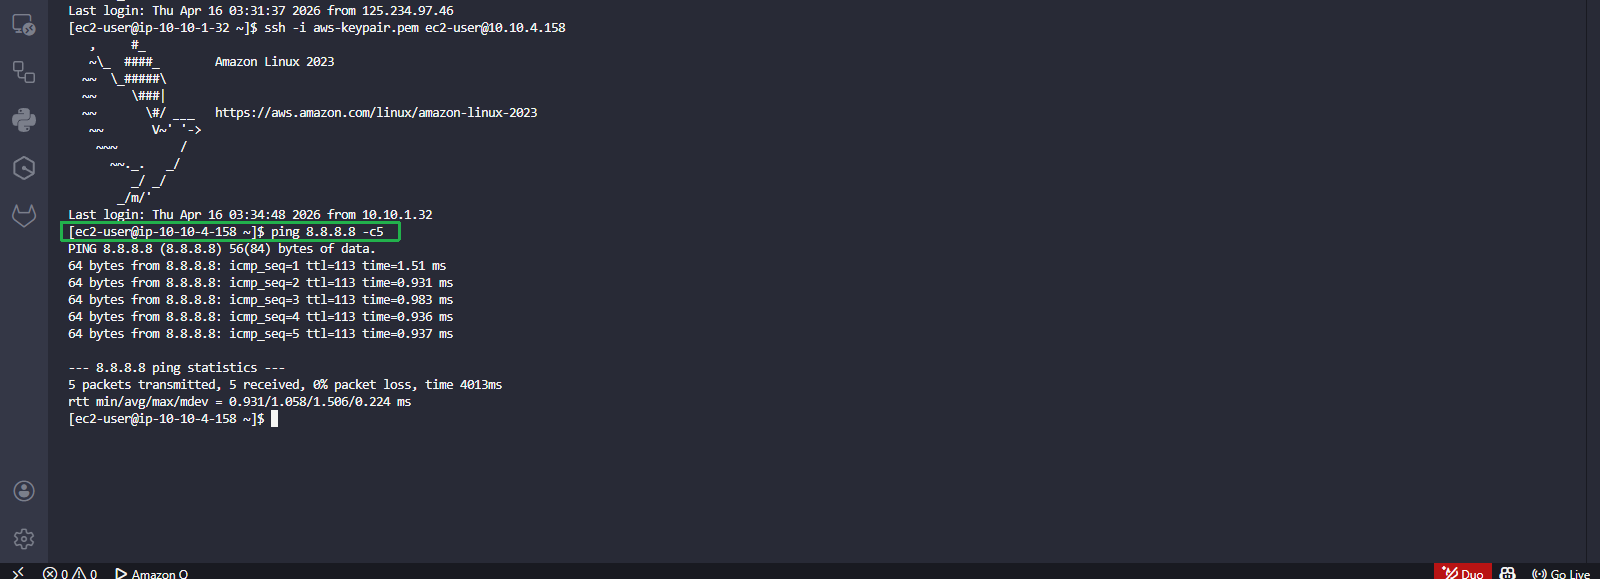
- Test internet connectivity from EC2 Private:
- Return to your SSH session on EC2 Private
- Run ping test:
ping amazon.com -c5- You should now see successful ping responses!
✅ Success: EC2 Private can now access the internet through NAT Gateway while remaining inaccessible from the internet.