Create Security Group
Creating Security Groups for Your VPC
ℹ️ What are Security Groups?
Security groups act as virtual firewalls for your Amazon EC2 instances to control inbound and outbound traffic. They operate at the instance level and can be configured with rules that allow specific traffic based on protocol, port, and source/destination.
Step-by-Step Security Group Creation
Public Subnet Security Group
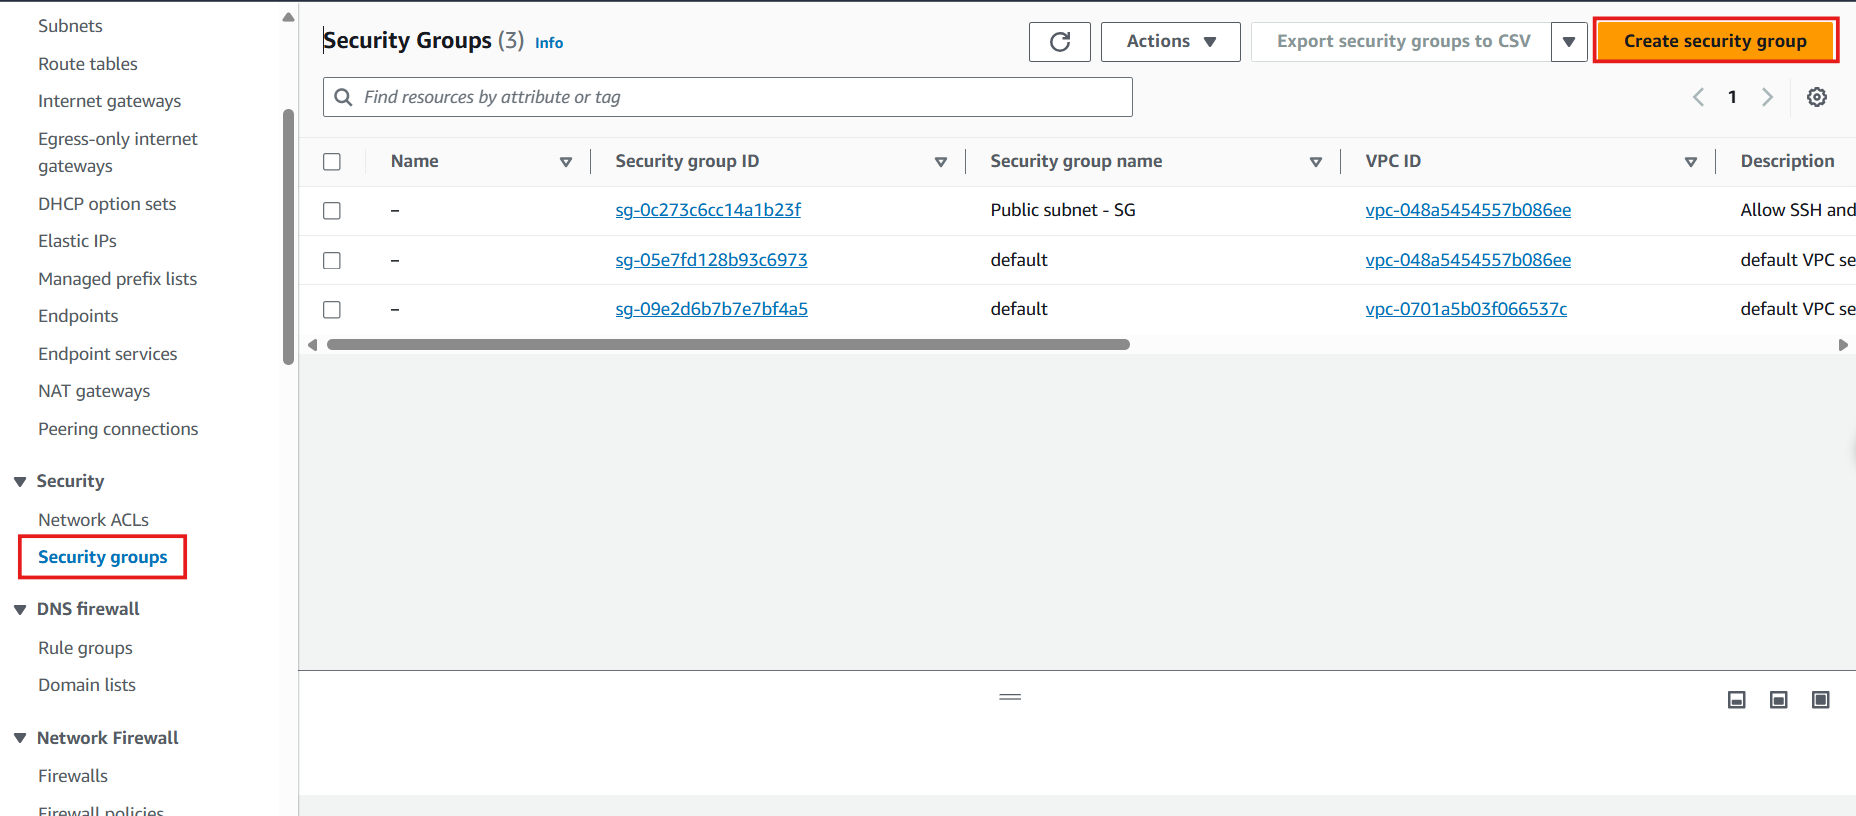
- Access the Security Group interface:
- Navigate to the VPC console
- Select Security Groups from the left navigation panel
- Click Create security group

- Configure the Public Subnet Security Group:
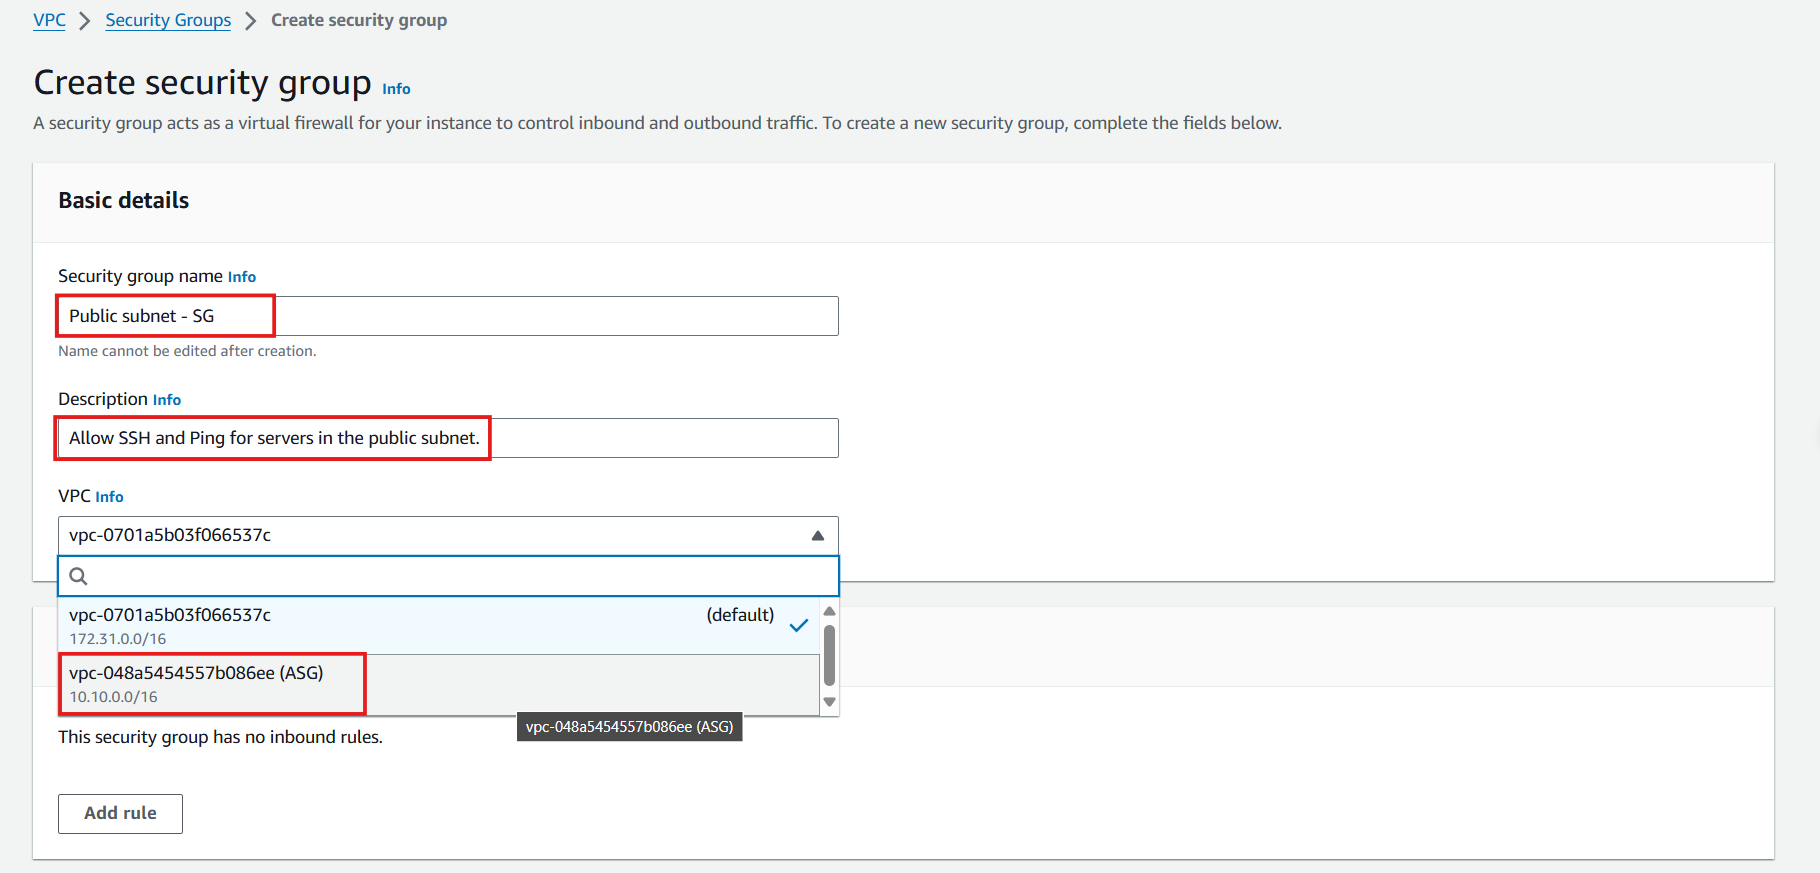
- Security group name: Enter
Public subnet - SG - Description: Enter
Allow SSH and Ping for servers in the public subnet - VPC: Select the ASG VPC from the dropdown
- Security group name: Enter
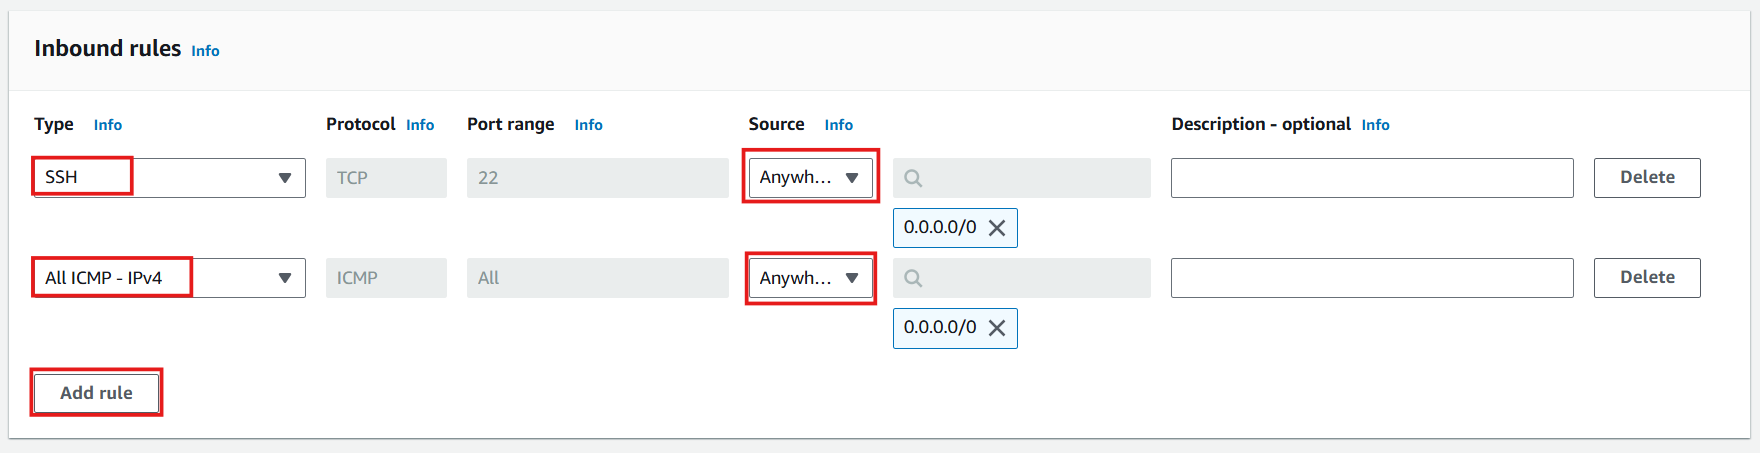
- Define inbound rules:
- Click Add rule
- Configure SSH access:
- Type: Select SSH
- Source: Select My IP (automatically uses your current public IPv4 address)
- Click Add rule again
- Configure ICMP access:
- Type: Select All ICMP - IPv4
- Source: Select Anywhere (0.0.0.0/0)
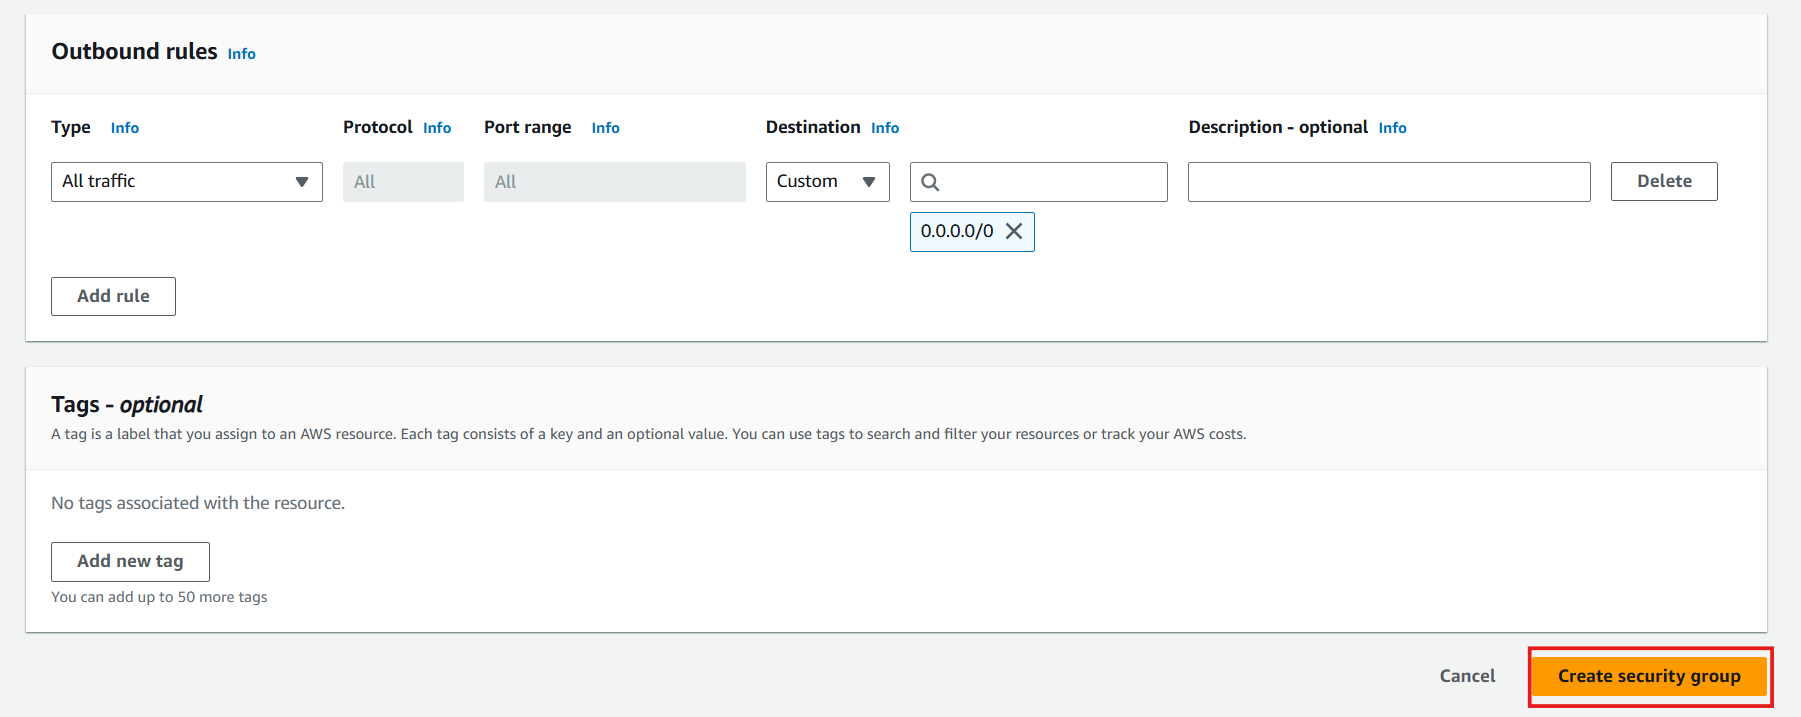
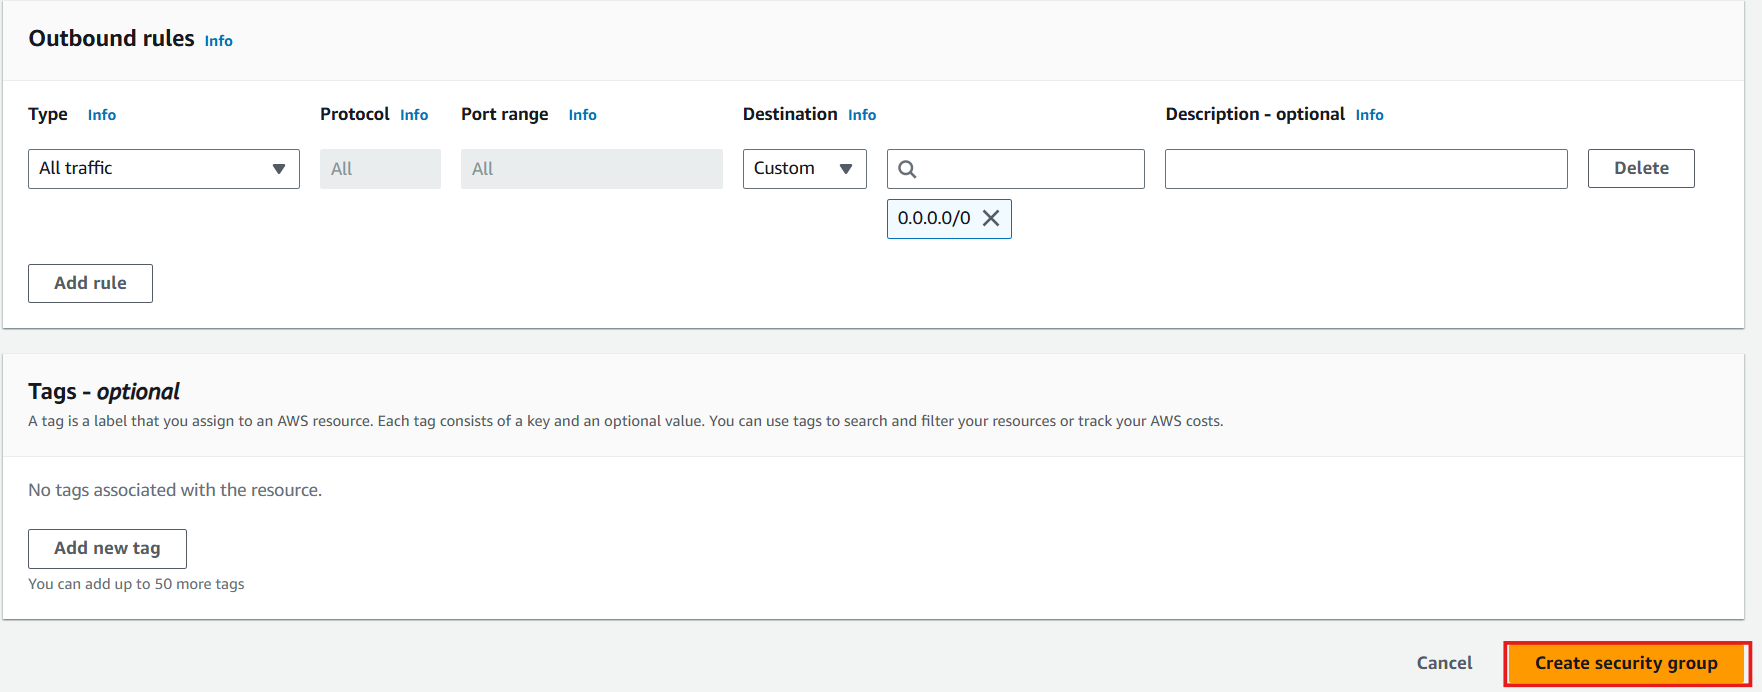
- Review outbound rules:
- By default, all outbound traffic is allowed
- Click Create security group
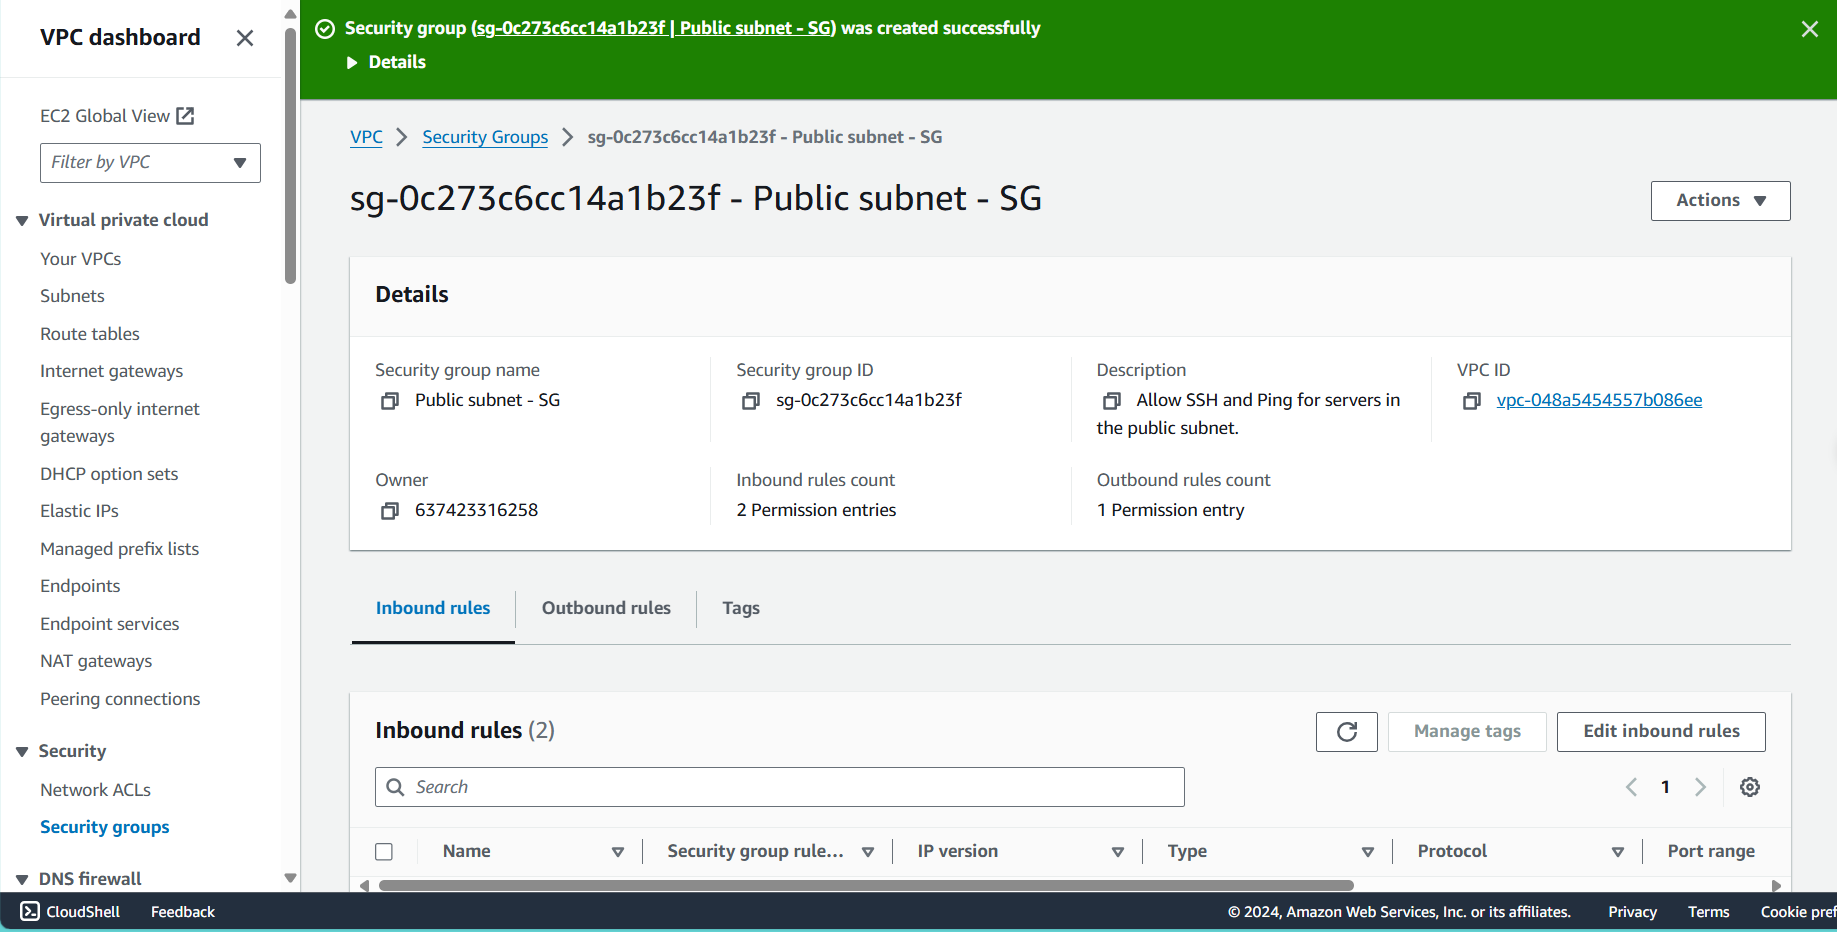
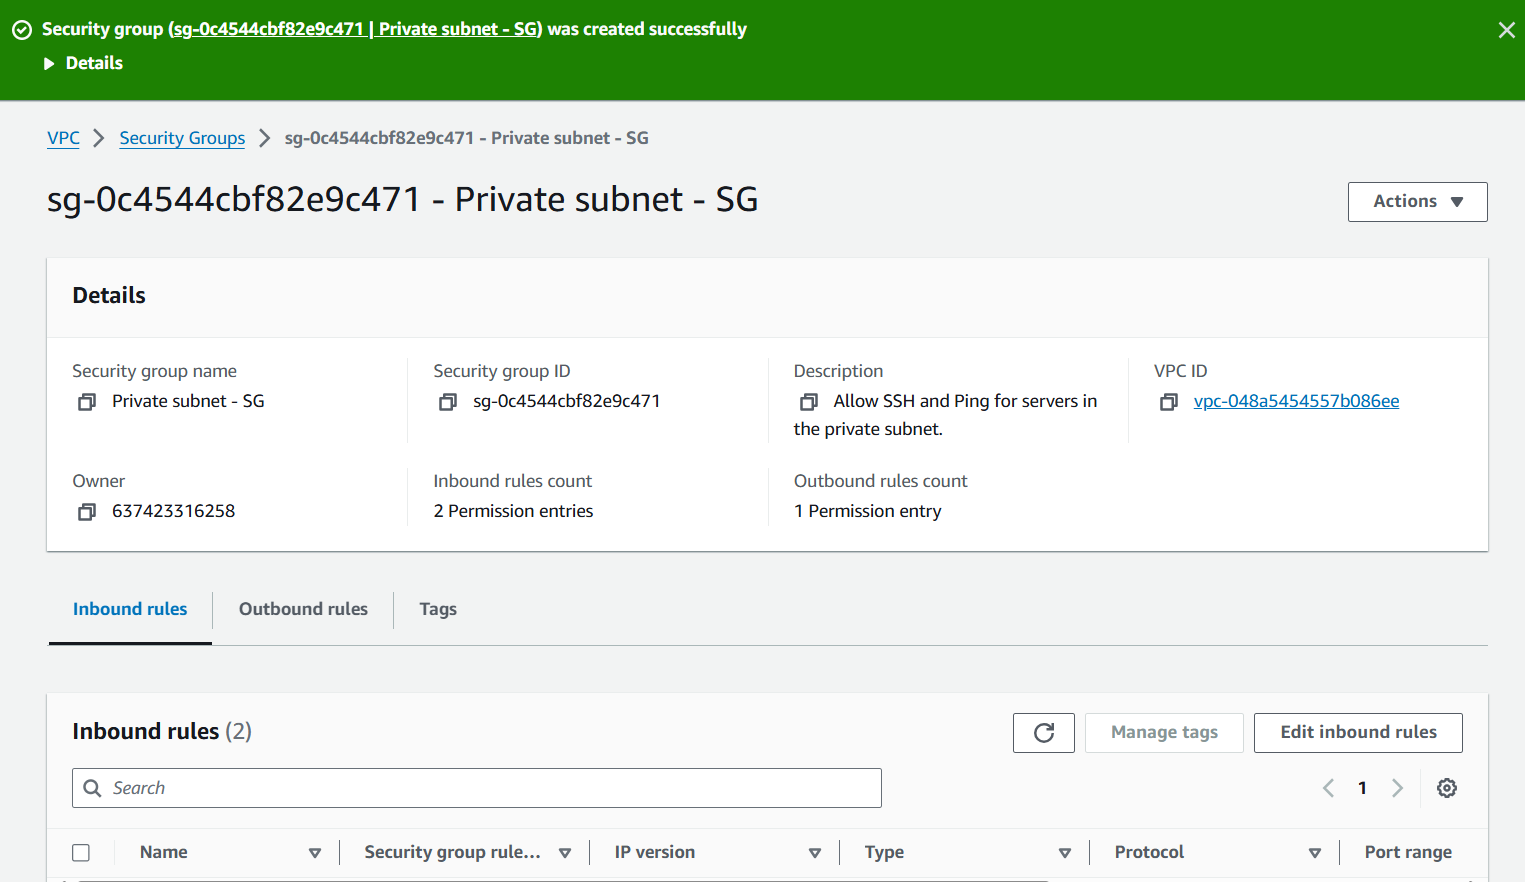
- Verify successful creation:
- You should see a success message
- Your new security group will appear in the list
Private Subnet Security Group
- Initiate another security group creation:
- Navigate back to Security Groups
- Click Create security group
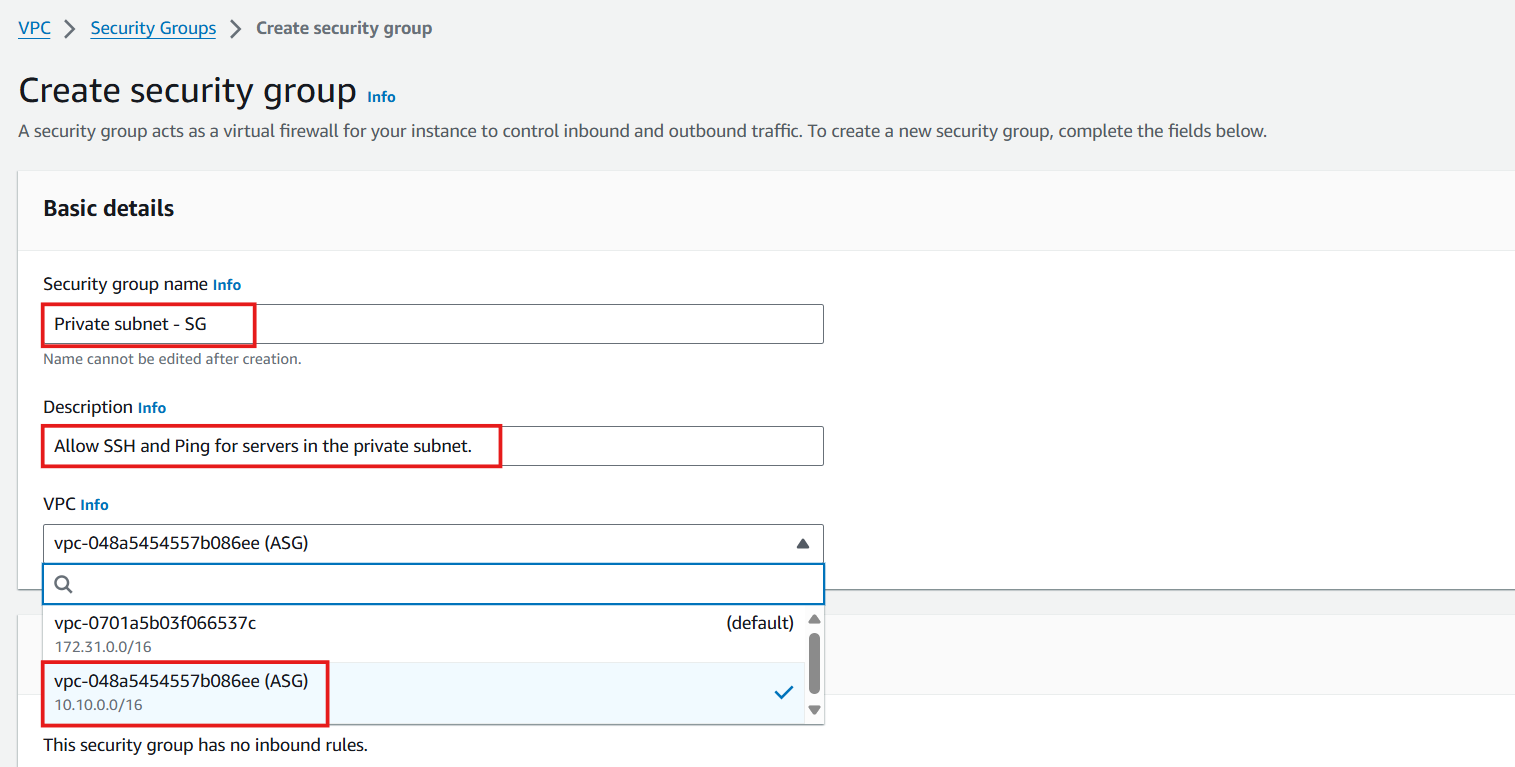
- Configure the Private Subnet Security Group:
- Security group name: Enter
Private subnet - SG - Description: Enter
Allow SSH and Ping for servers in the private subnet - VPC: Select the ASG VPC from the dropdown
- Security group name: Enter
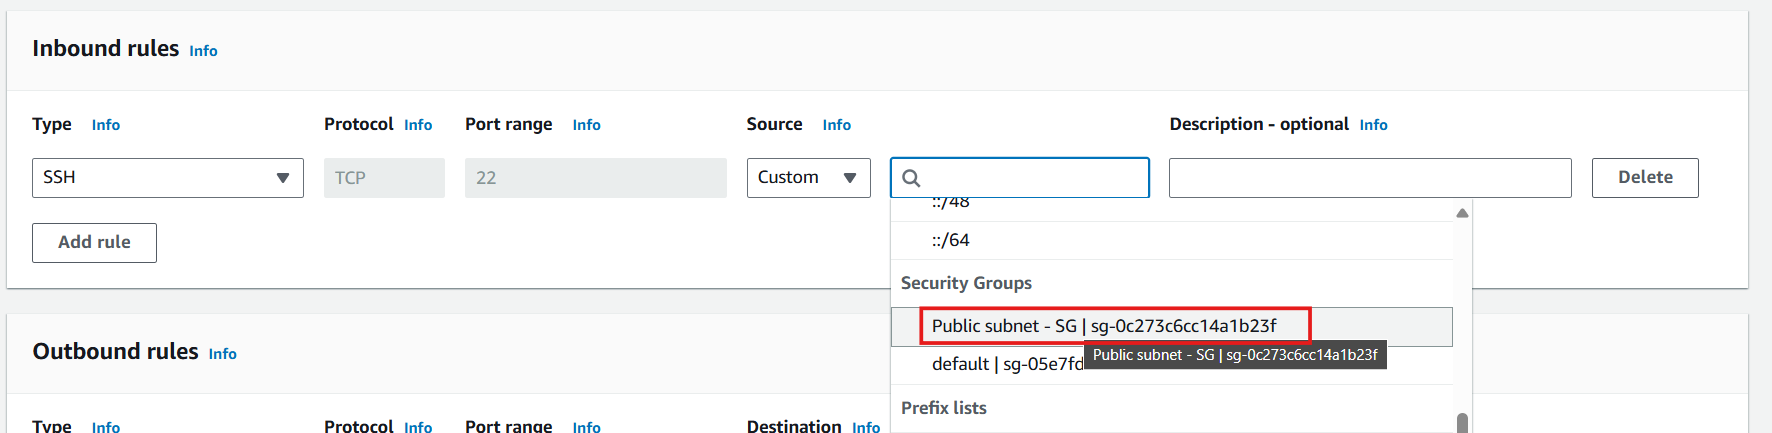
- Define SSH inbound rule:
- Click Add rule
- Configure SSH access:
- Type: Select SSH
- Source: Select Custom
- Search for and select Public subnet - SG (allows SSH access only from instances in the public subnet)
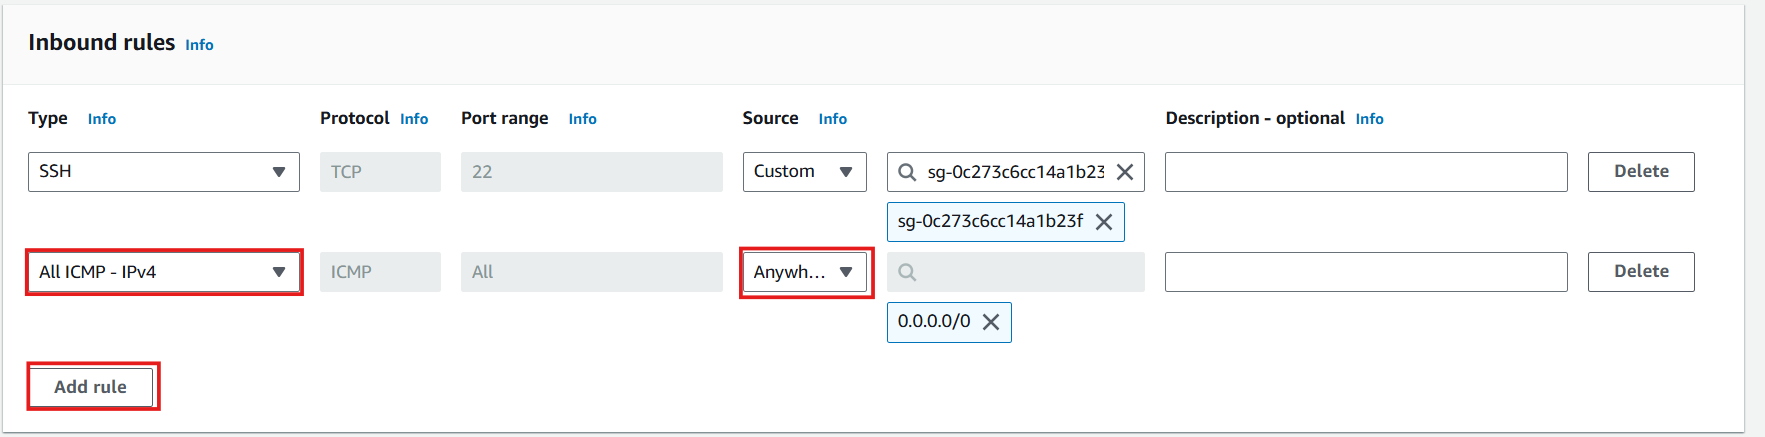
- Define ICMP inbound rule:
- Click Add rule
- Configure ICMP access:
- Type: Select All ICMP - IPv4
- Source: Select Anywhere (0.0.0.0/0)
- Complete the security group creation:
- Review your settings
- Click Create security group
- Verify both security groups:
- Confirm both security groups appear in your list
- You now have dedicated security groups for both public and private subnet resources
🔒 Security Note
The principle of least privilege is implemented here by allowing SSH access to private instances only from public instances, creating a secure bastion host architecture. This significantly reduces the attack surface of your private resources.
💡 Pro Tip
When referencing security groups as sources in rules (as we did for the private subnet), you create a dynamic reference that works regardless of IP changes. This makes your security configuration more maintainable as your infrastructure evolves.
⚠️ Important Consideration
While we’ve allowed ICMP from anywhere for testing purposes, in production environments you should restrict this to specific IP ranges or remove it entirely if ping functionality isn’t required.