Create VPC for VPN
Create a VPN Environment
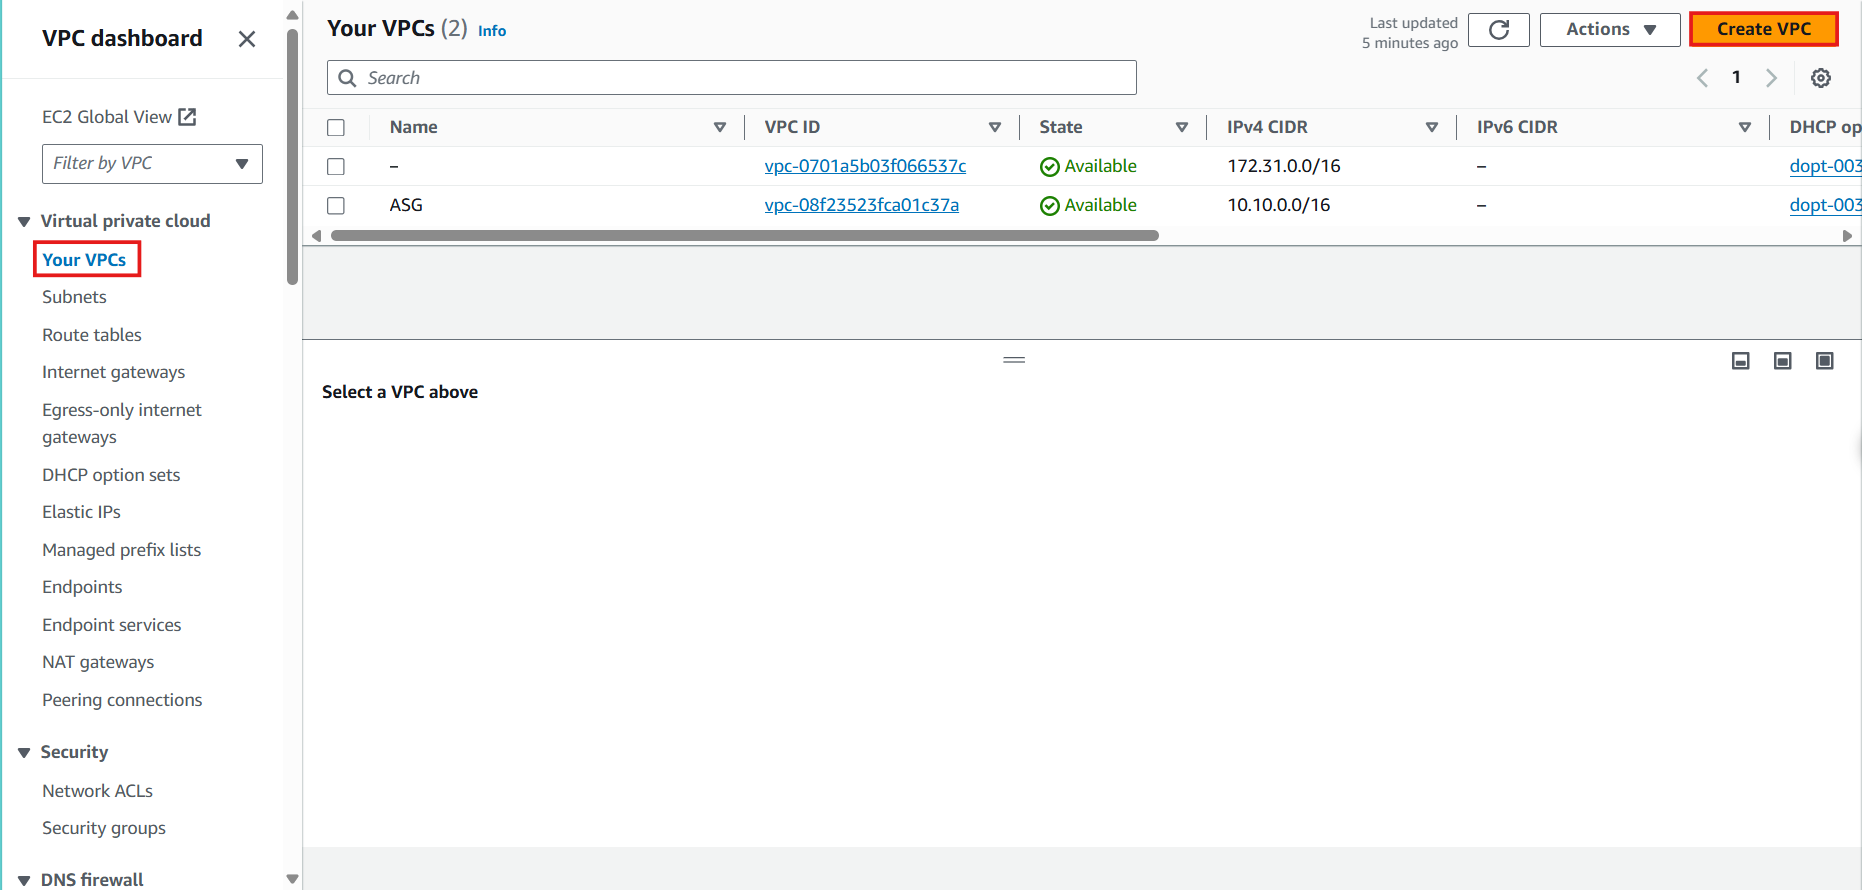
- Access VPC Interface
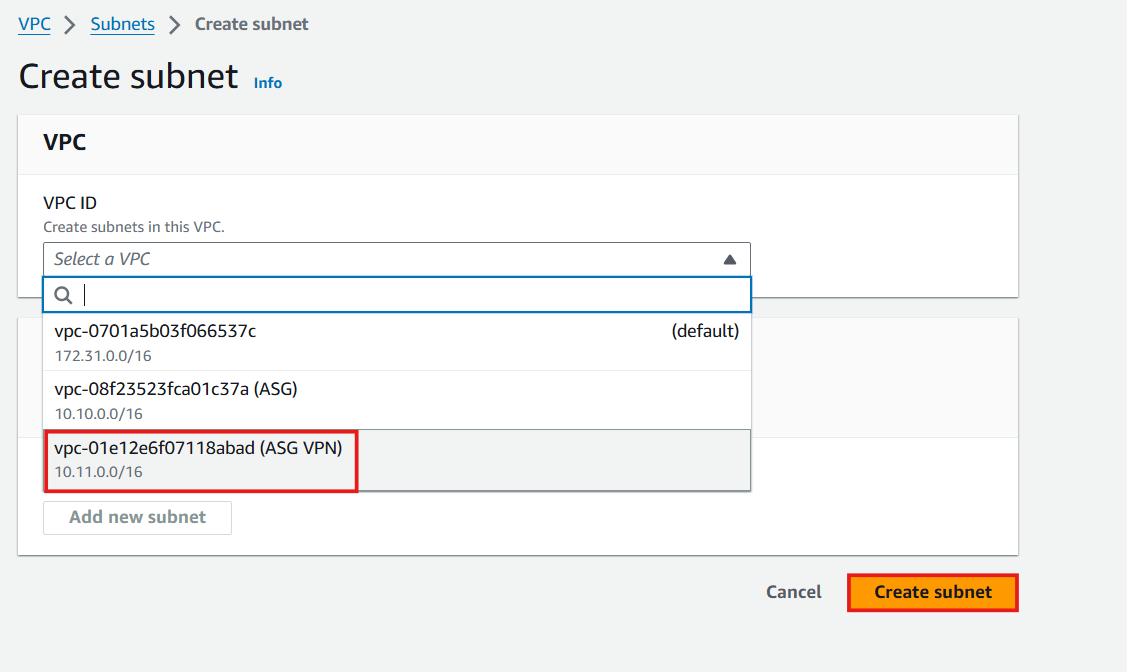
- Select Your VPC
- Select Create VPC
- In the Create VPC Interface
- Resource: Select VPC only
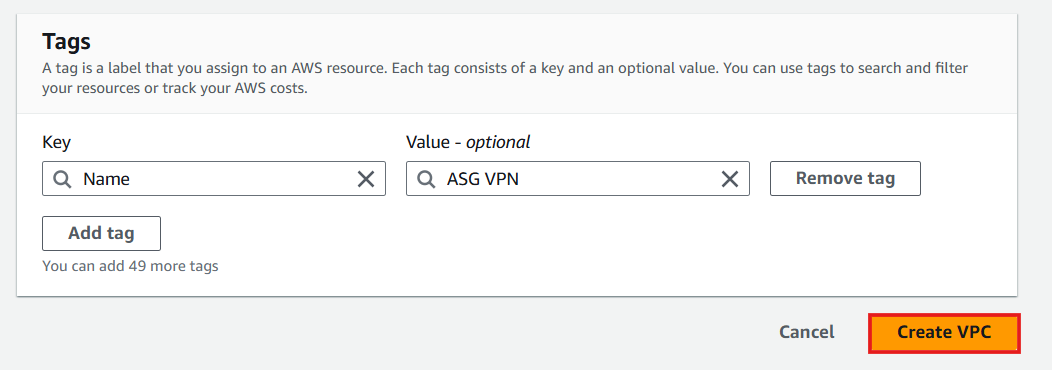
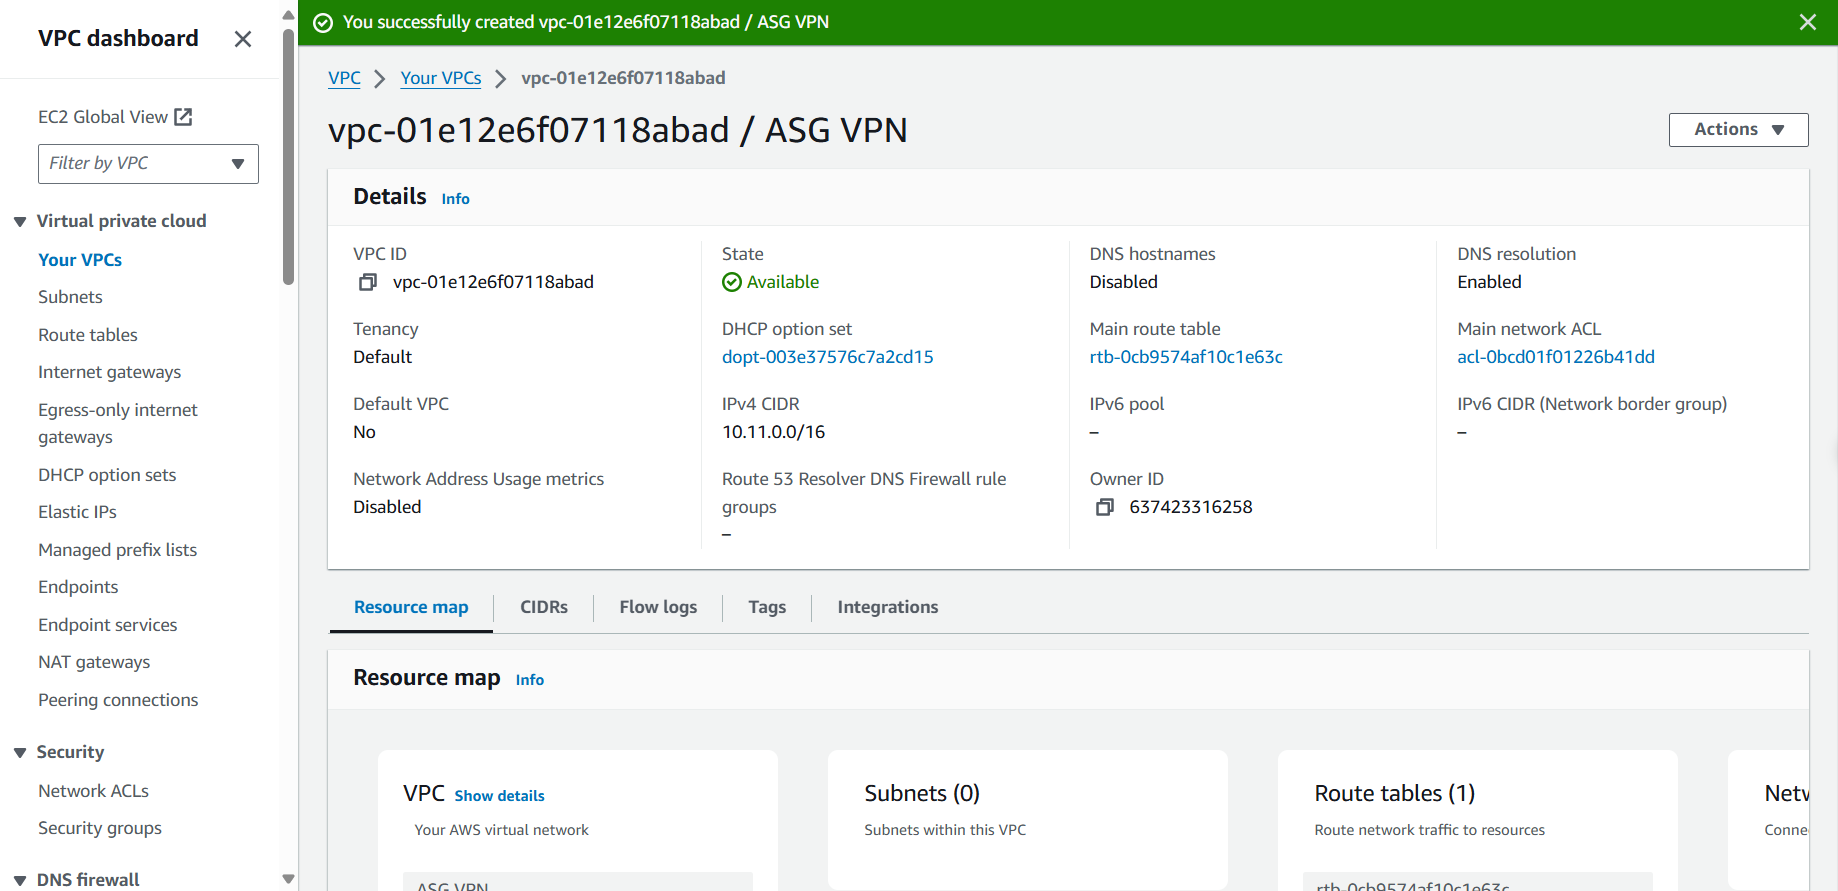
- Name: Enter
ASG VPN
- IPv4 CIDR block: Enter
10.11.0.0/16
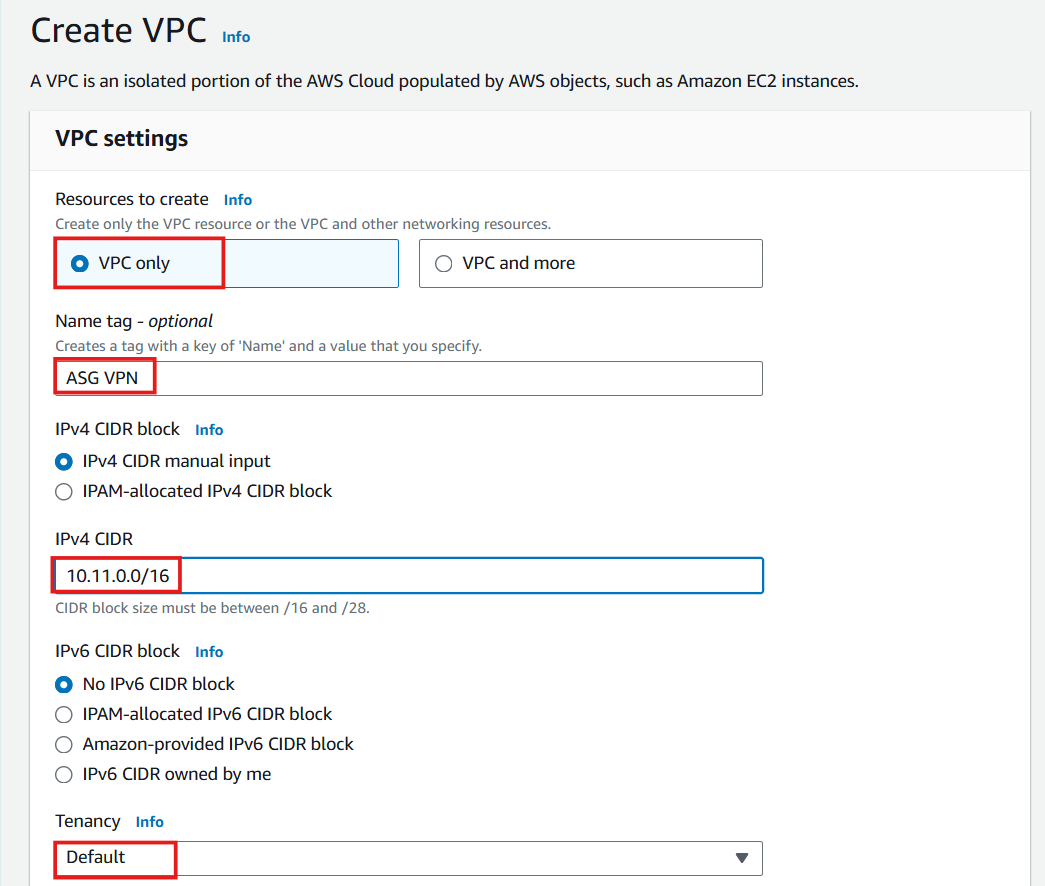
- Select Create VPC
- Successfully Create VPC
- Access VPC Interface
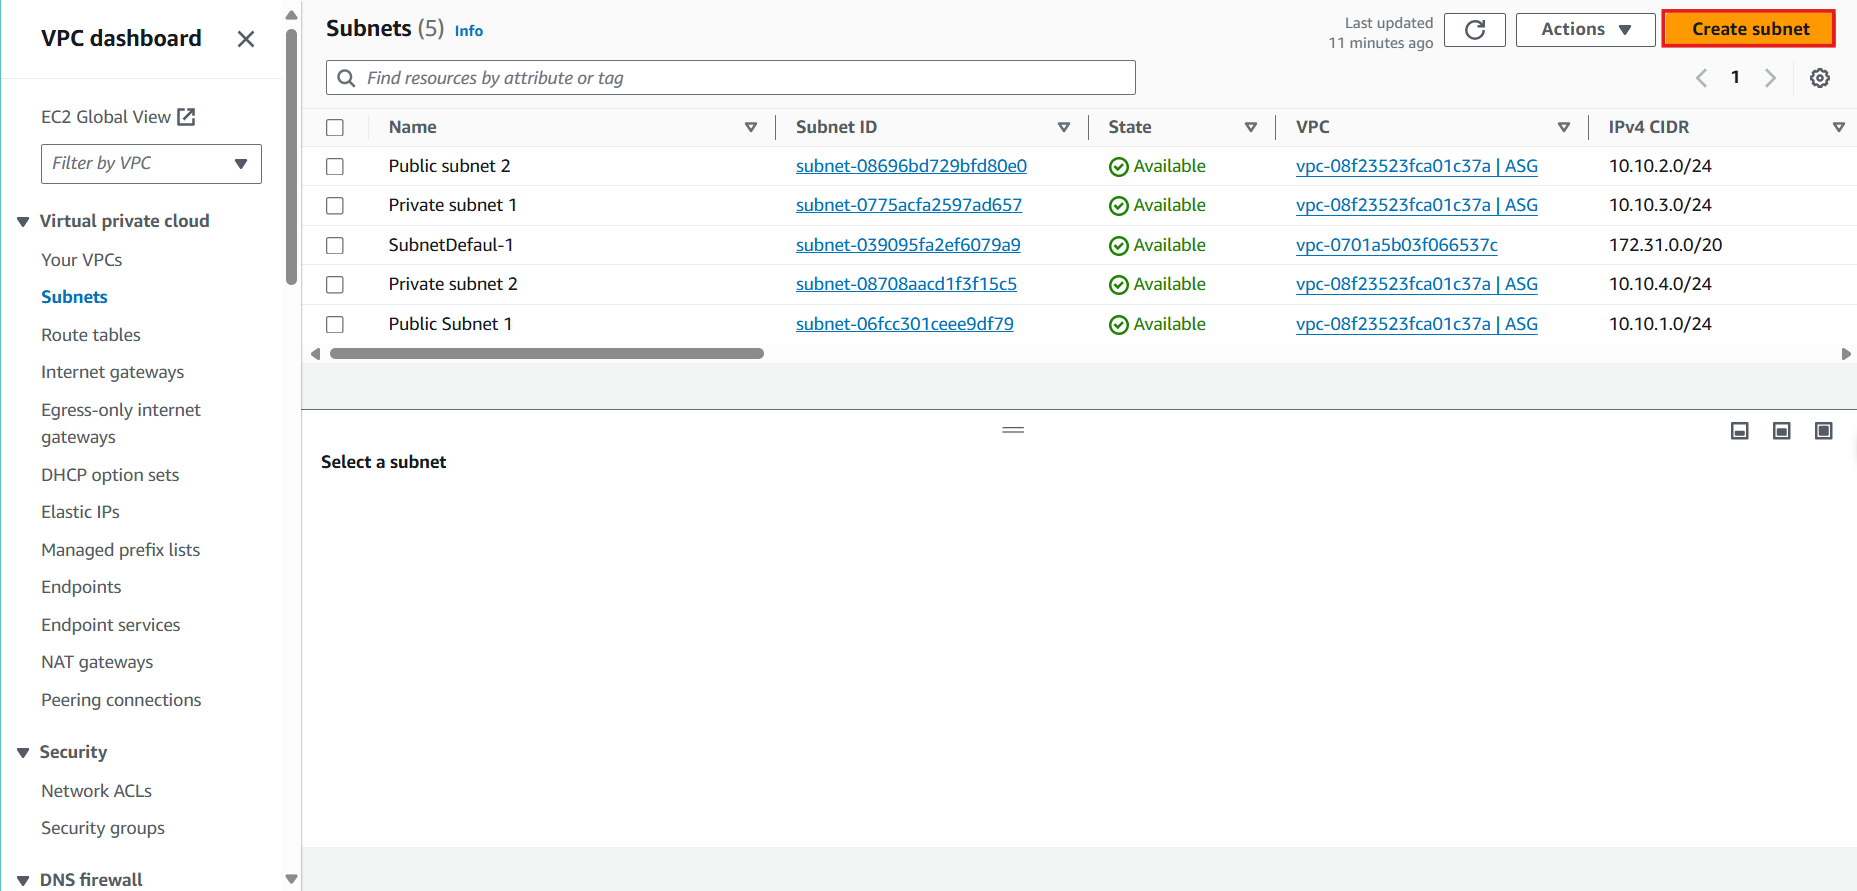
- Select Subnets
- Select Create subnet
- In the Create Subnet Interface
- In the Subnet Settings Interface
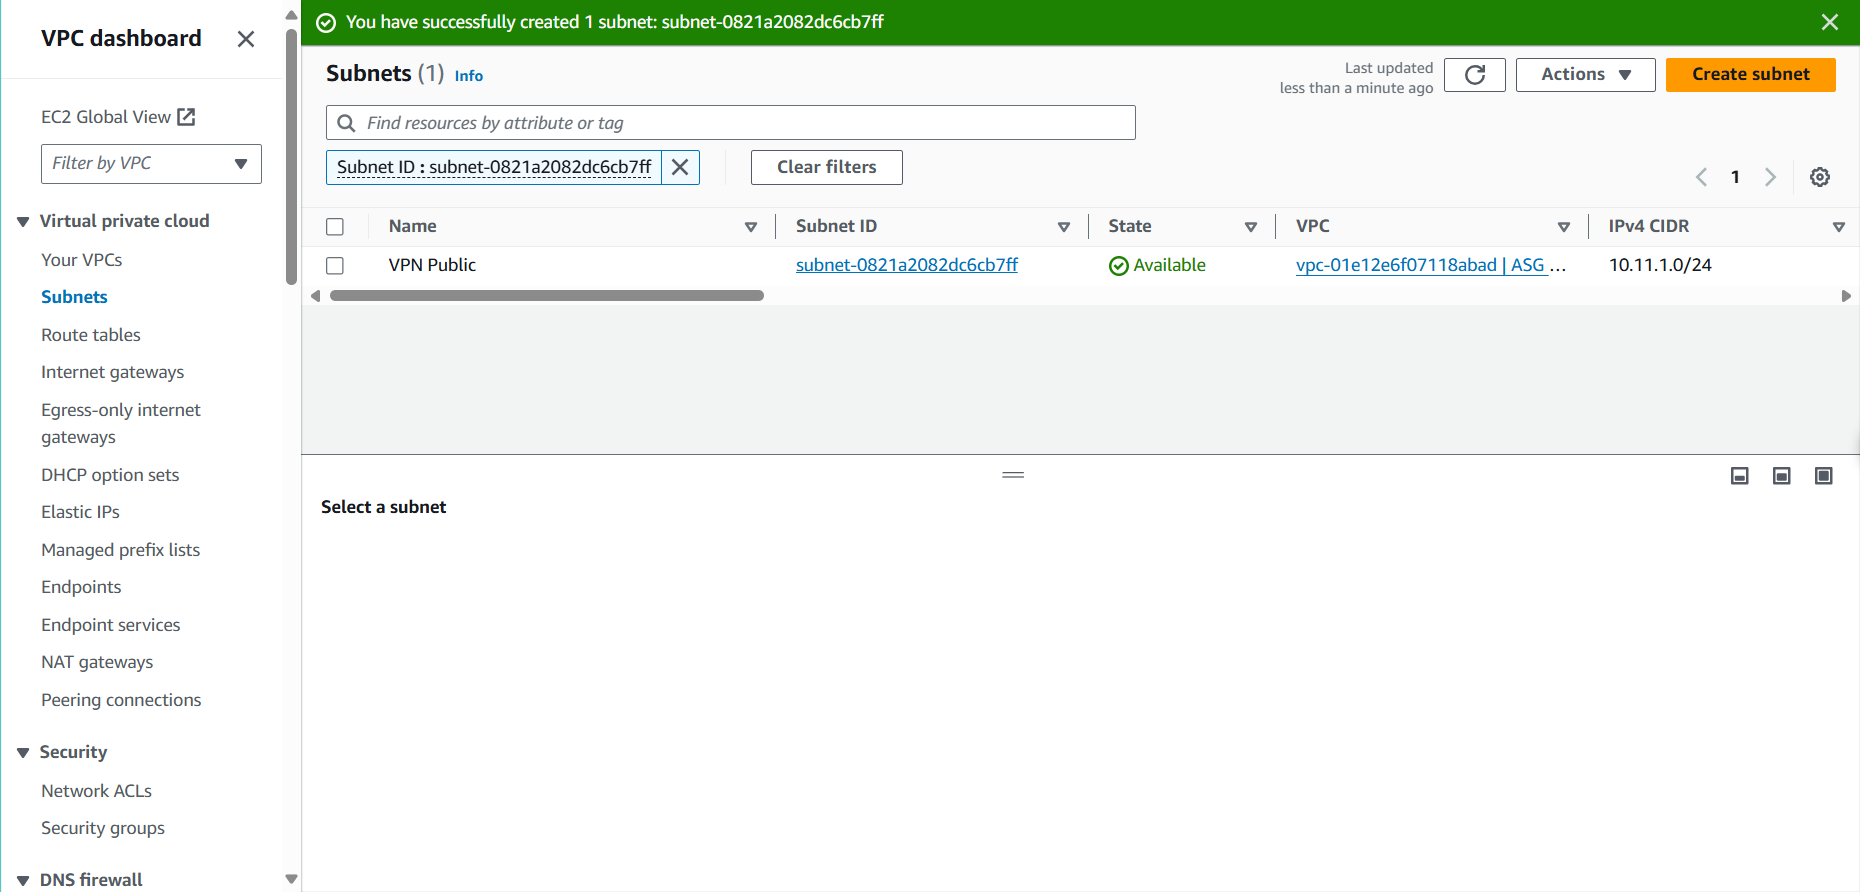
- Subnet name: Enter
VPN Public
- Select Availability Zone: ap-southeast-1a
- Select IPv4 CIDR block as
10.11.1.0/24 according to the architecture described

- Successfully Created VPN Public
- In the VPC Interface
- Select Subnets
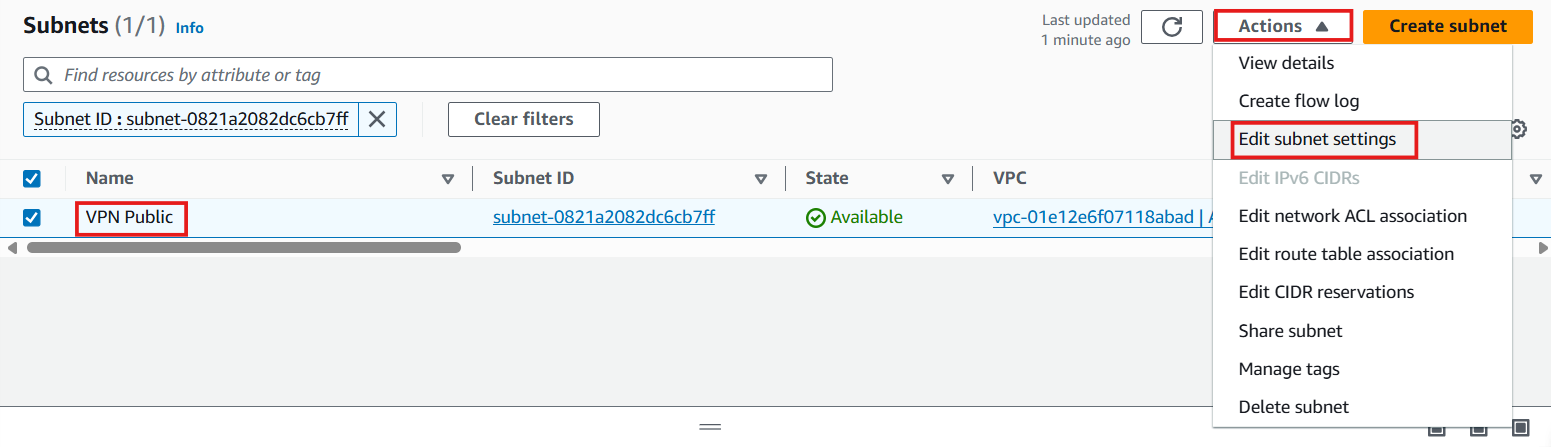
- Select VPN Public
- Select Actions
- Select Edit Subnet Settings
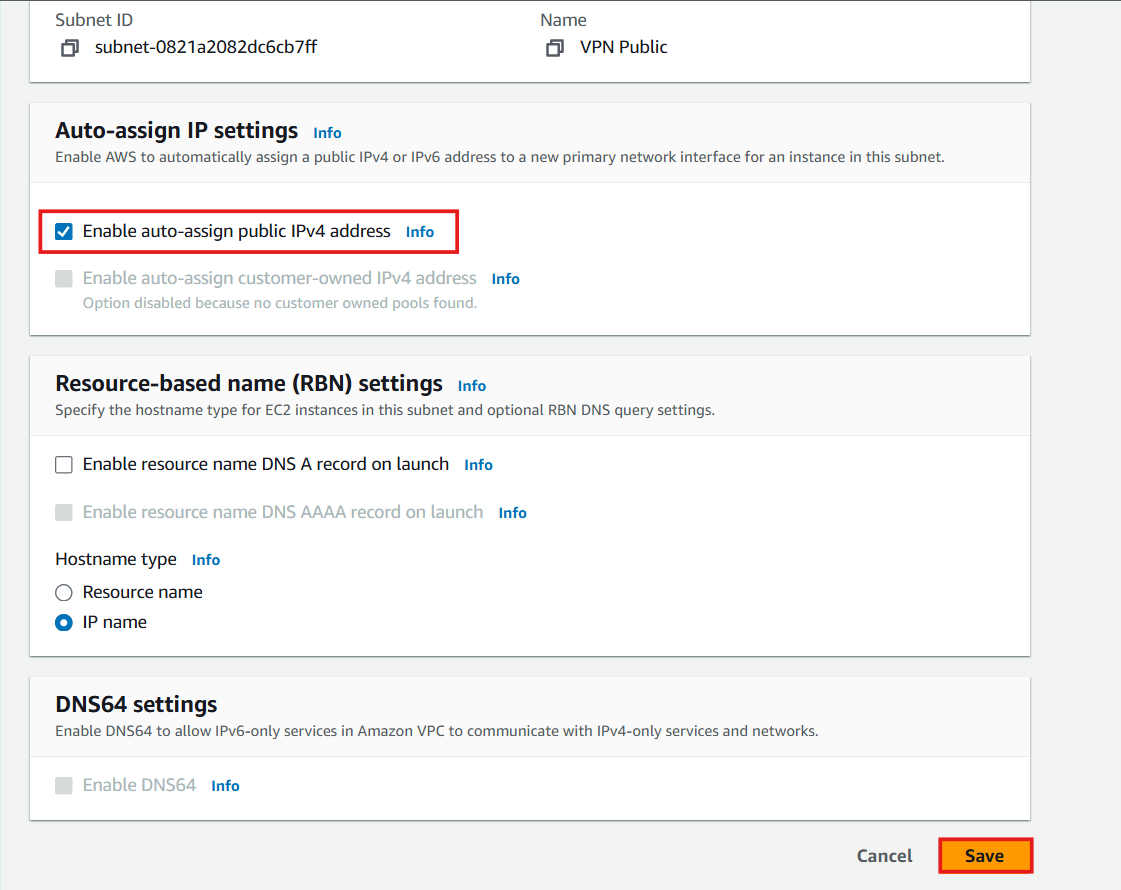
- Execute Auto-assign IP Settings
- Select Enable auto-assign public IPv4 address
- Select Save
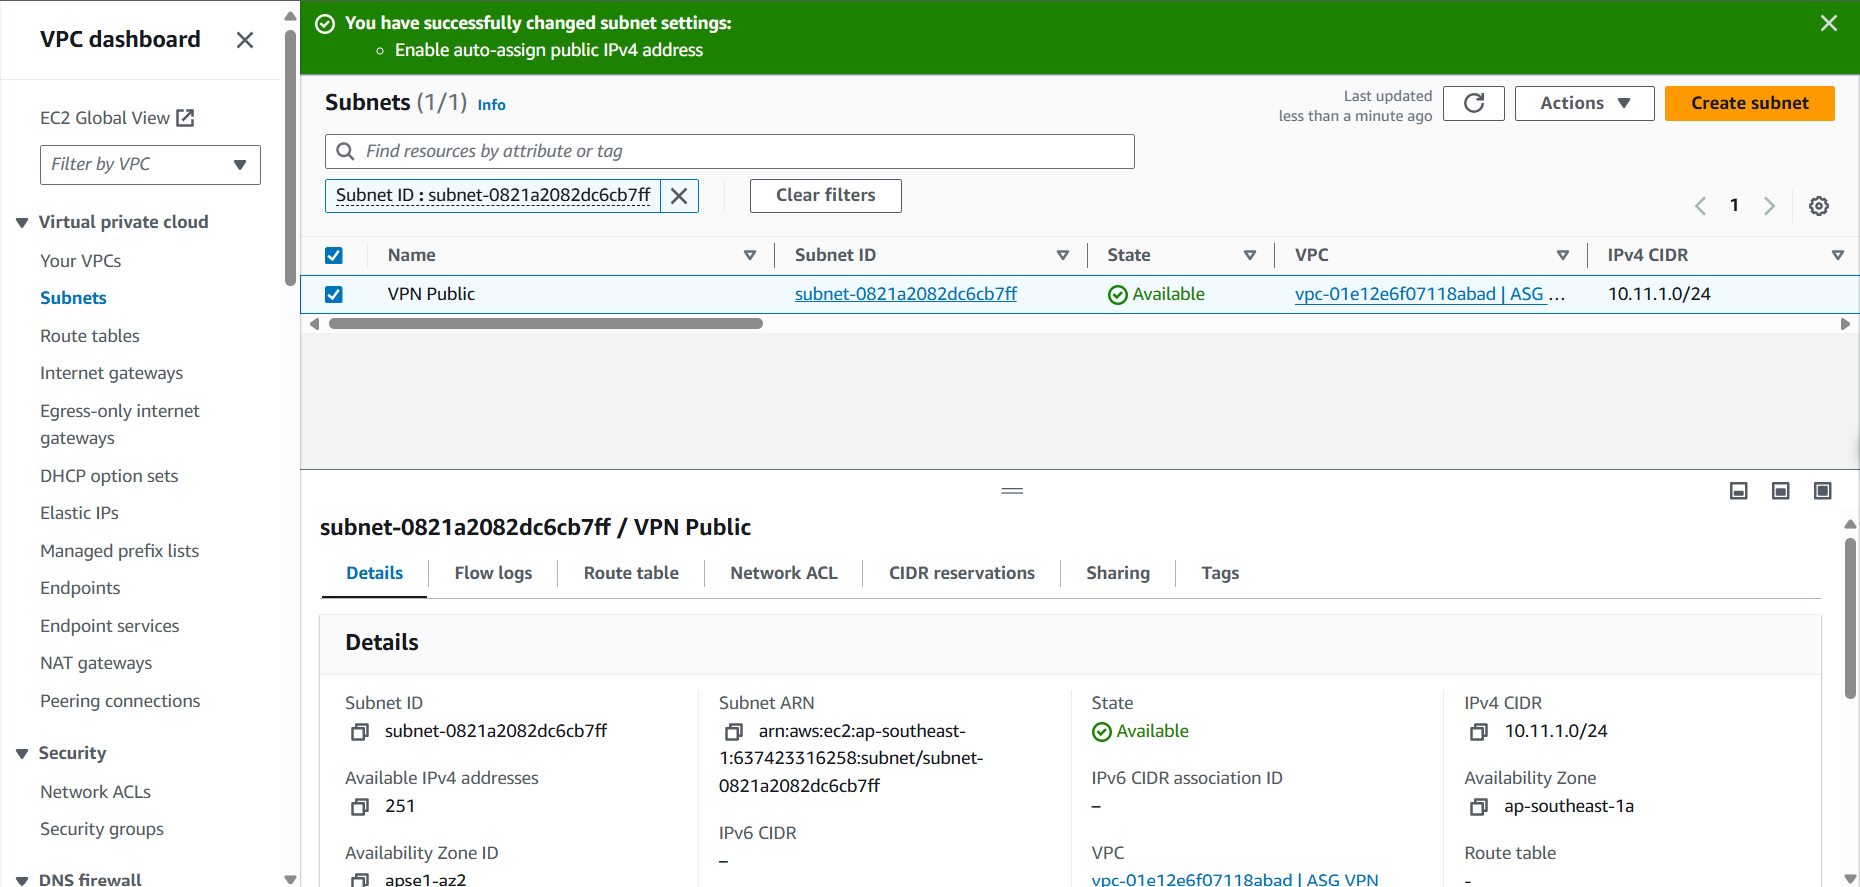
- Successful IP Allocation
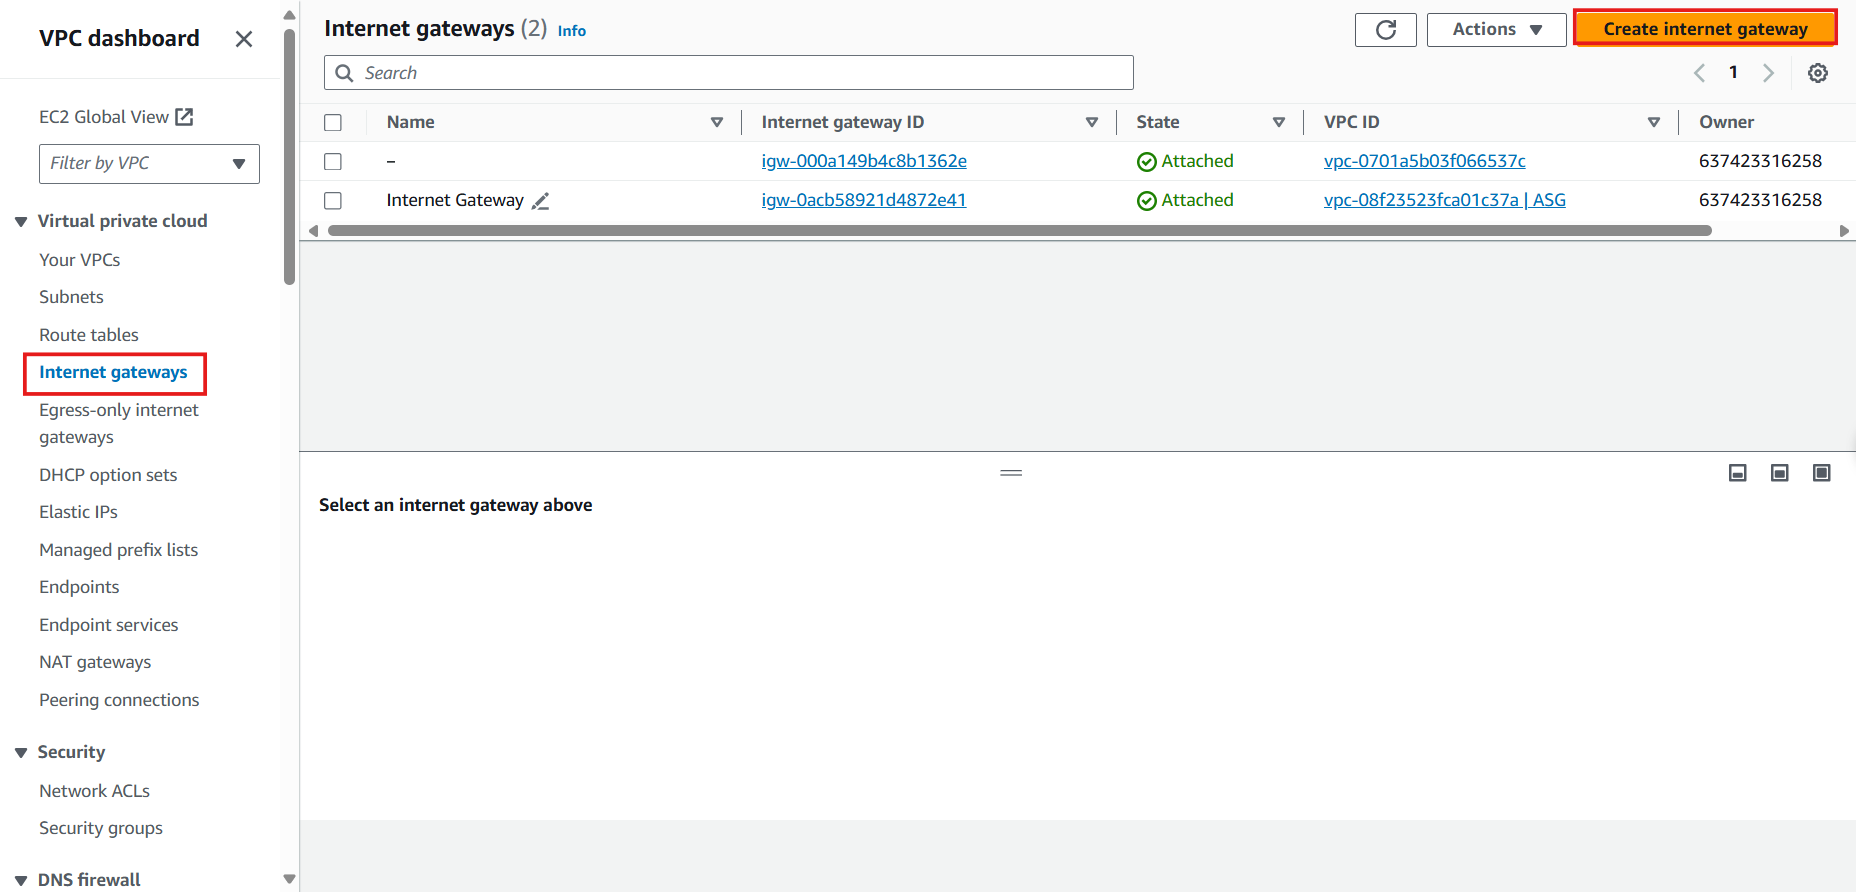
- In the VPC Interface
- Select Internet Gateway
- Select Create Internet Gateway
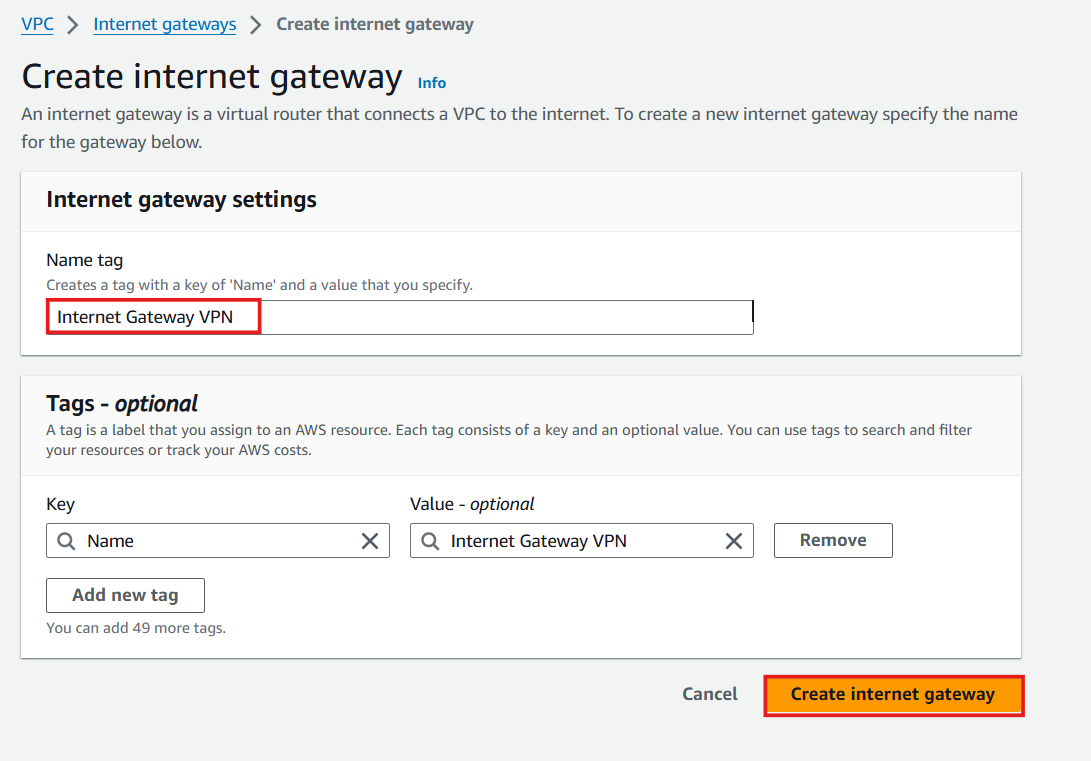
- In the Create Internet Gateway Interface
- Name tag: Enter
Internet Gateway VPN
- Select Create Internet Gateway
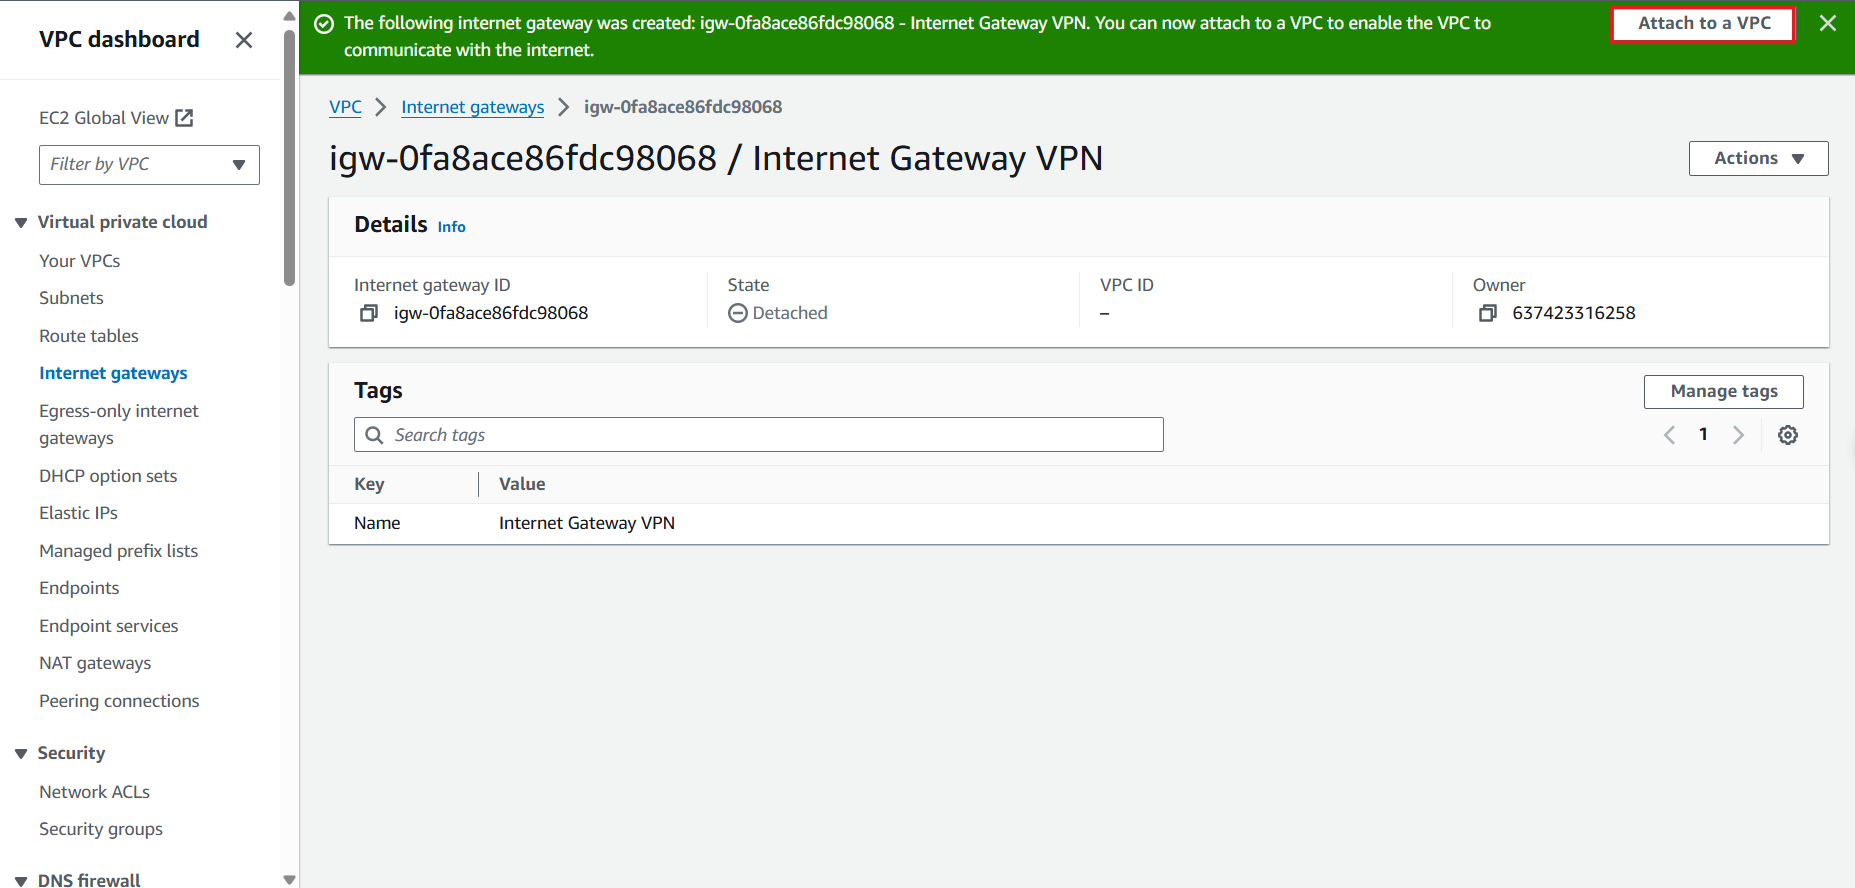
- After Creating Internet Gateway VPN Successfully and State is Detached
- Select Actions
- Select Attach to VPC
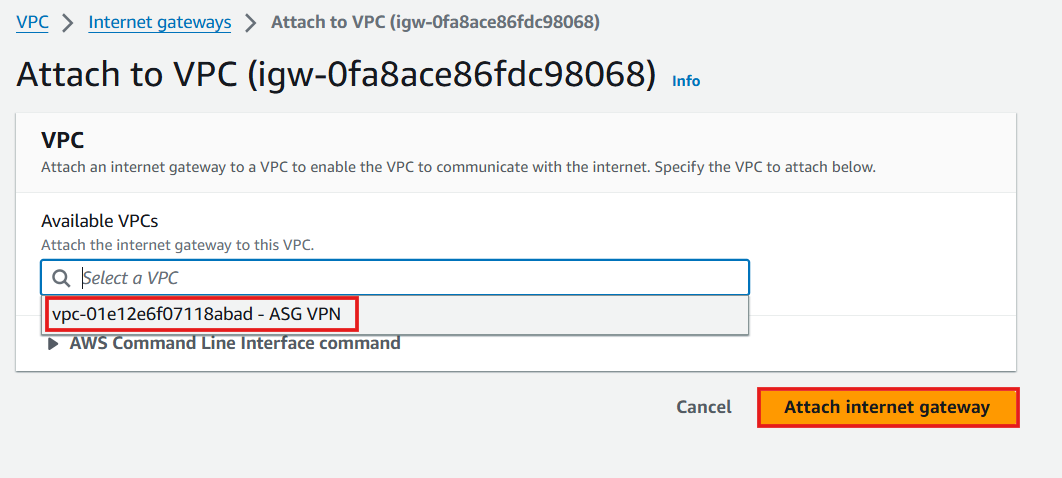
- Select VPC ASG VPN, VPC ID Will Be Automatically Filled In
- Select Attach Internet Gateway
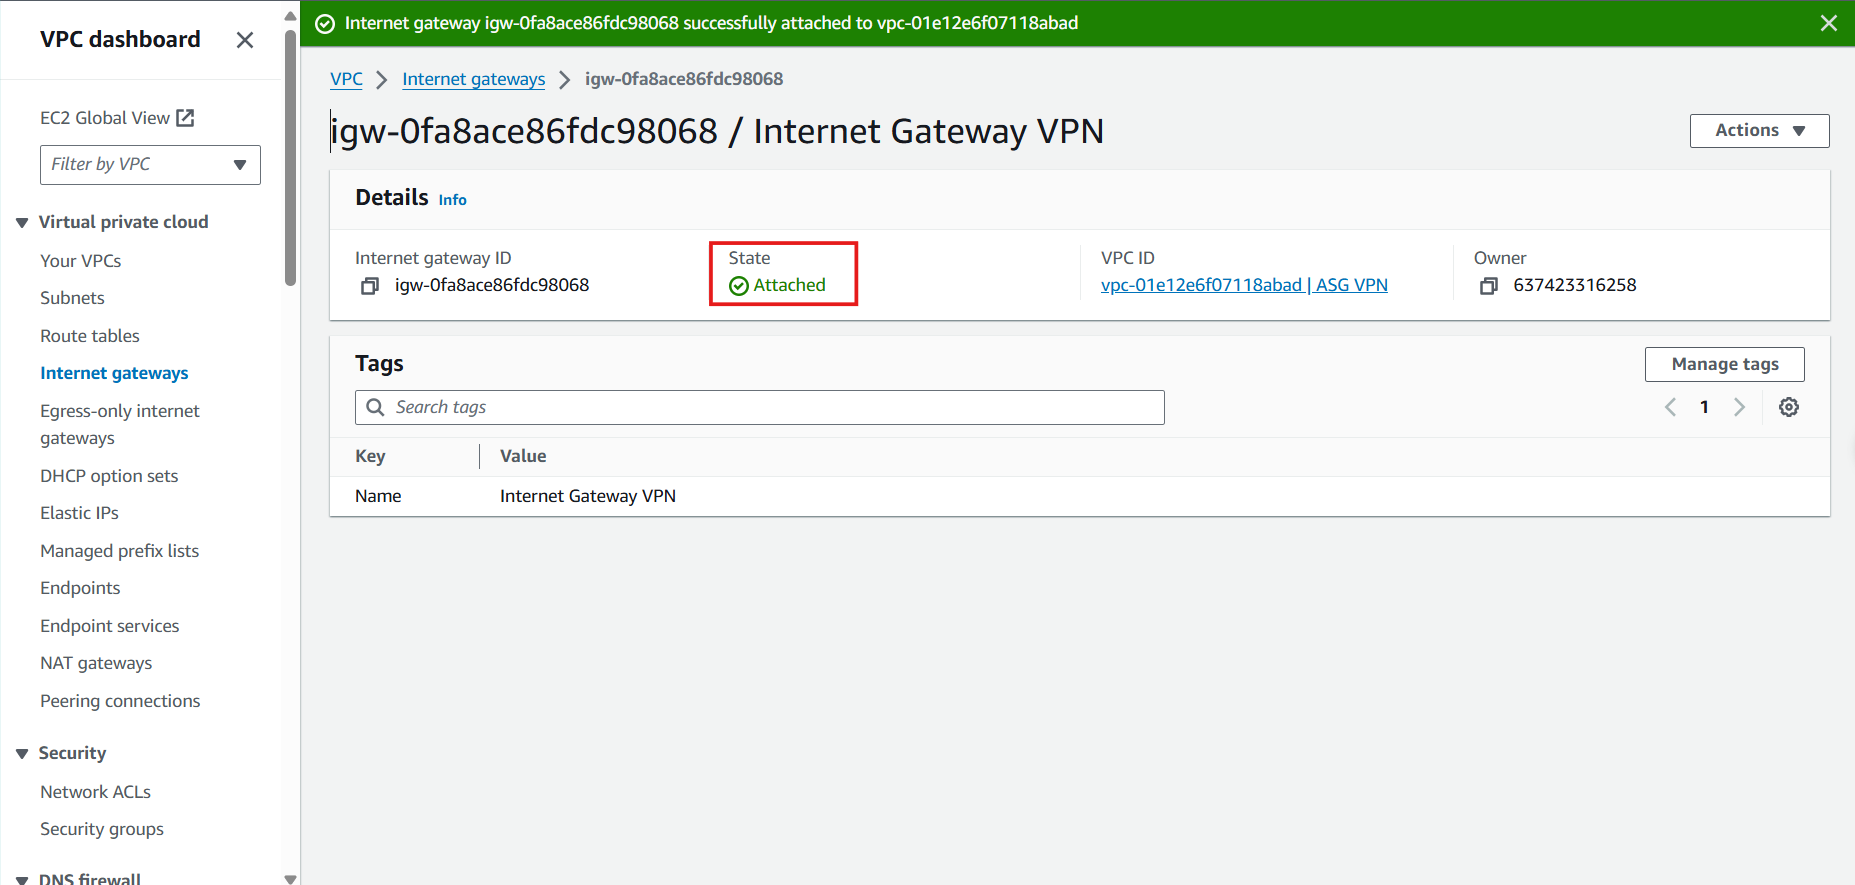
- Attach Succeeds When State is Attached
- Create a Route Table to Route Out to the Internet Through the Internet Gateway
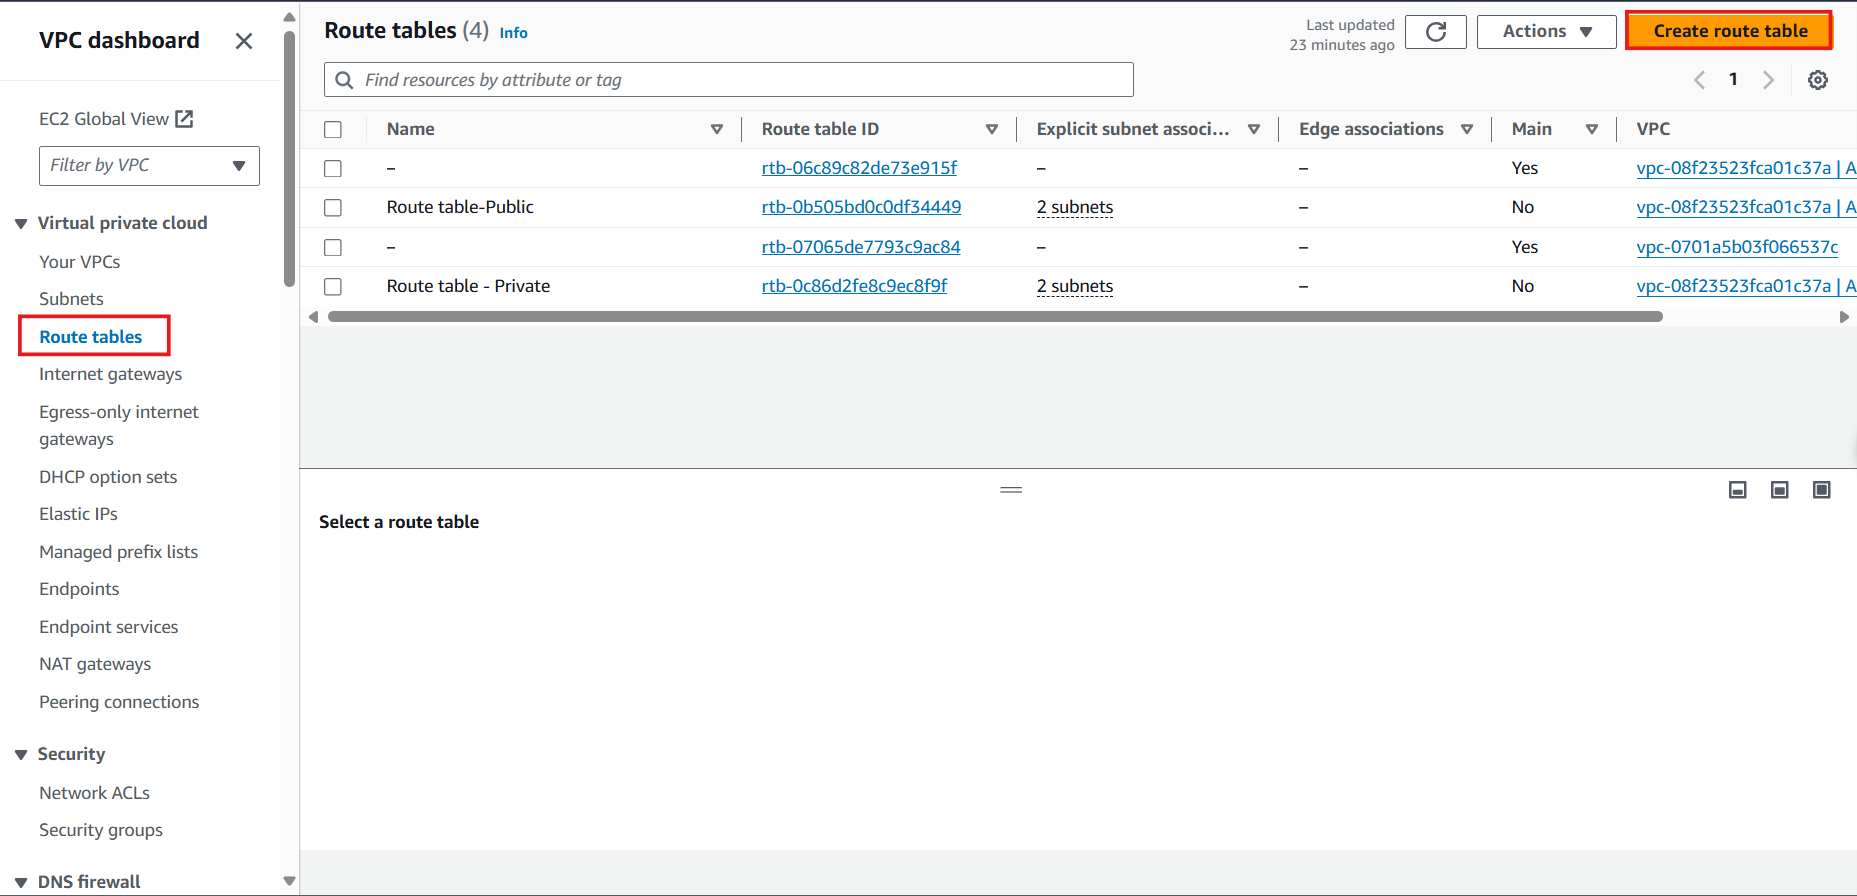
- In the VPC Interface
- Select Route Tables
- Select Create Route Table
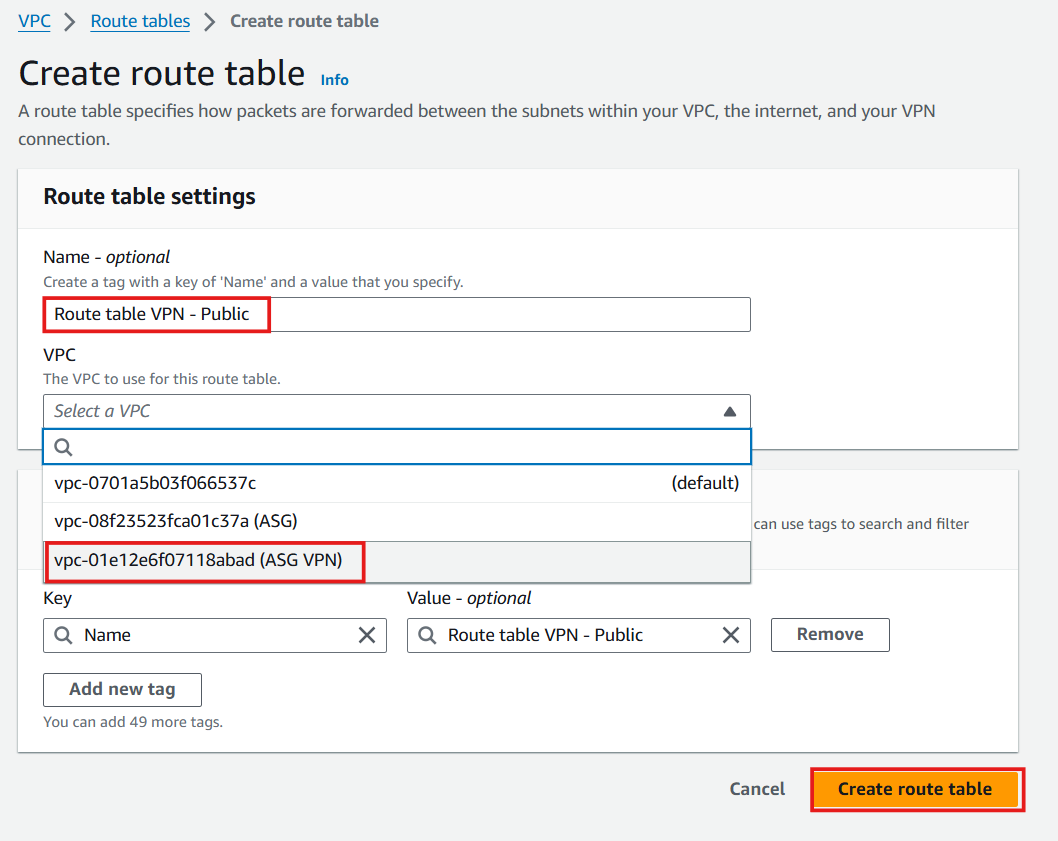
- In the Create Route Table Interface
- Name: Enter
Route table VPN - Public
- Select VPC named ASG VPN, VPC ID Will Be Automatically Filled In
- Select Create Route Table
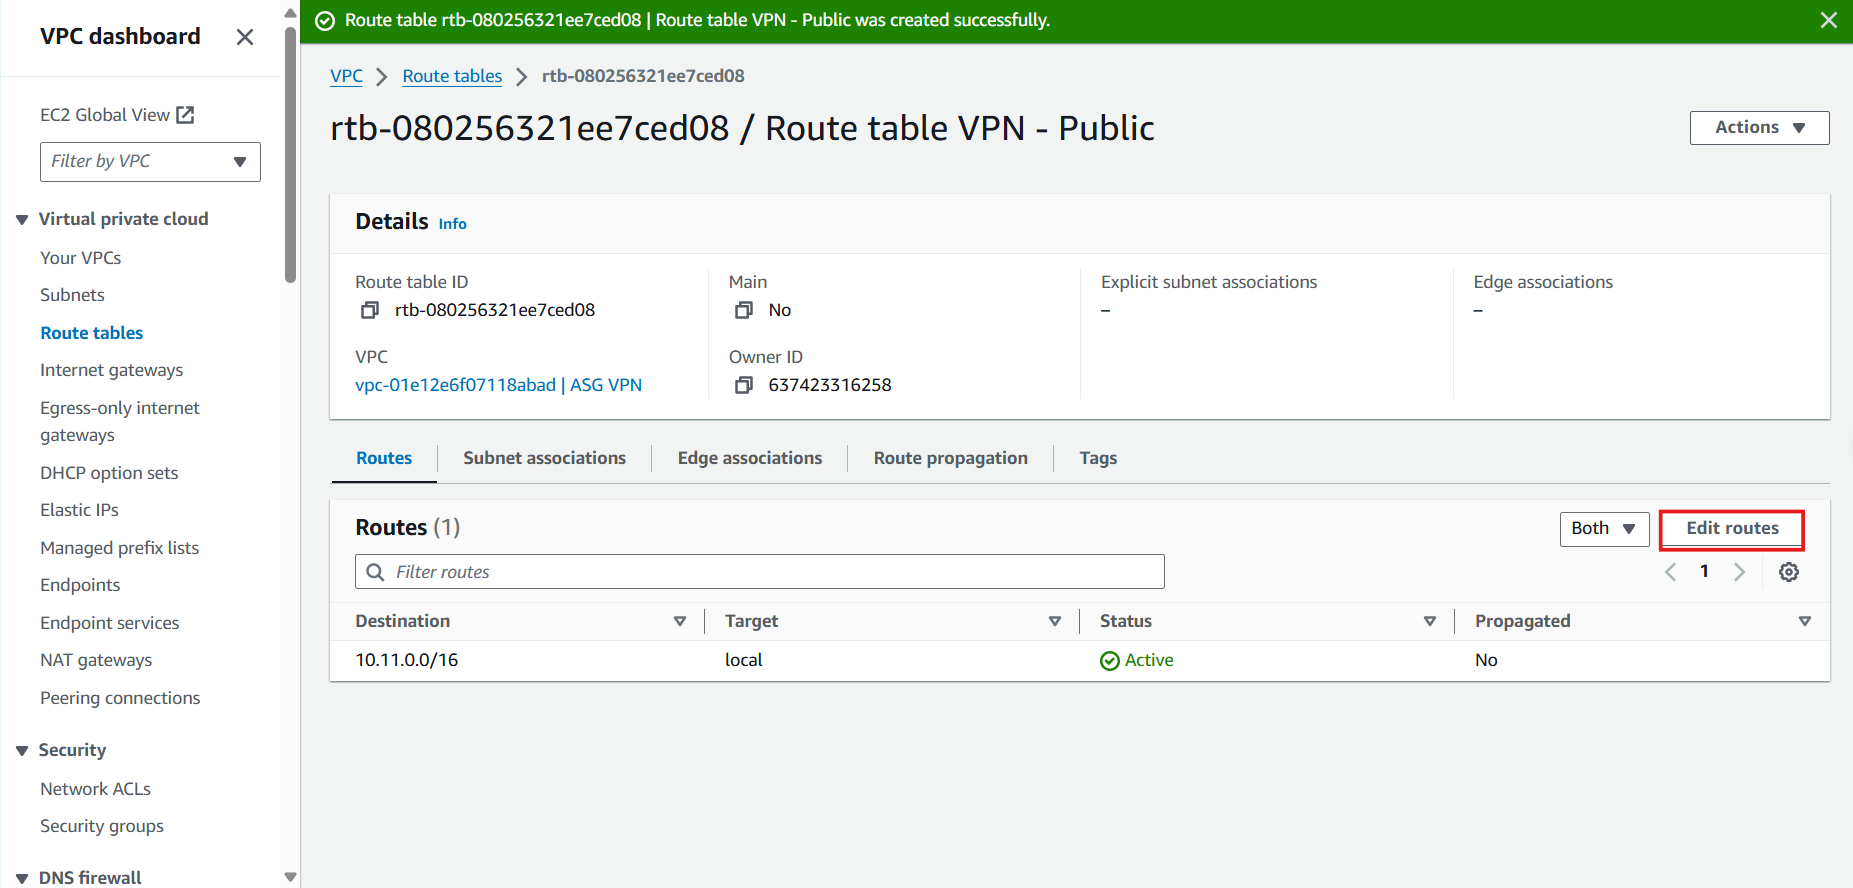
- Successfully Created Route Table
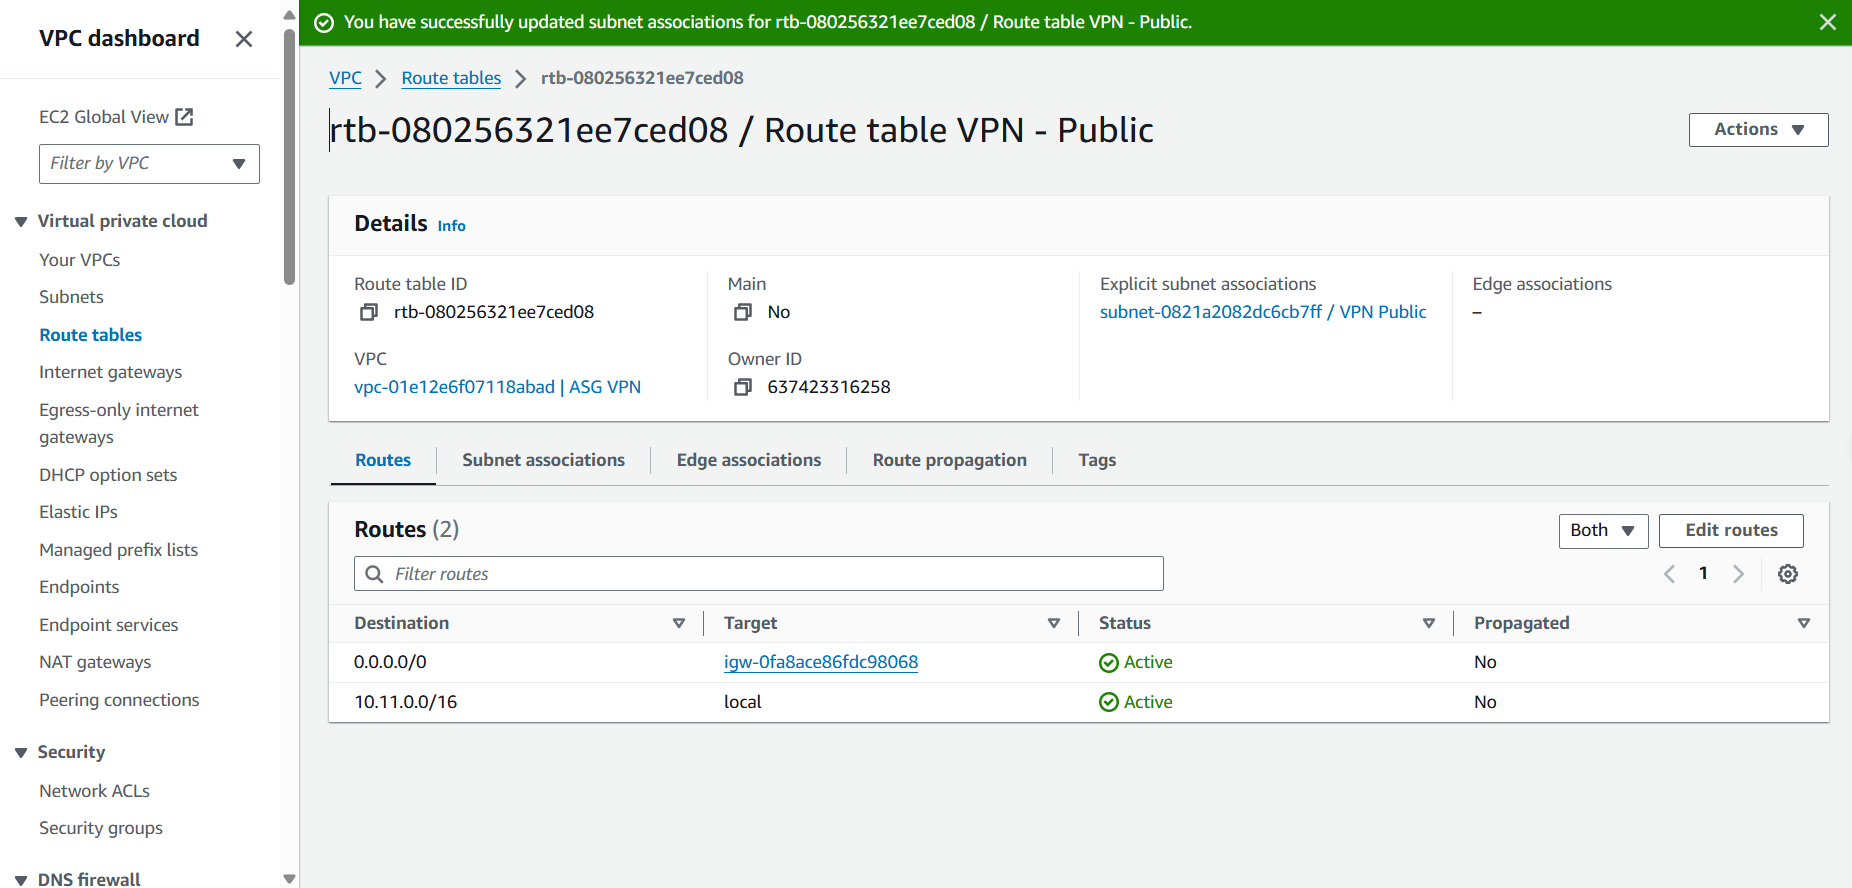
- In the Route Table VPN - Public Interface
- Select Route
- Select Edit Route
- In the Edit Routes Interface
- Select Add Route
- Fill in the Destination CIDR:
0.0.0.0/0 representing the Internet
- In the Target section, select Internet Gateway, then select the Internet Gateway VPN we created. Internet Gateway ID Will Be Automatically Filled In
- Select Save Changes

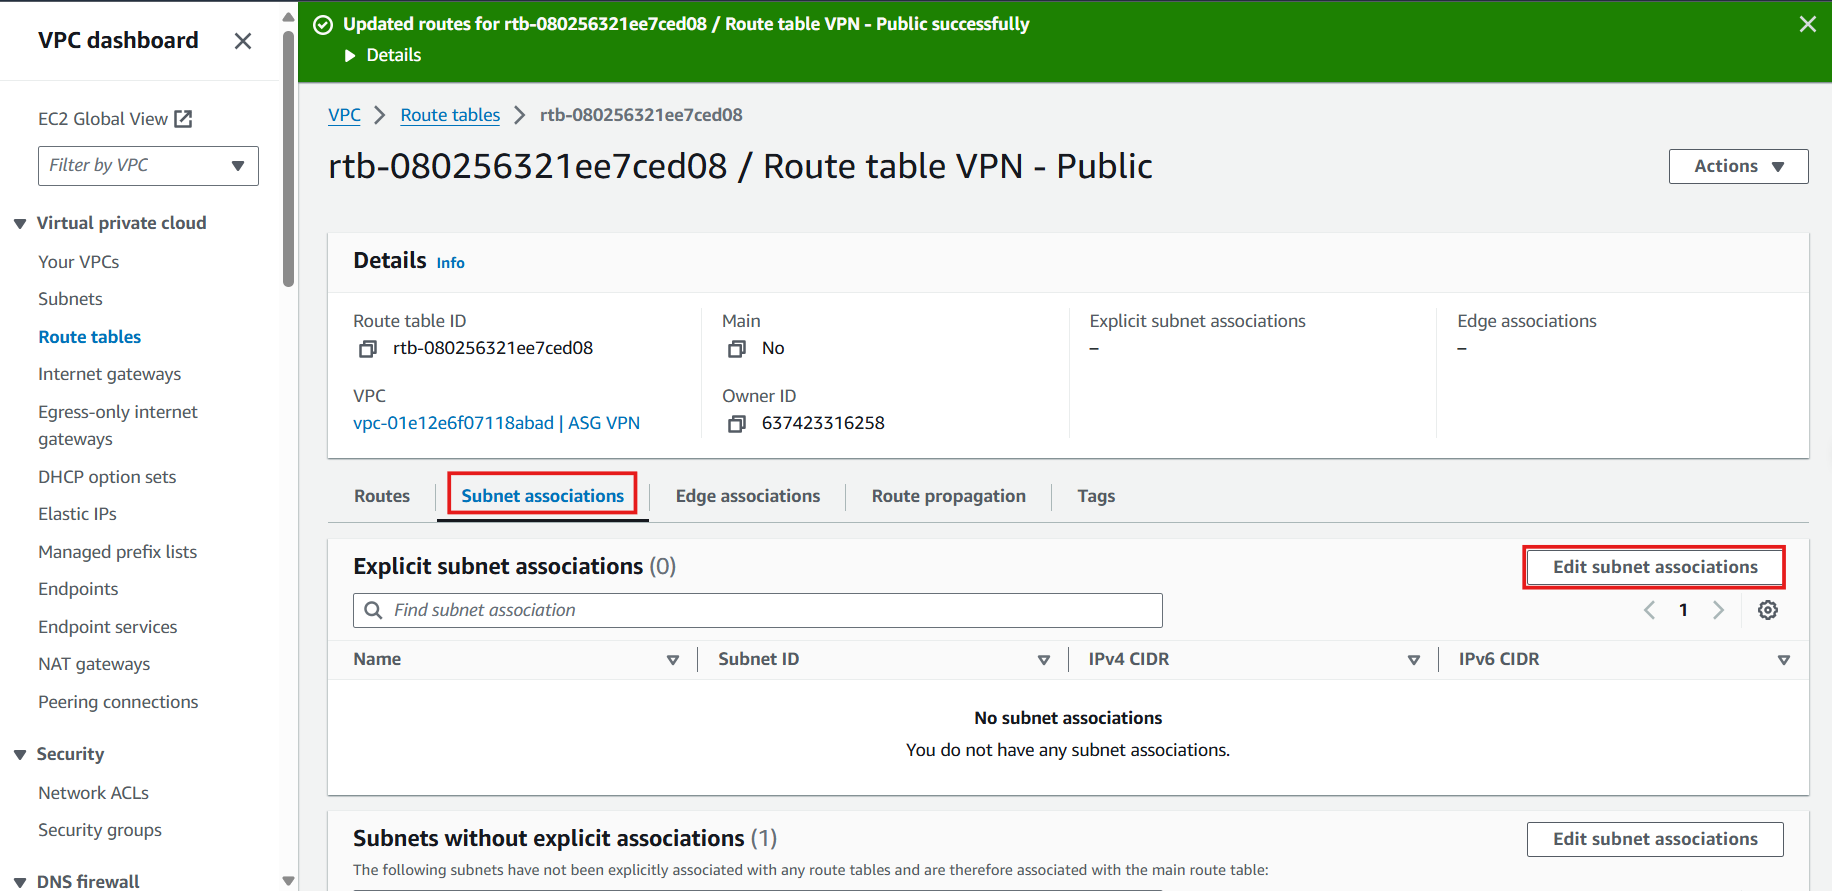
- In the Route Table VPN - Public Interface
- Select Subnet Associations
- Select Edit Subnet Associations
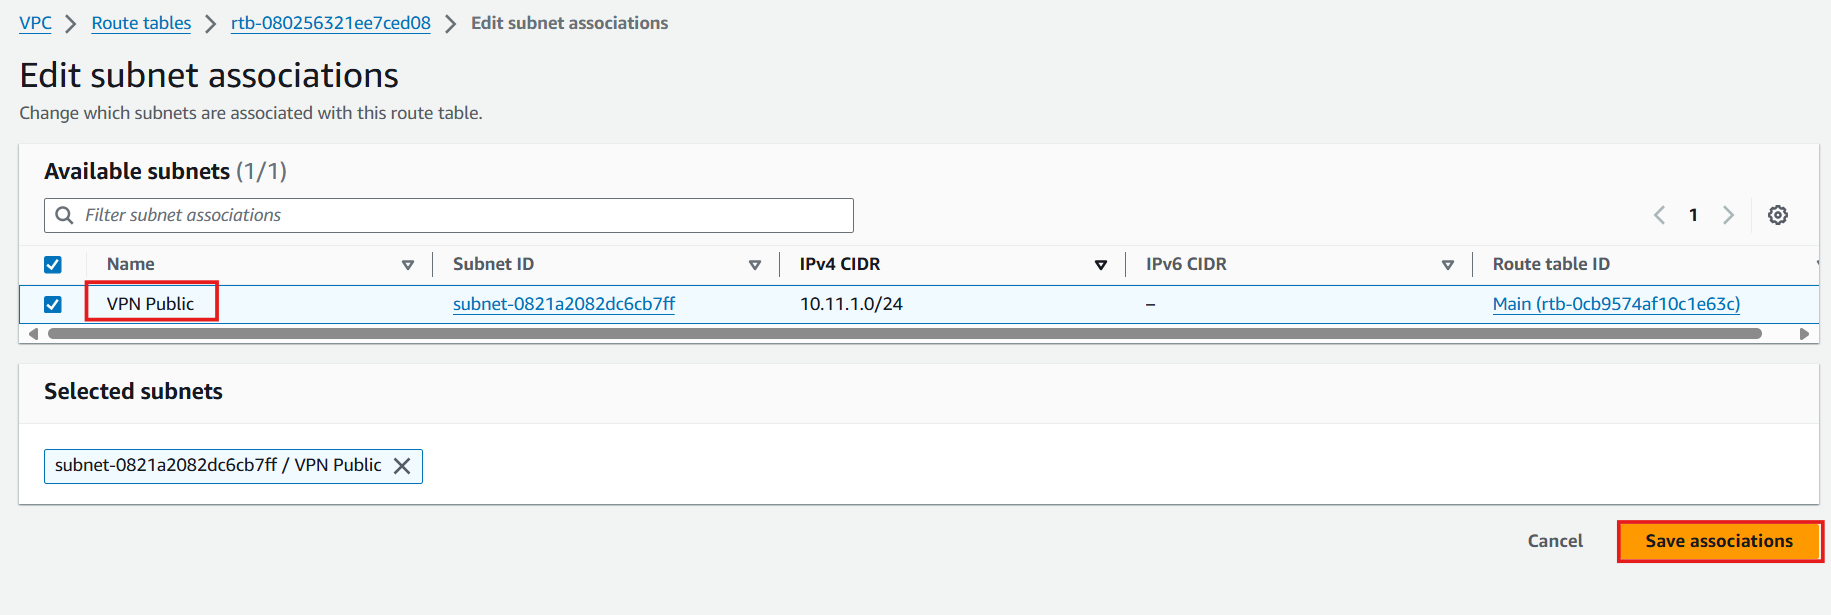
- In the Edit Subnet Associations Interface
- Expand the Subnet ID column by dragging the pane to the right
- Select Subnet VPN Public
- Select Save Associations
- Complete and Recheck Routes